

Did you ever wish for having your own copy of Oracle EBS R12? Well, Oracle provides a copy that is all yours called VISION instance. The below post is one of the best I came across, explaining how to setup your own VISION instance on Oracle VirtualBox
I hope, it was an easy ride. Oracle’s virtual appliance is perfectly sized for moderate hardware, without GUI out of the box. We’ll see how to install GUI, configure the appliance for network access etcetera in this post.
Basically you get Oracle Linux 7.9 OS, EBS R12 12.2.10 with Oracle database 19.9 in this appliance. You must update the OS to latest before installing GUI. So, let us setup the environment for the update now.
Stop the running application and database instances.
su - oracle
cd /u01/install/APPS/scripts
./stopapps.sh
./stopdb.sh
Oracle has the appliance set to start the database and application instances automatically during every reboot. I strongly suggest you to disable the automatic start of these instances. Oracle starts “ebscdb” and “apps” services every time when the box restarts. We can disable these services using chkconfig command
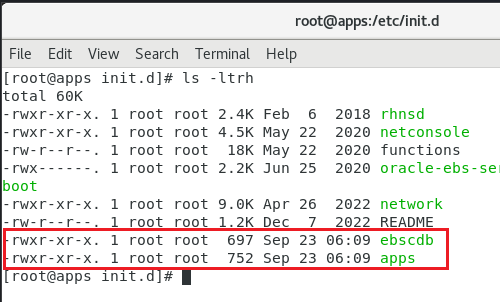
chkconfig apps off
chkconfig ebscdb off
That’s it. Now, when you restart the box, Oracle services will not start automatically.
Shutdown the server. Change the network configuration for the sever like seen in the below image.

This means, your server will start sharing the host’s active connection(s). If your host machine has an active internet connection, your EBS server will able to access internet this way from it’s environment.
Start the EBS server and complete the OS update. This should be around 2.2GB total downloads and minimum 30-40 minutes, depending upon the hardware resources you have allocated for the virtual machine.
Once the box is update, proceed with “Server with GUI” group installation.
yum groupinstall "Server with GUI"Restart the server after GUI installed. You can temporarily switch to graphical run level by issuing the command
systemctl isolate graphical.targetand to make the graphical interface as default, issue the below command as root
systemctl set-default graphical.targetPlease note, your box doesn’t have VirtualBox extensions yet, which is a MUST for proper mouse integration and more. Prior installing the VirtualBox extensions, make sure to install kernel devel package. Issue the following command
yum install kernel-uek-develAdditionally install the packages gcc, make & perl (pre-installed usually)
yum install gcc make perl -yReboot the server & install the VirtualBox extensions.
If you remember, we changed the network settings earlier for the update & if you try to start the database and application, this may not work. Depending upon how you want to access the VISION instance, you have to configure additional networking now. I suggest to leave the NAT configuration as it is and to configure an additional Network adapter for the intended connectivity.
For example, if you want to share the VISION instance with your teammates within a Class C network, do the following.

Use “Bridged Adapter” & select the adaptor that is connected to the network under “Name”. Recent computers have multiple network and WiFi adapters & selecting the correct adapter is very important for client connectivity. Make sure to setup “Promiscous Mode” to “Allow All”.
Find one free IP address and set up the same for your EBS VISION box. You will have to setup this information at multiple places.
For example, change the hosts file (most important)

Network settings. My box have NAT as first Network Adapter and Host Only network as 2nd Network Adapter. Hence my configurations are like below


For the NAT (Connection #1) I have the following setup

and for the Host Only network (Connection #2)

By having the NAT as first adapter, my box is able to connect to internet, shared from the host and my host can access the EBS instance from the virtual machine using the host only network.
That’s all folks.
