Oracle Linux | “Peer’s certificate issuer has been marked as not trusted by the user.”

Recently I was trying to update one of the Oracle Linux 7 boxes that is used for lab & came across multiple errors.

OCI : Yum Fails with [Errno 14] curl#6 - "Could not resolve host: yum-iad.$ocidomain; Unknown error"
[Errno 14] curl#60 - "Peer's certificate issuer has been marked as not trusted by the user."

I kept on doing almost everything yum was suggesting, disable the repos, cleaning etc. Yes, I did ping both google.com & yahoo.com to “insure” that I was connected to “internet” (I’m still struggling to figure out how the heck I managed to ping these hosts when I was actually unable to connect to Oracle mirrors)

However, after exhausting more than couple of hours, I decided to access the server through VNC & see whether I am missing something, that cannot be done from the command line.

Fired up Firefox & realized, I am not connected to “Internet” in real terms. I couldn’t open any pages and I proceeded with adding the static IP address to exclusion list and that was it.

So, if you ever come across the above mentioned errors, make sure you ARE connected!

Oracle RMAN | RMAN-03009 | ORA-19571| archived log RECID not found

We recently migrated from Oracle 11gR2 to 19c for our Oracle Applications (12.2.10) & decided to continue with old RMAN plans. Run a shell script, call RMAN as “Oracle” user, copy current day backups to a remote server & finalizing the activities with email sent.

Our previous database compressed RMAN backups were a maximum of 142GB per day, that grew to 190-192GB (few datafiles were added) after the upgrade. This made us to reduce the retention period from 7 to 5 and next day, while going through the RMAN logs, I found the following error.

released channel: c1
released channel: c2
released channel: c3
released channel: c4
RMAN-00571: ===========================================================
RMAN-00569: =============== ERROR MESSAGE STACK FOLLOWS ===============
RMAN-00571: ===========================================================

RMAN-03009: failure of backup command on c4 channel at 02/10/2022 22:24:51
ORA-19571: archived log RECID 416 STAMP 1095631214 not found in control file

RMAN> 

Recovery Manager complete.

So, I went through the previous days logs and found this error started being logged from 9th of Feb and rest were all okay.

I checked database “control_file_record_keep_time” parameter and found the value set as “7” which was more than our current backup retention period.

So the next factor to check was the RMAN script that we were using over a period of 6-7 years without a single failure.

export PATH=$ORACLE_HOME/bin:$PATH
export LAST_RMANLOG_FILE="rman_dailyfull`date +%d%m%y`.log"
echo "Starting Full Daily Database Backup of oracle ebsr12 PROD database"
date
rman target / << EOF >/u03/RMAN/log/rman_dailyfull`date +%d%m%y`.log
run
{
ALLOCATE CHANNEL c1 DEVICE TYPE disk;
ALLOCATE CHANNEL c2 DEVICE TYPE disk;
ALLOCATE CHANNEL c3 DEVICE TYPE disk;
ALLOCATE CHANNEL c4 DEVICE TYPE disk;
crosscheck archivelog all;
crosscheck backup;
BACKUP AS COMPRESSED BACKUPSET DATABASE FORMAT '/u03/RMAN/DAILYBKP/rman_comp_%d_lvl0_%U' TAG "dailyfull_db_lvl0_bkp" INCLUDE CURRENT CONTROLFILE;
sql 'ALTER SYSTEM ARCHIVE LOG CURRENT';
BACKUP AS COMPRESSED BACKUPSET ARCHIVELOG ALL FORMAT '/u03/RMAN/DAILYBKP/archive_%d_lvl0_%U';
DELETE NOPROMPT archivelog all completed before 'sysdate-7';
backup current controlfile format '/u03/RMAN/DAILYBKP/bkpcontrol_file.ctl_%d_%T';
DELETE NOPROMPT OBSOLETE RECOVERY WINDOW OF 5 DAYS;
RELEASE CHANNEL c1;
RELEASE CHANNEL c2;
RELEASE CHANNEL c3;
RELEASE CHANNEL c4;
}
EOF

After a close reading, I found the typo. I was deleting the obsolete backups within a window of 5 days & trying to delete logs which were “7” days old.

DELETE NOPROMPT archivelog all completed before 'sysdate-5';

That’s all. No more RMAN-03009, ORA-19571, or archived log RECID <NNN> STAMP <NNNNNNNNNN> not found in control file errors.

Oracle Application R12 | Error: Missing ormi[s] host port

Hello guys

One of the most awkward things that keeps on happening in my life is, I land on my posts/comments those were posted years back, which were definite solutions to few perplexing situations like “Error: Missing ormi[s]://<host>:<port>”

Year 2015, I posted a comment with the below thread

https://aboutsoa.wordpress.com/2009/06/22/error-missing-ormishostport/

explaining a possible solution to the error in attention…but I missed it.

Few days back I was setting up a VM with Oracle Applcations R12 to test SSD based storage device & landed on the same error! I didn’t have a clue…last four days I was going through each every other notes those I made, was scavenging through tones of blog posts and Oracle support documents, trying out suggestions to overcome the error below:

Executing service control script:
…../admin/scripts/adoacorectl.sh stop
Timeout specified in context file: 100 second(s) 

script returned:
****************************************************
ERROR : Timed out( 100000 ): Interrupted Exception

You are running adoacorectl.sh version 120.13

We had our Oracle Application R12 implemented on RHEL 5 & later cloned the same instance on Oracle Linux 6 for TESTs. One of the major differences between RHEL 5 & 6 was the native support for IPV6 with Linux 6. Not just R12, many Oracle products WERE/ARE not yet completely compatible with IPV6 & the first thing geeks ask you to do is to disable IPV6 (Even today!)

I did, trust me I did it on the interface, I did it in the sysctl.conf & wherever possible & still had the same ormi error, whenever I tried to shutdown the application services. The temporary solution was to re-run the stop all script & finally the script completes with “0” error.

I was NOT happy & I wanted my instance to shutdown gracefully, over a single attempt. I “knew” that Oracle was very sensitive to Network stack, a screwed up hostfile, DNS, firewall…anything that is related to network could cause these kind of issues. So I decided to go through each one of them. So, first was the hosts file.

The default /etc/hosts file from Linux 6 has the entries like below

127.0.0.1 localhost localhost.localdomain localhost4 localhost4.localdomain4

::1 localhost localhost.localdomain localhost6 localhost6.localdomain6

When Linux 5 have | Glad that I had a machine to cross check

127.0.0.1 localhost.localdomain localhost

::1 localhost6.localdomain6 localhost6

Immediately I decided to give it a try, I chopped the unnecessary strings from the hosts file & started the application tier & tried to shutdown!

That was it, no more
“Error: Missing ormi[s]://<host>:<port>”

No hacking of the Context files or disabling the IPV6 protocol is required, which could complicate SSH tunnel etc (as per Linux guys, I am not a Linux guy yet ;) in those means)

So, now you have a working solution, you have your IPV4 & IPV6 both enabled & an instance shuts down as you expect. Well, party time guys!

regards,

rajesh

Virtualize your desktop/laptop computer

Hello guys

This is my first post for the year 2016. Actually I have more drafts than posts this time with me and I truly hope that I will able to finish all of them in few weeks time. I’m sure you are interested about Oracle 12c products on Windows platform. Stay tuned, am on it

Coming back to the topic, I have a decent desktop computer that could be called a “half server” with the following configurations

  1. i7 processor 2nd generation
  2. 16GB DDR3 memory
  3. Around 4.5-5 terabyte of storage
  4. windows 10 64Bit Professional

I came across VMWare always 8 years back, liked it, and used it until they started charging for everything. Then Oracle VirtualBox (Earlier JAVA VirtualBox) started giving tough fight and it has become quite famous among developer communities where NOT many were truly able to afford VMWare’s paid software.

VMWare is altogether a different standard made for sophisticated environments, hence we will never compare both the products here. Our intention is to point you towards the advantages of using Virtual Machines that could less clutter your rig, give you better exposure to different technologies and a bit of networking etc

So our product of interest for this post is Oracle VirtualBox and we will see how we can utilize our existing desktops/laptops to run multiple virtual machines at the same time and thus utilize the available hardware to the maximum extends

So prior attempting to virtualize your existing computer, you need to know what kind of hardware you have and whether your computer meets minimum requirements to support virtualization.

So today is 3rd January 2016 & if your computer is 4 years old or less,  99.9% chances that your rig sure supports virtualization. Most of BIOS comes with the virtualization enabled by default.

Yet we should make sure that our computers support virtualization. Read the instructions provided here to find out whether your current processor supports virtualization OR

Just install Oracle VirtualBox and try to create a VM. You will immediately come to realize whether your rig really supports virtualization ;)

Well, that’s the brute force way of doing stuffs, adapt the one that defines you. If you are using Windows 10, I’ve noticed that many default installations enable Hyper-V by default. You need to disable it from add remove windows features console, so that you can create 64Bit VMs using Oracle VirtualBox. This post explains how to enable it, just do the opposite to disable it

Before anything else, you need to identify your processor, it’s capabilities. A nice comparison is available here for i3, i5 & i7 processors and definitely, the author favors i7 processors. Please spend few minutes to read about the differences between these three different processors.

A ripoff from http://www.pcadvisor.co.uk

What the difference between Core i3, i5, i7: Hyper-Threading

A thread in computing terms is a sequence of programmed instructions that the CPU has to process. If a CPU has one core, it can process only one thread at once, so can only do one thing at once (as before, it’s actually more complex than this, but the aim here is to keep it simple and understandable).

Hence, a dual-core CPU can process two threads at once, a quad-core four threads at once. That’s twice or four times the work in the same amount of time.

Hyper-Threading is a clever way to let a single core handle multiple threads.

A Core i3 with Hyper-Threading can process two threads per core which means a total of four threads can run simultaneously. The current Core i5 range doesn’t have Hyper-Threading so can also only process four cores. i7 processors do have it, so can process eight threads at once. Combine that with 8MB of cache and Turbo Boost Technology, and you can see why it’s good to choose a Core i7 over an i5 or i3.

Now, you should know how much physical memory you have. More, the merrier. Starting with Windows 7, computers started shipping with a minimum of 4GB as a standard. So, 4GB is enough for your OS and proposed virtualization? It’s going to be a tight fit. I will suggest an additional 4GB minimum, making the total physical memory 8GB so that you won’t have to sacrifice performance.

Finally the storage. Most of the branded PCs and laptops are coming with 500GB HDD as standard & extending the storage of a laptop is complex than of a desktop computer. For the later, all you need is another HDD which you can plug to one of the available SATA ports and configure. With a laptop, you may need to replace the HDD with a higher capacity one or use an external HDD for your additional storage requirements.

My current Virtualizations are mostly for Oracle technologies. I am a forms and reports developer, doing a certain level of .NET development & manage Oracle EBS R12 instances (“NOT a DBA”). Further I try almost all the database, weblogic versions & currently learning ASMM & RMAN. I have never attempted other areas of Oracle technologies, so my VMs run

  1. Oracle EBS R12 cloned instances
  2. Oracle database(s)
  3. Oracle weblogic server(s) with forms and reports (supported)

My EBS R12 VM has the following configuations

8GB memory out of 16GB physical, 4 processor out of 8 logical processors & almost 850GB of storage out of 4.5 terabyte total storage. Our instance has 400GB database size, 175GB application instance & the VM responds to requests instantaneously once after scheduled jobs are completed after a restart of the application. Usually I find the application responding better after 3 hours of settling down & the performance is assured throughout days and weeks until a restart.

My Weblogic, database VMs have the following configurations

4GB memory out of 16GB physical, 4 processor out of 8 logical processors & almost 250 GB of storage out of 4.5 terabyte total storage. I have my weblogic VM running 11gR2 64bit database as well. I get instant responses from both the Weblogic server and Oracle database 11gR2 from a client system, whenever accessed

Recommendations

Even though you can run multiple VMs at the same time, I would suggest, based on your hardware, limit them. Example

When I run my EBS R12 VM (8GB memory, 4 processors) my HOST computer is left with only 8GB free memory and 4 logical processors. If I start a Windows XP VM (2GB memory, 2 processors) to check the application performance, I feel my rig start slowing down and couple of times my computer shutdown with a high thermal point.

So make sure that you do tweaking to your VMs in order to make sure that your HOST doesn’t breakdown due to overload.

I always make sure that my HOST always has half of the hardware resources reserved for it, ie, 8GB memory, 4 processors regardless how many VMs I run at the same time! This is by using the VirtualBox console to alter the parameters of VMs before they are started

1

All the settings for the VMs could be altered using the settings, like increasing or decreasing the memory, processors, adding and removing storage devices etc.

2

Below you watch how fast my VM running EBS r12 responds to requests from another VM running Windows XP

Advantages of using Virtualization

The most important advantage for me is: I’ve a less cluttered HOST, said, I am NOT installing all the technologies to one OS, breaking it with conflicting versions of services and libraries and processing load.

Other advantages

  1. I can backup (copy) my entire “machine” and restore it during a total mess up or loss of data, rather than rebuilding the entire computer
  2. I get a sand-boxed environment & without fearing my attempts will break my main OS, continue the experiments
  3. I can make a VM, for example, running Oracle Enterprise Linux, copy and keep the OS installed disk somewhere and copy it to new VMs whenever required! Say, you install the OS only once and whenever you need to create a new VM with same OS, just duplicate the disk that has the OS! (Make sure you make a backup of the OS disk prior installing and configuring additional software into it)

Finally my suggestions for you, in case if you are considering to build your 1st VM using Oracle VirtualBox

  1. Majority of the Oracle geeks prefer Linux against Windows for database, weblogic deployments. So if you are NOT familiar with Linux, I suggest you start learning, regardless whether you FEEL very comfortable with it or NOT. You may be joining a firm that has reservations towards Windows OS running Oracle products, especially Oracle DBAs who have valid points like block corruptions, difficulties to recover from a crash are complex in the case of Windows OS.
  2. Install OS in a separate disk. 40GB dynamic size should be more than enough for any recent Linux distros. Avoid Linux 7 if you are truly new to Linux. Oracle Linux 6.7 should be your friend.
  3. Install 64Bit OS, so that you can take the advantage of your 64Bit processor and physical memory
  4. Install Oracle supported Linux distros (RHEL, OEL & certain versions of Debian. CentOS is not at all supported)
  5. Install the complete desktop, you are hardly going to complete the installations on pure CLI mode.
  6. Add SCSI interface to your VM and for Oracle database etc, use SCSI disks. I had a huge argument with VirtualBox guys about the performance difference between SATA VDI disks and SCSI VDI disks. I found the SCSI VDI disks performing better, however I was dismissed saying as far both the types are created on the same HDD, it must be more psychological :O
  7. Use 1TB 7200 RPM disks in the place of 2TB 5400 RPM disks. Later ones are best for data storage, when the previous ones give you better I/O. Create fixed size VDI for databases & applications, that means you will NOT able to increase the size of the disk once after created, however, it gives you faster I/O and better performance.
  8. Update your OS. As soon as the VM is built, update your OS prior installing database, weblogic etc. RHEL will NOT allow you to update the packages without subscription, hence Oracle Enterprise Linux should be your best choice of Linux distro. Please note, you shouldn’t use Oracle Linux in a production environment without acquiring sufficient licenses. Whatever I suggest here are limited for study/evaluation purposes and I don’t encourage any kind of illegal usage of software!
  9. Use Oracle’s pre-install packages to install database, EBS etc prerequisites rather than trying to download individual components from different download sites.
  10. Use shared folders between HOST and Guest (VM) so that you don’t have to sacrifice storage. Not just that, when you want to keep the backup of some files from the VM, the shared folders will make it as easy as possible
  11. Use bridged network, with Promiscuous Mode “Allow All” so that you can communicate with the VM from network
  12. 3
  13. Disable IPV6, firewall, SELinux on your Linux VM
  14. If you creating a Windows VM, I’m sure you better know how to configure your guest so that you can access it from a network.

Finally recommendations for a DESKTOP computer to try virtualization

  1. i7 processor + good quality heat sink. Your HOST and VMs are going to create loads of heat!
  2. 16GB Memory (DDR4 is the new standard, do not ignore it)
  3. 1×2 TB HDD

Few years back, such a configuration looked impossible for me, well, I saved bit by bit and made my dream computer. I’m sure you can also do it :) & trust me, a good computer opens a new world for you.

All the best and wish you all a very successful year ahead!

for Windows7bugs

rajesh


Oracle R12 Cloning | dbTier "ouicli.pl INSTE8_APPLY 1"

Hi guys

There could be thousands (exaggerated) reasons why a Oracle cloning process could go all bad. I’m not an application DBA, however, have enough experience with the architecture, technology as I interact with it everyday as a part of my job.

Few months back, I started doing something what a DBA should do, cloning. My prior attempts were mostly at home, using virtual machines and test instances and they were NOT as mission critical as what we do at work.

So, after the storage device was revamped with new partition structures I was asked to do a cloning for the production instance. Let me explain how the application was deployed prior the storage restructuring

  1. We had the database tier on mount point /u05
  2. Application on /u06 mount point

So, I recreated the same mount points and started the cloning process for dbTier and the process got terminated at 2% and the log files shown me an error that I was not familiar with.

“ouicli.pl INSTE8_APPLY 1”

Google searches fetched me hundreds of results for “ouicli.pl INSTE8_APPLY”, however the error codes were mostly for 255 or “-1” and apparently I didn’t have any clue what was going wrong.

So I unzipped the tar ball for database tier once again, and the cloning process got aborted at 2%,  and I was getting nervous as I was expected to make the instance online by early morning 7AM

Most of the reference materials were explaining about non-existent Oracle inventory locations, and I confirmed that it was not the case from my part (Obviously, I was overlooking at this constrain itself!)

After half a dozen times tasting failure, finally I tried to see what was written inside the oraInst.loc file

oraprod@erp-prod:/home/oraprod&gt;cd $ORACLE_HOME
oraprod@erp-prod:/u05/oraprod/PROD/db/tech_st/10.2.0&gt;cat oraInst.loc
inventory_loc=/u01/oraprod/PROD/db/tech_st/10.2.0/admin/oui/PROD_erp-prod/oraInventory

and I realized that inventory location was wrongly pointing towards an non-existing mount point and physical location!

I modified the oraInst.loc content with the correct mount point

inventory_loc=/u05/oraprod/PROD/db/tech_st/10.2.0/admin/oui/PROD_erp-prod/oraInventory

and the cloning process went ahead without giving another errors.

We had an instance that was running from last 6 years, which was only once cloned from a cold backup during the storage device change, and somehow the inventory location remain unchanged with the repositories.

I hope this finding could help few newbies like me out there

regards,

rajesh

Oracle EBS R12, Install/Clone on Oracle/Red Hat Linux 7.x

Hi guys

Last reviewed on: 10th January 2022

Made changes to the body for Oracle Linux 7.9

References: http://www.slideshare.net/tianpan/oracle-ebs-r1213installationlinux64bitpantian

(and dozens of EBS R12 related blogs and oracle community posts)

As far I could recollect, Oracle EBS R12.0.x & R12 12.1.x are not certified yet for Linux 7.x, let it be Red Hat Linux or Oracle enterprise Linux. Does the certification path really make guys like us trying to clone, install EBS R12 over yet to be certified platforms? Well, my case, I always did attempt & succeeded to a certain levels. Starting with Oracle 10g over Windows 7, 8 etc.

This time, my attempt was to clone our existing EBS R12 12.0.6 instance from Red Hat linux Enterprise 5 64Bit to Oracle Enterprise linux 7 64Bit.

I can’t say whether it is a rightful thing for you or for your environment. For me it was a fun project, that I achieved to a maximum satisfactory level.

Environment: Source System

Red Hat Linux 5.11 64Bit, 48GB physical memory, HBA interfaced external storage, single node EBS R12 12.0.6 with Oracle database 10.2.0.3 database

Environment: Target System

1. Oracle VirtualBox VM with 4 processors, 10GB memory, Oracle Enterprise Linux 7.9 with GUI on demand

VDI fixed size of 1.3T holding both application tier & database tier files copied from source system

2. A Desktop machine with i7 Processor, 4.5 TB Storage, 16GB physical RAM for real hardware performance testing

How to?

Definitely, this is not for a production instance, not for a production instance, not for a production instance & REMEMBER, even if you have valid Oracle support, Oracle will NOT support YOU as the platform is NOT certified for 12.0.x or 12.1.x

Oracle Enterprise Linux 7.x is not certified for EBS R12.0.x , hence I was unable to find the pre-requisites install for EBS R12 for the OS. The hacks started from this point onward

Update(10th January 2022): Oracle Linux 7.9 has the “Add-on” repository that allows you to install the pre-requisites package, however meant for later certified versions of Oracle EBS. Hence, stick to Oracle Linux 6 public yum repository based package installation as mentioned below.

(Please make sure that you fully updated your OEL 7.x box prior the attempts listed below)

As root switch the directory to

cd /etc/yum.repos.d

Go to

http://public-yum.oracle.com/ and install the ol6 repo following instructions provided. The instruction might get in to folds, just follow the below.

cd /etc/yum.repos.d/
wget http://yum.oracle.com/public-yum-ol6.repo

Please note public yum repositories will be soon removed, if you are reading this post much later, make sure that you will find relevant sources to install the pre-requisites.

Open the ol6 repo file using gedit/vim and enable the add-on repo. Make sure the OEL7 repo doesn’t have the add-ons enabled. If you miss this, you might end up rebuilding the Linux Server (That’s what I did!)

install pre-requisites for EBS R12 by issuing the following command

yum install oracle-ebs-server-R12-preinstall -y

Once the installation completed, you will notice that you have two new users created

oracle

applmgr

If your cloned instance was having different user names for both application and database, create same usernames and add them to relevant groups

for example applprod to oinstall group and oraprod to dba, oinstall groups (mandatory)

Special note: If you are attempting these hacks for Production instances, sorry buddy, YOU will never be supported by Oracle as they have recently confirmed to me through a private message that they don’t have any plans to certify 12.0.x versions on OEL 6 or 7

Prior you attempt to clone or install the 12.0.6 instance on OEL 6, 7 make sure that you have taken care of few things prior the attempt. There are few OS level files formatting mandatory for Oracle applications, those caused me almost 3 weeks of reading various blog posts, and NOT a single solution to address a weird error associated with “Error: Missing ormi[s]://<host>:<port>” error while shutting down the application services using adstpall.sh script file! And the reason was default formatting of /etc/hosts file by OEL 7 installation!

Few errors you should see when the /etc/hosts file is NOT formatted as per Oracle’s installation notes…

Executing service control script:
 …../admin/scripts/adoacorectl.sh stop
 Timeout specified in context file: 100 second(s) 

script returned:

  ERROR : Timed out( 100000 ): Interrupted Exception
  You are running adoacorectl.sh version 120.13 

So the /etc/hosts file must be formatted like below with your OEL/RHEL 6.x & 7.x installations

127.0.0.1 localhost.localdomain localhost 
::1 localhost6.localdomain6 localhost6 
192.168.10.15 erp-prodbak.xyz.com erp-prodbak #Your box 
192.168.10.16 erp-prod.xyz.com erp-prod #Your production server, if at all required 

Rest of the network related mandatory elements specified in the reference documents could be ignored, or you may format them as well. If you are going to touch your /etc/resolv.conf file at all, make sure that after changing the content of the resolv.conf, you make it read-only by issuing the following command

chattr +i resolv.conf 

else after a reboot, this file be rewritten by the networking admin services

Now let us refer to the /etc/sysctl.conf & /etc/security/limits.conf files, which are setting system level parameters for the application. While I noticed that the previously configured parameters were causing performance degradation once after the clone, I just copied these elements from a 12.1.3 vision instance and replaced to find that, my cloned instance started flying, giving me much better performance than our Production instance that has the latest hardware and 48GB physical memory!

Once again, thoroughly check the below parameters, if something looks not appropriate for your environment, refrain from updating

as a precaution, do a backup for both the above mentioned files

cp /etc/sysctl.conf /etc/sysctl.conf.original 
cp /etc/security/limits.conf /etc/security/limits.conf.original 

Now using your favorite editor, replace the content of you sysctl.conf file with following

# Kernel sysctl configuration file for Red Hat Linux
#
# For binary values, 0 is disabled, 1 is enabled.  See sysctl(8) and
# sysctl.conf(5) for more details.
#
# Use '/sbin/sysctl -a' to list all possible parameters.

# Controls IP packet forwarding
net.ipv4.ip_forward = 0

# Controls source route verification
net.ipv4.conf.default.rp_filter = 1

# Do not accept source routing
net.ipv4.conf.default.accept_source_route = 0

# Controls the System Request debugging functionality of the kernel
kernel.sysrq = 0

# Controls whether core dumps will append the PID to the core filename.
# Useful for debugging multi-threaded applications.
kernel.core_uses_pid = 1

# Controls the use of TCP syncookies
net.ipv4.tcp_syncookies = 1

# Controls the default maxmimum size of a mesage queue
kernel.msgmnb = 65536

# Controls the maximum size of a message, in bytes
kernel.msgmax = 65536

# Controls the maximum shared segment size, in bytes

# Controls the maximum number of shared memory segments, in pages
kernel.shmall = 4294967296

# oracle-ebs-server-R12-preinstall setting for fs.file-max is 6815744
fs.file-max = 6815744

# oracle-ebs-server-R12-preinstall setting for kernel.sem is '256 32000 100 142'
kernel.sem = 256 32000 100 142

# oracle-ebs-server-R12-preinstall setting for kernel.shmmni is 4096
kernel.shmmni = 4096

# oracle-ebs-server-R12-preinstall setting for kernel.shmall is 1073741824 on x86_64
# oracle-ebs-server-R12-preinstall setting for kernel.shmall is 2097152 on i386

# oracle-ebs-server-R12-preinstall setting for kernel.shmmax is 4398046511104 on x86_64
# oracle-ebs-server-R12-preinstall setting for kernel.shmmax is 4294967295 on i386
kernel.shmmax = 4398046511104

# oracle-ebs-server-R12-preinstall setting for kernel.msgmni is 2878
kernel.msgmni = 2878

# oracle-ebs-server-R12-preinstall setting for net.core.rmem_default is 262144
net.core.rmem_default = 262144

# oracle-ebs-server-R12-preinstall setting for net.core.rmem_max is 4194304
net.core.rmem_max = 4194304

# oracle-ebs-server-R12-preinstall setting for net.core.wmem_default is 262144
net.core.wmem_default = 262144

# oracle-ebs-server-R12-preinstall setting for net.core.wmem_max is 1048576
net.core.wmem_max = 1048576

# oracle-ebs-server-R12-preinstall setting for fs.aio-max-nr is 1048576
fs.aio-max-nr = 1048576

# oracle-ebs-server-R12-preinstall setting for net.ipv4.ip_local_port_range is 9000 65500
net.ipv4.ip_local_port_range = 9000 65500

Save the file and issue the following command

sysctl -p

Now, change the limits.conf file with following content

# /etc/security/limits.conf
#
#Each line describes a limit for a user in the form:
#
#            
#
#Where:
# can be:
#        - a user name
#        - a group name, with @group syntax
#        - the wildcard *, for default entry
#        - the wildcard %, can be also used with %group syntax,
#                 for maxlogin limit
#
# can have the two values:
#        - "soft" for enforcing the soft limits
#        - "hard" for enforcing hard limits
#
# can be one of the following:
#        - core - limits the core file size (KB)
#        - data - max data size (KB)
#        - fsize - maximum filesize (KB)
#        - memlock - max locked-in-memory address space (KB)
#        - nofile - max number of open file descriptors
#        - rss - max resident set size (KB)
#        - stack - max stack size (KB)
#        - cpu - max CPU time (MIN)
#        - nproc - max number of processes
#        - as - address space limit (KB)
#        - maxlogins - max number of logins for this user
#        - maxsyslogins - max number of logins on the system
#        - priority - the priority to run user process with
#        - locks - max number of file locks the user can hold
#        - sigpending - max number of pending signals
#        - msgqueue - max memory used by POSIX message queues (bytes)
#        - nice - max nice priority allowed to raise to values: [-20, 19]
#        - rtprio - max realtime priority
#
#                 
#

#*               soft    core            0
#*               hard    rss             10000
#@student        hard    nproc           20
#@faculty        soft    nproc           20
#@faculty        hard    nproc           50
#ftp             hard    nproc           0
#@student        -       maxlogins       4

# * hard nofile 65535
# * soft nofile 4096
# * hard nproc 16384
# * soft nproc 2047


# oracle-ebs-server-R12-preinstall setting for nofile soft limit is 4096
oratest   soft   nofile    4096
appltest   soft   nofile    4096

# oracle-ebs-server-R12-preinstall setting for nofile hard limit is 65536
oratest   hard   nofile    65536
appltest   hard   nofile    65536

# oracle-ebs-server-R12-preinstall setting for nproc soft limit is 16384
# refer orabug15971421 for more info.
oratest   soft   nproc    16384
appltest   soft   nproc    16384

# oracle-ebs-server-R12-preinstall setting for nproc hard limit is 16384
oratest   hard   nproc    16384
appltest   hard   nproc    16384

# oracle-ebs-server-R12-preinstall setting for stack soft limit is 10240KB
oratest   soft   stack    10240
appltest   soft   stack    10240

# oracle-ebs-server-R12-preinstall setting for stack hard limit is 32768KB
oratest   hard   stack    32768
appltest   hard   stack    32768


# End of file

Install unzip version 5 from https://oss.oracle.com/el4/unzip/unzip.html

(This is mandatory as 12.0.x doesn’t support unzip versions above 5, and your cloning will fail with error notifying unzip is not supported)

Source the libdb.so.2 library file to /usr/lib from your source system, as the libgdbm.so.4.0.0 soft link hack will not work. If the libdb.so.2 is already a soft link in your source system, move the source file “libgdbm.so.2.0.0” from source to target box and create the soft link.

Now go ahead and enjoy the cloning/installation of your R12 12.0.x, or R12.1.x releases over OEL/RHEL 7.x (CENTOS is GNU release of RHEL, so you may experiment with that distro as well, nothing guaranteed though)

Please be warned, I have read many places that, few modules do not work on Linux 6,7 releases. Hence, the entire exercises you painfully executed may turn futile at later stages, and once again, if you have a live Oracle support, do not attempt such with your Production instance!

Enjoy guys :)

for Windows7bugs

rajesh

Linux shell script file for Start/Stop Weblogic Services


This time we are sharing a shell script for starting/stopping Weblogic services. This shell script can

  1. Start Weblogic Admin Server (after starting Node Manager)
  2. Once the Admin server started, you can start the forms and reports services using the Admin Console
  3. Unless conflicts, you should able to access the Oracle enterprise manager console as well

Copy the content below in plain text file first, change the extension to .sh and set the execute permissions


[sourcecode language=”bash” gutter=”false” wraplines=”true”]
#!/bin/sh

if [ -z "$1" ]; then
echo "You must supply either start or stop command while calling this script! correct usage: weblogic_start_stop.sh start|stop"
exit
fi

bold=`tput bold`
normal=`tput sgr0`

case "$1" in
‘start’)
echo "Starting Management Node & Weblogic Server 10.3.6"

echo "Starting NodeManager"

nohup $WLS_HOME/server/bin/startNodeManager.sh > /dev/null 2>&1 &

sleep 10

output=`ps -ef | grep -i nodemanager.javahome | grep -v grep | awk {‘print $2’} | head -1`

set $output

pid=$1

echo "Weblogic NodeManager Service was started with process id : ${bold}$pid${normal}"

echo "Starting WebLogic Domain"

nohup $MW_HOME/user_projects/domains/ClassicDomain/bin/startWebLogic.sh > /dev/null 2>&1 &

# Sleep until exiting
sleep 60
echo "All done, exiting"
exit
esac

################################Stopping the services##################################

case "$1" in
‘stop’)
echo "Stopping Weblogic Server & Node Manager"

nohup $MW_HOME/user_projects/domains/ClassicDomain/bin/stopWebLogic.sh > /dev/null 2>&1 &

sleep 30

# echo "Killing Nodemanager process now"

output=`ps -ef | grep -i nodemanager.javahome | grep -v grep | awk {‘print $2’} | head -1`
set $output
pid=$1
echo "Killing Weblogic NodeManager Service Process : ${bold}$pid${normal}"

kill -9 `ps -ef | grep -i nodemanager.javahome | grep -v grep | awk {‘print $2’} | head -1`

echo "All done, exiting"
exit
esac

[/sourcecode]


If you have queries, please ask them using comments section.

for Windows7bugs

rajesh

Oracle R12 Vision Instance 12.1.3 Cloning – step by step instructions

*General Note: The below instructions, which were successfully completed and tested are from the prospective of a person who do not have any previous knowledge about cloning, advance level Linux administration etc. If you find it too amateurish, please let us know with the comments session and corrections. We will be more than happy to amend the post.

Most probably few of the errors we received with write permissions missing to /tmp for applprod user should because of missing Rapid Clone patches.

Prerequisites

Oracle VirtualBox (We don’t support a physical system as detailing a cloning for a Linux system wouldn’t fit entirely within the discussed topic)

Minimum 4GB of memory to spare for the Virtual Machine

500GB of free hard disk space (If you don’t have additional 500GB, you can use the same source machine for cloning, by backing up the necessary folders and after removing the E-BIZ folder entirely)

Step #1

Create a folder on a partition where you have 500GB or more space and call it “ebiznew”

Copy and paste both System.vdi and ebs1211db.vdi from your other virtual machine folder, where you have a properly working Vision Instance (We are not going to clone the existing VM using the VirtualBox clone utility)

Change the uuid for both System.vdi and ebs1211db.vid

E:\ebiznew>C:\Program Files\Oracle\VirtualBox\VBoxManage.exe&amp;quot; internalcommands
sethduuid System.vdi
UUID changed to: 5dbdd6e3-c8ff-431d-bdd8-edf31c3012fb

E:\ebiznew>C:\Program Files\Oracle\VirtualBox\VBoxManage.exe&amp;quot; internalcommands
sethduuid ebs1211db.vdi
UUID changed to: 05068998-dc4d-46ef-8f8f-1ae07b786bfa

[code language=”text” gutter=”false”]

E:\ebiznew&gt;&quot;C:\Program Files\Oracle\VirtualBox\VBoxManage.exe&quot; internalcommands
sethduuid System.vdi
UUID changed to: 5dbdd6e3-c8ff-431d-bdd8-edf31c3012fb

E:\ebiznew&gt;&quot;C:\Program Files\Oracle\VirtualBox\VBoxManage.exe&quot; internalcommands
sethduuid ebs1211db.vdi
UUID changed to: 05068998-dc4d-46ef-8f8f-1ae07b786bfa
[/code]

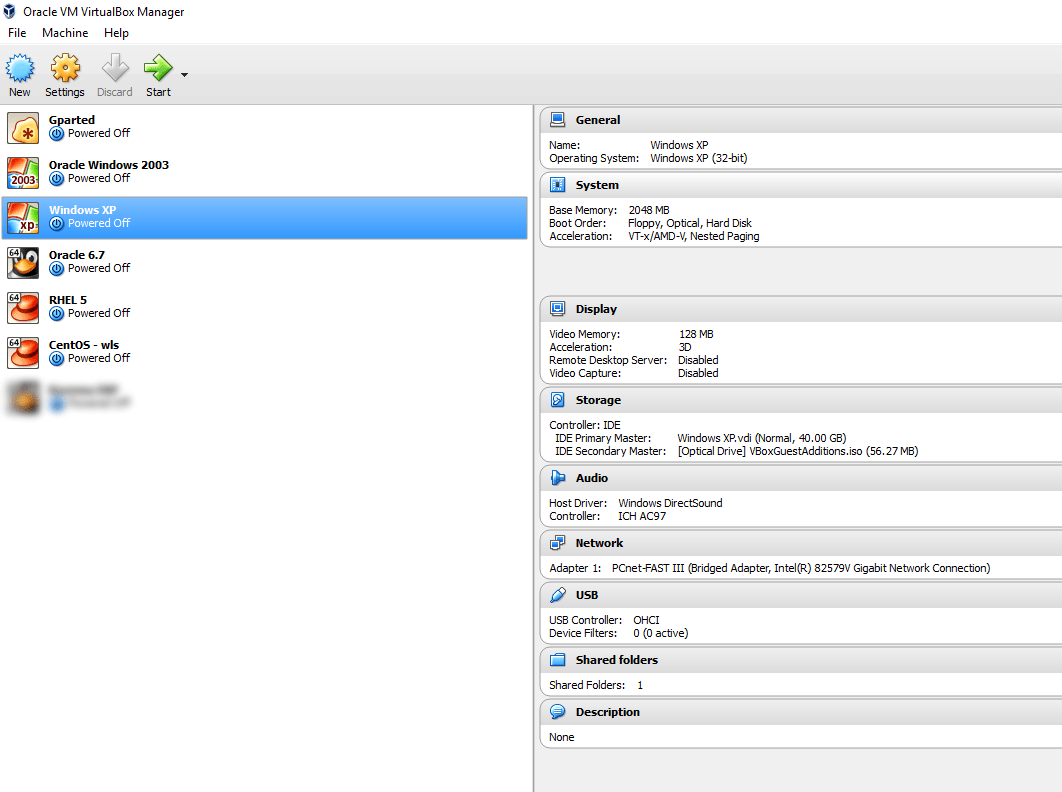
Now start creating a new VM using VirtualBox and attach System.vdi and ebs1211db.vdi under SATA

As we have changed the kernel to NON Xen, you should able to boot up the VM immediately

Once logged in as “root”, let us drop the existing E-BIZ/* folders for cloning purpose

As root

[sourcecode language="bash"]
#cd /u01

#rm -rf *

[/sourcecode]

Sit back, it will take a while for the system to delete the folders and contents

Once the folders and file are deleted create a new folder called “backup” within /u01

[sourcecode language="bash"]
#mkdir backup
[/sourcecode]

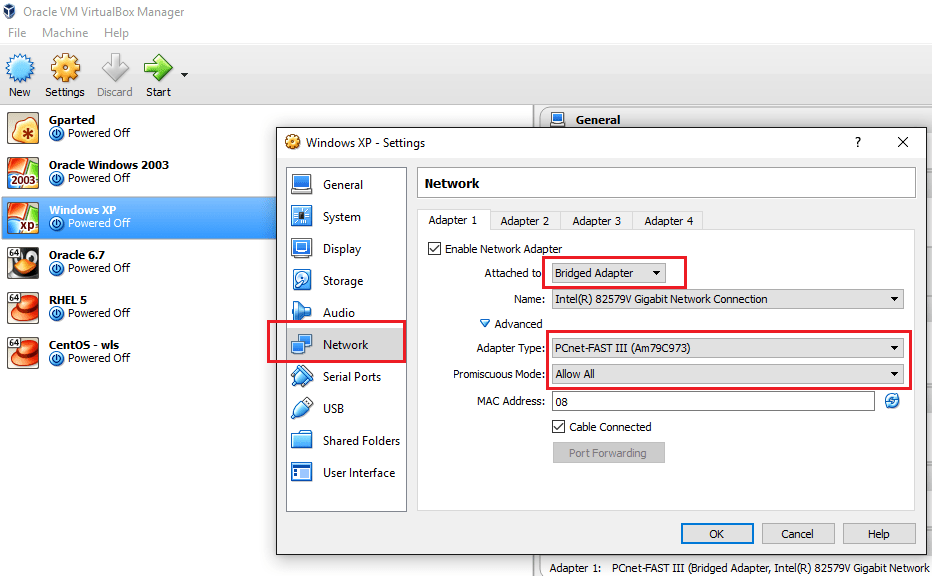
Change the hostname, IP address etc for the new VM

Make sure from your HOST box you can ping the new VM by both hostname and IP address

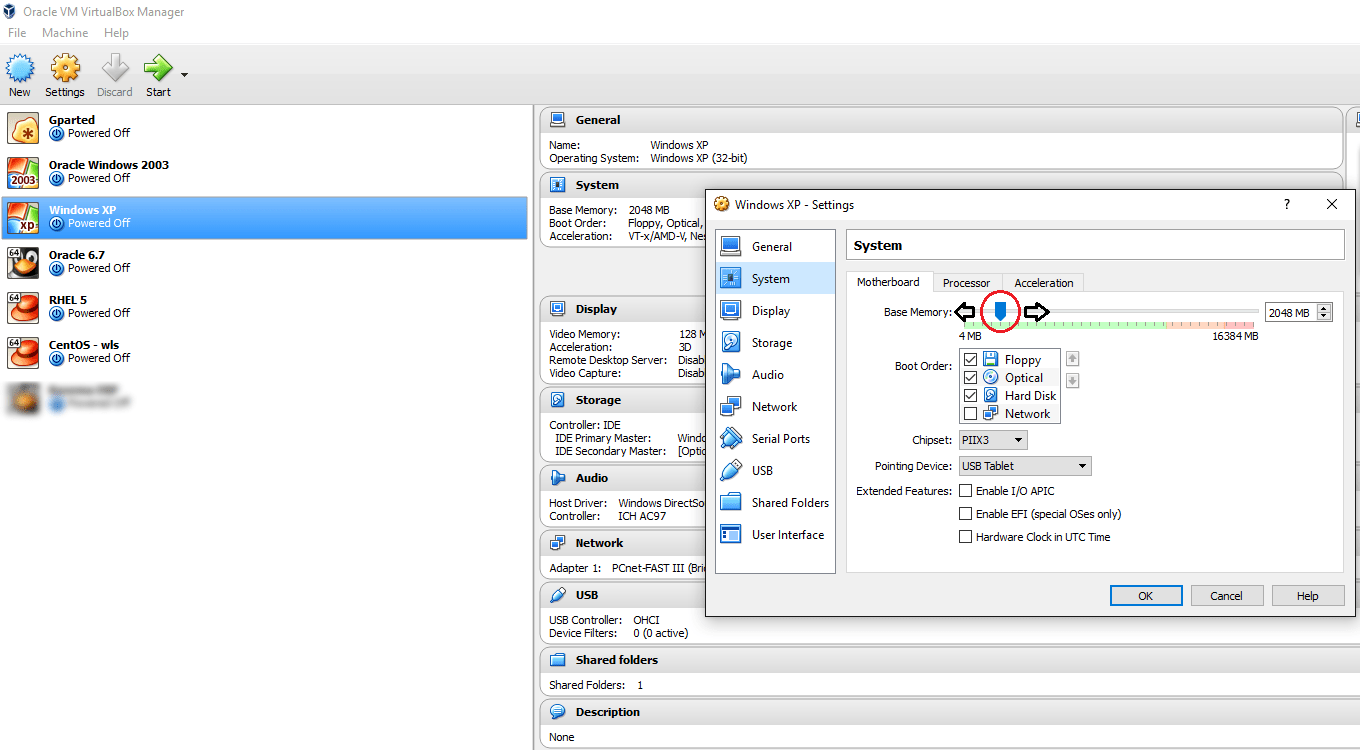
*Special note: If you have a total of 8GB(only) memory with your box, you have to change the memory allocations for both your VMs (one which already has the Vision instance configured & the new VM on which you are going to execute the cloning) to 2GB each

Boot up you VM with Vision instance configured and running (Aka source system)

Edit /etc/hosts file and add the IP address and hostname of your new VM

As root

vi /etc/hosts

192.168.0.50 ebs1213.rhome.com ebs1213

Where ebs1213 is the new hostname you have set for the new VM. Adjust it according to the name you have chosen

Save and exit the vi editor and try to ping the new VM from your source VM

ping ebs1213.rhome.com

Make sure you are getting ping replies from the new VM

Start dbTier and appsTier sequentially and make sure that you can access the application

Step #2

Now we are all set to “try” our first cloning process

Prior cloning we MUST prepare the source system for cloning. Hence switch user to “oracle” and switch to following folder (Adjust the path according to your environment)

cd /u01/E-BIZ/db/tech_st/11.2.0.2/appsutil/scripts/VIS_appvis

$perl adpreclone.pl dbTier

(provide the apps password when it is promoted)

The pre-clone should complete within few minutes time, and if there are no errors (in our case), we can proceed to prepare the application tier now

As user “Oracle” switch to

/u01/E-BIZ/inst/apps/VIS_appvis/admin/scripts

$perl adpreclone.pl appsTier

(provide the apps password when it is promoted)

Let the pre-clone procedure complete.

Once the pre-clone procedure has been completed, shutdown the application tier and database tier sequentially

Check for FNDLIBR processes, until the count reaches two(2)

$ps –ef | grep FNDLIBR | wc –l

Now we have to copy the database and application tier folders to our target VM. For our exercise we will create individual tar.gz files for both database and application folders

We will create a new folder with /u01 on the source system

As root

[sourcecode language="text"]
#cd /u01

#mkdir backup

#cd backup

# time tar -zcvf db.tar.gz /u01/E-BIZ/db/*

This will create a new tar ball with the name “db.tar.gz” inside /u01/backup folder

Sit back and relax, it is going to take some time

Once the tar process finishes, we will attempt to create a tar ball for the application tier

#time tar -zcvf apps.tar.gz /u01/E-BIZ/apps/apps_st/*

The entire tar processes may take more than couple of hours time (Depending upon the resources you have allocated for the source VM)
[/sourcecode]

Now we will copy the tar files created to our target system using SCP

As root, from /u01/backup folder

#scp –pr db.tar.gz root@ebs1213:/u01/backup

You will be given a warning, accept the prompt. After that, you will be asked to enter the root password for your target machine, in our case “ebs1213”

If your vision instance is fresh without much data added after it was put online, the tar ball will be something less than 30GB, and the transfer should complete within 16-20 minutes time

Once the database tar ball transferred you can proceed with transferring your application tar bar

#scp –pr apps.tar.gz root@ebs1213:/u01/backup

Amount of time required will vary depending upon the resources available. Wait until the transfer completes

Now you can shutdown your source system (So that you can release the memory/processors allocated and increase them with your new VM on which we will continue with the cloning process)

Shutdown your new VM (Target system)

Make changes to your new VM with more memory, processors etc

Boot up the new VM and logon to the VM as root

Step #3

We are going to MIMIC a production instance with our new VM (Please note, do not attempt to violate Oracle’s licensing agreements, our intention is not to help you with doing something which is against Oracle’s licensing terms and Vision instance usage)

We will create two new users and add them to existing oinstall and dba groups

As root

Now switch to /u01 folder (or other mount point as you have created it)

We will create a number of folders, which will be entirely different from the Vision Instance structure

[sourcecode language="bash"]
#mkdir oraprod

#cd oraprod

#mkdir PROD

#cd PROD

#mkdir db

#cd /u01

#mkdir applprod

#cd applprod

#mkdir PROD

#cd PROD

#mkdir apps

[/sourcecode]

Now we will change the ownership & permissions for /u01/oraprod & /u01/applprod

As root

[sourcecode language="bash"]
chown -R oraprod:dba /u01/oraprod

chmod -R 777 /u01/oraprod

chown -R oraprod:dba /u01/applprod

chmod -R 777 /u01/applprod

[/sourcecode]

Now we will extract the tar balls to appropriate folders

#cd /u01/oraprod/PROD/db

#time tar –zxvf /u01/backup/db.tar.gz

Approximately the extraction process will take around 3 hours for the database tar ball and around one hour for the application tar ball

Once the database tar ball extracted, we will start extracting the application tar ball

cd /u01/applprod/PROD/apps

time tar –zxvf /u01/backup/apps.tar.gz

Now we can start the actual cloning process

Step #4 Cloning the database tier

[sourcecode language="bash"]
[root@visclone u01]# su - oraprod
[oraprod@ebs1213 ~]$ cd /u01/oraprod/PROD/db/tech_st/11.2.0.2/appsutil/clone/bin
[oraprod@ebs1213 bin]$

#
[root@visclone u01]# su - oraprod
[oraprod@ebs1213 ~]$ cd /u01/oraprod/PROD/db/tech_st/11.2.0.2/appsutil/clone/bin
[oraprod@ebs1213 bin]$ perl adcfgclone.pl dbTier

                     Copyright (c) 2002 Oracle Corporation
                        Redwood Shores, California, USA

                        Oracle Applications Rapid Clone

                                 Version 12.0.0

                      adcfgclone Version 120.31.12010000.8

Enter the APPS password :

Running:
/u01/oraprod/PROD/db/tech_st/11.2.0.2/appsutil/clone/bin/../jre/bin/java -Xmx600M -cp /u01/oraprod/PROD/db/tech_st/11.2.0.2/appsutil/clone/jlib/java:/u01/oraprod/PROD/db/tech_st/11.2.0.2/appsutil/clone/jlib/xmlparserv2.jar:/u01/oraprod/PROD/db/tech_st/11.2.0.2/appsutil/clone/jlib/ojdbc5.jar oracle.apps.ad.context.CloneContext -e /u01/oraprod/PROD/db/tech_st/11.2.0.2/appsutil/clone/bin/../context/db/CTXORIG.xml -validate -pairsfile /tmp/adpairsfile_3095.lst -stage /u01/oraprod/PROD/db/tech_st/11.2.0.2/appsutil/clone  2&gt; /tmp/adcfgclone_3095.err; echo $? &gt; /tmp/adcfgclone_3095.res

Log file located at /u01/oraprod/PROD/db/tech_st/11.2.0.2/appsutil/clone/bin/CloneContext_1007224741.log

Provide the values required for creation of the new Database Context file.

Target System Hostname (virtual or normal) [ebs1213] :

Target Instance is RAC (y/n) [n] :

Target System Database SID : PROD

Target System Base Directory : /u01/oraprod

Target System utl_file_dir Directory List : /usr/tmp

Number of DATA_TOP's on the Target System [1] : 1

Target System DATA_TOP Directory 1 [/u01/E-BIZ/db/apps_st/data] : /u01/oraprod/PROD/db/apps_st/data

Target System RDBMS ORACLE_HOME Directory [/u01/oraprod/db/tech_st/11.1.0] : /u01/oraprod/PROD/db/tech_st/11.2.0.2

Do you want to preserve the Display [appvis:0.0] (y/n)  : n

Target System Display [ebs1213:0.0] :

Do you want the the target system to have the same port values as the source system (y/n) [y] ? : n

Target System Port Pool [0-99] : 42

[/sourcecode]

Database cloning will kick start now, and should complete without throwing errors. Some sample outputs like below

[sourcecode language="text"]
Checking the port pool 42
done: Port Pool 42 is free
Report file located at /u01/oraprod/PROD/db/tech_st/11.2.0.2/appsutil/temp/portpool.lst
Complete port information available at /u01/oraprod/PROD/db/tech_st/11.2.0.2/appsutil/temp/portpool.lst

Creating the new Database Context file from :
  /u01/oraprod/PROD/db/tech_st/11.2.0.2/appsutil/template/adxdbctx.tmp

The new database context file has been created :
  /u01/oraprod/PROD/db/tech_st/11.2.0.2/appsutil/PROD_ebs1213.xml

Log file located at /u01/oraprod/PROD/db/tech_st/11.2.0.2/appsutil/clone/bin/CloneContext_1007224741.log
Check Clone Context logfile /u01/oraprod/PROD/db/tech_st/11.2.0.2/appsutil/clone/bin/CloneContext_1007224741.log for details.

Running Rapid Clone with command:
perl /u01/oraprod/PROD/db/tech_st/11.2.0.2/appsutil/clone/bin/adclone.pl java=/u01/oraprod/PROD/db/tech_st/11.2.0.2/appsutil/clone/bin/../jre mode=apply stage=/u01/oraprod/PROD/db/tech_st/11.2.0.2/appsutil/clone component=dbTier method=CUSTOM dbctxtg=/u01/oraprod/PROD/db/tech_st/11.2.0.2/appsutil/PROD_ebs1213.xml showProgress contextValidated=true
Running:
perl /u01/oraprod/PROD/db/tech_st/11.2.0.2/appsutil/clone/bin/adclone.pl java=/u01/oraprod/PROD/db/tech_st/11.2.0.2/appsutil/clone/bin/../jre mode=apply stage=/u01/oraprod/PROD/db/tech_st/11.2.0.2/appsutil/clone component=dbTier method=CUSTOM dbctxtg=/u01/oraprod/PROD/db/tech_st/11.2.0.2/appsutil/PROD_ebs1213.xml showProgress contextValidated=true
APPS Password :

Beginning database tier Apply - Mon Oct  7 22:50:46 2013

/u01/oraprod/PROD/db/tech_st/11.2.0.2/appsutil/clone/bin/../jre/bin/java -Xmx600M -DCONTEXT_VALIDATED=true  -Doracle.installer.oui_loc=/u01/oraprod/PROD/db/tech_st/11.2.0.2/oui -classpath /u01/oraprod/PROD/db/tech_st/11.2.0.2/appsutil/clone/jlib/xmlparserv2.jar:/u01/oraprod/PROD/db/tech_st/11.2.0.2/appsutil/clone/jlib/ojdbc5.jar:/u01/oraprod/PROD/db/tech_st/11.2.0.2/appsutil/clone/jlib/java:/u01/oraprod/PROD/db/tech_st/11.2.0.2/appsutil/clone/jlib/oui/OraInstaller.jar:/u01/oraprod/PROD/db/tech_st/11.2.0.2/appsutil/clone/jlib/oui/ewt3.jar:/u01/oraprod/PROD/db/tech_st/11.2.0.2/appsutil/clone/jlib/oui/share.jar:/u01/oraprod/PROD/db/tech_st/11.2.0.2/appsutil/clone/jlib/oui/srvm.jar:/u01/oraprod/PROD/db/tech_st/11.2.0.2/appsutil/clone/jlib/ojmisc.jar   oracle.apps.ad.clone.ApplyDBTier -e /u01/oraprod/PROD/db/tech_st/11.2.0.2/appsutil/PROD_ebs1213.xml -stage /u01/oraprod/PROD/db/tech_st/11.2.0.2/appsutil/clone   -showProgress
APPS Password : Log file located at /u01/oraprod/PROD/db/tech_st/11.2.0.2/appsutil/log/PROD_ebs1213/ApplyDBTier_10072250.log
  /      0% completed
[/sourcecode]

Once the cloning completes without errors, the database instance will start automatically and you can proceed with cloning the application tier

Step #5 Cloning the application tier

[sourcecode language="text"]
[oraprod@visclone u01]# su - oraprod
[applprod@ebs1213 ~]$ cd /u01/oraprod/PROD/apps/apps_st/comn/clone/bin
[applprod@ebs1213 bin]$

[applprod@ebs1213 bin]$ perl adcfgclone.pl appsTier

                     Copyright (c) 2002 Oracle Corporation
                        Redwood Shores, California, USA

                        Oracle Applications Rapid Clone

                                 Version 12.0.0

                      adcfgclone Version 120.31.12010000.8

Enter the APPS password :

Running:
/u01/applprod/PROD/apps/apps_st/comn/clone/bin/../jre/bin/java -Xmx600M -cp /u01/applprod/PROD/apps/apps_st/comn/clone/jlib/java:/u01/applprod/PROD/apps/apps_st/comn/clone/jlib/xmlparserv2.jar:/u01/applprod/PROD/apps/apps_st/comn/clone/jlib/ojdbc14.jar oracle.apps.ad.context.CloneContext -e /u01/applprod/PROD/apps/apps_st/comn/clone/bin/../context/apps/CTXORIG.xml -validate -pairsfile /tmp/adpairsfile_11049.lst -stage /u01/applprod/PROD/apps/apps_st/comn/clone  2&gt; /tmp/adcfgclone_11049.err; echo $? &gt; /tmp/adcfgclone_11049.res

Log file located at /u01/applprod/PROD/apps/apps_st/comn/clone/bin/CloneContext_1007230323.log

Provide the values required for creation of the new APPL_TOP Context file.

Target System Hostname (virtual or normal) [ebs1213] :

Target System Database SID : PROD

Target System Database Server Node [ebs1213] :

Target System Database Domain Name [rhome.com] :

Target System Base Directory : /u01/applprod

Target System Tools ORACLE_HOME Directory [/u01/applprod/apps/tech_st/10.1.2] : /u01/applprod/PROD/apps/tech_st/10.1.2

Target System Web ORACLE_HOME Directory [/u01/applprod/apps/tech_st/10.1.3] :  /u01/applprod/PROD/apps/tech_st/10.1.3

Target System APPL_TOP Directory [/u01/applprod/apps/apps_st/appl] :  /u01/applprod/PROD/apps/apps_st/appl

Target System COMMON_TOP Directory [/u01/applprod/apps/apps_st/comn] :  /u01/applprod/PROD/apps/apps_st/comn

Target System Instance Home Directory [/u01/applprod/inst] :  /u01/applprod/PROD/inst      
Target System Root Service [enabled] :

Target System Web Entry Point Services [enabled] :

Target System Web Application Services [enabled] :

Target System Batch Processing Services [enabled] :

Target System Other Services [disabled] :

Do you want to preserve the Display [appvis:0.0] (y/n)  : n

[/sourcecode]

We had an error, applprod user failing to write to /tmp folder

Target System Display [ebs1213:0.0] :
RC-50004: Error occurred in CloneContext:
AC-00005: No write permissions for creating the Context file – /tmp/temp.xml
Raised by oracle.apps.ad.context.AppsContext
Check Clone Context logfile /u01/applprod/PROD/apps/apps_st/comn/clone/bin/CloneContext_1007230323.log for details.

ERROR: Context creation not completed successfully.
For additional details review the file /tmp/adcfgclone_11049.err if present.

Hence I have changed the ownership & permissions for  /tmp folder

[sourcecode language="bash"]
login as: root
root@ebs1213.rhome.com's password:
Last login: Mon Oct  7 16:18:34 2013 from 192.168.0.200

[root@ebs1213/]# ls -al | grep tmp
drwxrwxrwx   7 root   root     20480 Oct  7 23:06 tmp
[root@ebs1213/]# chown -R applprod:dba /tmp
[root@ebs1213/]# chmod -R 777 /tmp
[root@ebs1213/]# ls -al | grep tmp
drwxrwxrwx   7 applprod dba      20480 Oct  7 23:06 tmp
[root@ebs1213/]#
[/sourcecode]

Re-run the application tier cloning as user “applprod”

[sourcecode language="text"]
Checking the port pool 42
done: Port Pool 42 is free
Report file located at /u01/applprod/PROD/inst/apps/PROD_ebs1213/admin/out/portpool.lst
Complete port information available at /u01/applprod/PROD/inst/apps/PROD_ebs1213/admin/out/portpool.lst

UTL_FILE_DIR on database tier consists of the following directories.

1. /usr/tmp
2. /usr/tmp
3. /u01/oraprod/PROD/db/tech_st/11.2.0.2/appsutil/outbound/PROD_ebs1213
4. /usr/tmp
Choose a value which will be set as APPLPTMP value on the target node [1] : 1

Creating the new APPL_TOP Context file from :
  /u01/applprod/PROD/apps/apps_st/appl/ad/12.0.0/admin/template/adxmlctx.tmp

The new APPL_TOP context file has been created :
  /u01/applprod/PROD/inst/apps/PROD_ebs1213/appl/admin/PROD_ebs1213.xml

Log file located at /u01/applprod/PROD/apps/apps_st/comn/clone/bin/CloneContext_1007233459.log
Check Clone Context logfile /u01/applprod/PROD/apps/apps_st/comn/clone/bin/CloneContext_1007233459.log for details.

Running Rapid Clone with command:
perl /u01/applprod/PROD/apps/apps_st/comn/clone/bin/adclone.pl java=/u01/applprod/PROD/apps/apps_st/comn/clone/bin/../jre mode=apply stage=/u01/applprod/PROD/apps/apps_st/comn/clone component=appsTier method=CUSTOM appctxtg=/u01/applprod/PROD/inst/apps/PROD_ebs1213/appl/admin/PROD_ebs1213.xml showProgress contextValidated=true
Running:
perl /u01/applprod/PROD/apps/apps_st/comn/clone/bin/adclone.pl java=/u01/applprod/PROD/apps/apps_st/comn/clone/bin/../jre mode=apply stage=/u01/applprod/PROD/apps/apps_st/comn/clone component=appsTier method=CUSTOM appctxtg=/u01/applprod/PROD/inst/apps/PROD_ebs1213/appl/admin/PROD_ebs1213.xml showProgress contextValidated=true
APPS Password :

Beginning application tier Apply - Mon Oct  7 23:36:52 2013

/u01/applprod/PROD/apps/apps_st/comn/clone/bin/../jre/bin/java -Xmx600M -DCONTEXT_VALIDATED=true  -Doracle.installer.oui_loc=/oui -classpath /u01/applprod/PROD/apps/apps_st/comn/clone/jlib/xmlparserv2.jar:/u01/applprod/PROD/apps/apps_st/comn/clone/jlib/ojdbc14.jar:/u01/applprod/PROD/apps/apps_st/comn/clone/jlib/java:/u01/applprod/PROD/apps/apps_st/comn/clone/jlib/oui/OraInstaller.jar:/u01/applprod/PROD/apps/apps_st/comn/clone/jlib/oui/ewt3.jar:/u01/applprod/PROD/apps/apps_st/comn/clone/jlib/oui/share.jar:/u01/applprod/PROD/apps/apps_st/comn/clone/jlib/oui/srvm.jar:/u01/applprod/PROD/apps/apps_st/comn/clone/jlib/ojmisc.jar  oracle.apps.ad.clone.ApplyAppsTier -e /u01/applprod/PROD/inst/apps/PROD_ebs1213/appl/admin/PROD_ebs1213.xml -stage /u01/applprod/PROD/apps/apps_st/comn/clone    -showProgress
APPS Password : Log file located at /u01/applprod/PROD/inst/apps/PROD_ebs1213/admin/log/ApplyAppsTier_10072336.log
  -      0% completed

  Completed Apply...
Mon Oct  7 23:43:12 2013


Do you want to startup the Application Services for PROD? (y/n) [y] : y

Starting application Services for PROD:
Running:
/u01/applprod/PROD/inst/apps/PROD_ebs1213/admin/scripts/adstrtal.sh -nopromptmsg

You are running adstrtal.sh version 120.15.12010000.3

The logfile for this session is located at /u01/applprod/PROD/inst/apps/PROD_ebs1213/logs/appl/admin/log/adstrtal.log
Executing service control script:
/u01/applprod/PROD/inst/apps/PROD_ebs1213/admin/scripts/adopmnctl.sh start
script returned:
****************************************************

You are running adopmnctl.sh version 120.6.12010000.5

Starting Oracle Process Manager (OPMN) ...
opmnctl: opmn started.

adopmnctl.sh: exiting with status 0

adopmnctl.sh: check the logfile /u01/applprod/PROD/inst/apps/PROD_ebs1213/logs/appl/admin/log/adopmnctl.txt for more information ...


.end std out.

.end err out.

****************************************************


Executing service control script:
/u01/applprod/PROD/inst/apps/PROD_ebs1213/admin/scripts/adalnctl.sh start
script returned:
****************************************************

adalnctl.sh version 120.3

Checking for FNDFS executable.
Starting listener process APPS_PROD.

adalnctl.sh: exiting with status 0


adalnctl.sh: check the logfile /u01/applprod/PROD/inst/apps/PROD_ebs1213/logs/appl/admin/log/adalnctl.txt for more information ...


.end std out.

.end err out.

****************************************************


Executing service control script:
/u01/applprod/PROD/inst/apps/PROD_ebs1213/admin/scripts/adapcctl.sh start
script returned:
****************************************************

You are running adapcctl.sh version 120.7.12010000.2

Starting OPMN managed Oracle HTTP Server (OHS) instance ...
opmnctl: opmn is already running.
opmnctl: starting opmn managed processes...

adapcctl.sh: exiting with status 0

adapcctl.sh: check the logfile /u01/applprod/PROD/inst/apps/PROD_ebs1213/logs/appl/admin/log/adapcctl.txt for more information ...


.end std out.

.end err out.

****************************************************


Executing service control script:
/u01/applprod/PROD/inst/apps/PROD_ebs1213/admin/scripts/adoacorectl.sh start
script returned:
****************************************************

You are running adoacorectl.sh version 120.13

Starting OPMN managed OACORE OC4J instance  ...

adoacorectl.sh: exiting with status 0

adoacorectl.sh: check the logfile /u01/applprod/PROD/inst/apps/PROD_ebs1213/logs/appl/admin/log/adoacorectl.txt for more information ...


.end std out.

.end err out.

****************************************************


Executing service control script:
/u01/applprod/PROD/inst/apps/PROD_ebs1213/admin/scripts/adformsctl.sh start
script returned:
****************************************************

You are running adformsctl.sh  version 120.16.12010000.3

Starting OPMN managed FORMS OC4J instance  ...
Calling txkChkFormsDeployment.pl to check whether latest FORMSAPP.EAR is deployed...
Program : /u01/applprod/PROD/apps/apps_st/appl/fnd/12.0.0/patch/115/bin/txkChkFormsDeployment.pl started @ Mon Oct  7 23:44:32 2013

*** Log File = /u01/applprod/PROD/inst/apps/PROD_ebs1213/logs/appl/rgf/TXK/txkChkFormsDeployment_Mon_Oct_7_23_44_31_2013/txkChkFormsDeployment_Mon_Oct_7_23_44_31_2013.log

File &quot;/u01/applprod/PROD/apps/tech_st/10.1.3/j2ee/forms/applications/forms/formsweb/WEB-INF/lib/frmsrv.jar&quot; exists. Proceeding to check the size...

=============================================
*** Latest formsapp.ear has been deployed ***
=============================================


Program : /u01/applprod/PROD/apps/apps_st/appl/fnd/12.0.0/patch/115/bin/txkChkFormsDeployment.pl completed @ Mon Oct  7 23:44:32 2013

Perl script txkChkFormsDeployment.pl got executed successfully


adformsctl.sh: exiting with status 0

adformsctl.sh: check the logfile /u01/applprod/PROD/inst/apps/PROD_ebs1213/logs/appl/admin/log/adformsctl.txt for more information ...


.end std out.
*** ALL THE FOLLOWING FILES ARE REQUIRED FOR RESOLVING RUNTIME ERRORS
*** Log File = /u01/applprod/PROD/inst/apps/PROD_ebs1213/logs/appl/rgf/TXK/txkChkFormsDeployment_Mon_Oct_7_23_44_31_2013/txkChkFormsDeployment_Mon_Oct_7_23_44_31_2013.log

.end err out.

****************************************************


Executing service control script:
/u01/applprod/PROD/inst/apps/PROD_ebs1213/admin/scripts/adoafmctl.sh start
script returned:
****************************************************

You are running adoafmctl.sh version 120.8

Starting OPMN managed OAFM OC4J instance  ...

adoafmctl.sh: exiting with status 0

adoafmctl.sh: check the logfile /u01/applprod/PROD/inst/apps/PROD_ebs1213/logs/appl/admin/log/adoafmctl.txt for more information ...


.end std out.

.end err out.

****************************************************


Executing service control script:
/u01/applprod/PROD/inst/apps/PROD_ebs1213/admin/scripts/adcmctl.sh start
script returned:
****************************************************

You are running adcmctl.sh version 120.17.12010000.5

Starting concurrent manager for PROD ...
Starting PROD_1007@PROD Internal Concurrent Manager
Default printer is noprint

adcmctl.sh: exiting with status 0


adcmctl.sh: check the logfile /u01/applprod/PROD/inst/apps/PROD_ebs1213/logs/appl/admin/log/adcmctl.txt for more information ...


.end std out.

.end err out.

****************************************************


Executing service control script:
/u01/applprod/PROD/inst/apps/PROD_ebs1213/admin/scripts/jtffmctl.sh start
script returned:
****************************************************

You are running jtffmctl.sh version 120.3

Validating Fulfillment patch level via /u01/applprod/PROD/apps/apps_st/comn/java/classes
Fulfillment patch level validated.
Starting Fulfillment Server for PROD on port 9342 ...

jtffmctl.sh: exiting with status 0


.end std out.

.end err out.

****************************************************


All enabled services for this node are started.

adstrtal.sh: Exiting with status 0

adstrtal.sh: check the logfile /u01/applprod/PROD/inst/apps/PROD_ebs1213/logs/appl/admin/log/adstrtal.log for more information ...

[applprod@ebs1213 bin]$

[/sourcecode]

Rolled back /tmp ownership

[sourcecode language="bash"]
[root@ebs1213 /]# chown -R root:root /tmp
[root@ebs1213 /]# ls -al | grep tmp
drwxrwxrwx   7 root   root     28672 Oct  7 23:44 tmp
[root@ebs1213 /]#
[/sourcecode]

Try to access your newly cloned instance through http://ebs1213.rhome.com:8042/

You should be provided with a login page. Use either sysadmin or other user you have created earlier, change site name etc and enjoy!

I hope you have enjoyed another “beginner” post form windows7bugs

for windows7bugs

rajesh

Install Google Chrome with YUM on Fedora, CentOS/Red Hat (RHEL) 6.2, Even on Oracle Enterprise Linux 6.3


Our intention is not to copy paste the entire content from another website most of the times, hence only the link to external website is provided here. Please note, if you follow the instructions properly, installing Google Chrome is a matter just few minutes.

http://www.if-not-true-then-false.com/2010/install-google-chrome-with-yum-on-fedora-red-hat-rhel/

To create google.repo do the following

as root

$cd /etc/yum.repos.d/

$touch google.repo

$gedit google.repo (or use vi/vim)

for 32-bit, add following block

[google-chrome]
name=google-chrome - 32-bit
baseurl=http://dl.google.com/linux/chrome/rpm/stable/i386
enabled=1
gpgcheck=1
gpgkey=https://dl-ssl.google.com/linux/linux_signing_key.pub

for 64-bit, add following block (you may add both blocks to google.repo)

[google-chrome]
name=google-chrome - 64-bit
baseurl=http://dl.google.com/linux/chrome/rpm/stable/x86_64
enabled=1
gpgcheck=1
gpgkey=https://dl-ssl.google.com/linux/linux_signing_key.pub


Save google.repo file

$yum install google-chrome-stable (Current release is 20.x) and the total download is around 41Mb) on installation it will consume a total of 120Mb on your HDD