After some thoughts, I’ve decided to retire Google Ads from my blog as these auto ads started messing up with the content by overlapping. Years back, I opted to go for a hosted blog, hoping the ad revenue could be channeled for supporting education. Well, I think I have to find alternative means to support my cause :))
Back to the subject. Yesterday (12th Nov, 2025) I disabled Auto Ads on my Google Adsense and few minutes later, started a new post. Unfortunately I was presented with an error “TypeError: Class constructors cannot be invoked without ‘new’ at gt“
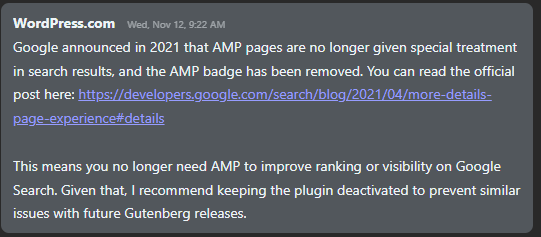
As the error was too generic, I rushed to raise a support ticket with WordPress & the issue was resolved by a “Human Agent” by disabling AMP plug-in that has a conflict with their Gutenberg plug-in!
The agent said, as Google has decided not to give AMP pages special treatments & the AMP plug-in was the culprit!
So if you are also clueless what went wrong all of a sudden, a good start will be by disabling the AMP plug-in. Hope this helps few out there! Happy blogging.
WordPress wp-admin redirect loop is that one dreaded issue, leaves you without much help from anyone, trust me, literally no one gives you a proper answer, including wordpress.com. To add more frustration, think of using .htaccess to redirect because the site files are inside a sub-folder.
I had a strange situation with our corporate website, wp-admin redirecting to the login page once after authentication is successfully done. I couldn’t load this page successfully from any of the browsers, however I was able to login using my mobile phone’s chrome browser!
So WordPress works this way, user tries to access the admin page using yoursite.com/wp-admin that calls the wp-login.php page and after the successful authentication, user is redirected to WordPress admin page, aka wp-admin!
For some reasons that I don’t understand, this gets into a loop! wp-admin loads the login page, login page gets redirected to wp-admin page which wouldn’t load because the authentication didn’t happen(?)…
After couple of hours trying to understand and modify the .htaccess file, I noticed that whenever I tried to access mysite.com/wp-admin, the request was getting redirected to mysite.com/wp-login.php & I decided to proceed with mysite.com/wp-login.php instead of mysite.com/wp-admin
Well, that stopped the redirect loop. I was able to successfully authenticate and access the admin page this way. Are you experiencing the same issue? give it a try and share your experience with us.
We are using Firefox ESR for Oracle Applications (EBS) & after experiencing stuttering and sluggishness on Microsoft Edge Chrome, decided to switch to Firefox, hoping better experiences. Not just the experience was horrible, to my utter surprise I realized Firefox was not doing spell checking as I was typing. To my further disappointment, found the right click context menu within the text columns didn’t show me the language options either.
So, I knew that there was something drastically wrong. I checked Mozilla Firefox forums and the accepted answers were about installing Dictionary for the targeted language thatI never did in the past! However, I noticed something interesting that Instead of English US, Firefox had only English GB as available under the language section and “Check Your spelling as you type” was enabled by default. Teh noly isseu I aws heving wsa FryerFlox wll nto od tath!
After “some” time reading and failed experiments, I decided to download the “English US” as additional language mainly for the reason that my OS uses it as the base language.
After downloading English (US), automatically it become the default language for Firefox & reloading the editor page started showing language options!
I don’t have any technical details for why English (GB) was not doing spell checking or missing language settings within the Context menu. One of these days I am going to check with Firefox forums for a better answer. Until then!
Came across this error after WordPress update? Well, the first time I dealt with one of same nature was when we upgraded our business WordPress to latest version. I have posted about it here & strangely, that is the single post of mine ever got more than couple of likes :)
We are using Elementor and, the stack was the main culprit that was generating maximum errors against the outdated PHP. Having both PHP and Elementor upgraded fixed our issues last time & I didn’t expect anything different this time either.
This time, as soon as I came across the errors once after WordPress upgrade, I asked our hosting partner to upgrade PHP (7.4 => 8.x) for WordPress 6.2.2 and updated Elementor afterwards. That has taken care of the annoying “Deprecated” error messages those were appearing in the admin console (mostly). Please note, while Elementor could be the primary culprit, any other plugin that makes the function calls listed could be the reason for these errors. Update each one of them and see whether the issues persist.
Our business website uses WordPress. We have a theme bought from the market place and Elementor for page designs. The whole setup costed us something below 200$ & we are happy with the way the site delivers all our needs (not forgetting dozens of plugins that we use for basic features)
Recently we noticed “Elementor” throwing few errors while the pages were getting loaded. Errors were like “Deprecated: _register_skins is deprecated since version“. A quick Google search landed us on this discussion & rolled back Elementor to a previous version as suggested by one of the users and expected no further issues.
We were wrong. We started getting serious issues related to Jetpack, a plugin that is provided by “Automatic”, WordPress’s own repository. Our pages started showing some weird messages while loading and we were completely denied WordPress Admin page access. Our hosting company renamed the plugin folder & we were able to log on and disable Jetpack plugin, which was not recommended by many.
Much of the Jetpack related errors were like get_name(), get_title(),get_description(),get_long_description(),get_features(),get_pricing_for_ui(),get_manage_url() should not be abstract in & Warning: Cannot modify header information…
Jetpack error(s)
Then I remembered about a PHP related warning I have noticed during the last admin panel visit. WordPress was recommending PHP upgrade as they were in the process of stop supporting PHP 5.x versions. So I approached our hosting & asked them to upgrade the available PHP options for us. Once after they installed the latest available versions, we switched to PHP 7.4 (7.3 is deprecated already) from 5.6 . Proceeded with enabling Jetpack and upgraded Elementor to latest.
Everything started working as expected. So if you started facing Elementor or Jetpack related errors all of a sudden, before breaking your head anywhere else, check the version of PHP & give a try by upgrading it to one of the not deprecated versions.
Almost a year back I posted about Linux Subsystem for Windows & interesting that I am revisiting the subject in the same period once again. Within an year time loads have changed with the Linux subsystem. Starting from Windows 10 version 1803, once started the Linux Subsystem is available in the background until a reboot! Sounds great?
This time we will see such an enhancement could be utilized on Windows for some extended “developments”, and I will walk you through setting up “WordPress” using WSL. Please note, I am opting “WordPress” as target ONLY for few reasons like:
“WordPress” is developed using PHP
“WordPress” mostly uses MySQL for database
“WordPress” is mostly hosted on LINUX environments
Windows SubSystem for Linux Installation
You must enable “Windows SubSystem for Linux ” through “Turn Windows Features on or off”, after which you will have to reboot your Windows box
Open “Windows Store” and search for Linux, that should bring up many results as seen with the image below
We’ll be using Ubuntu 18.04 LTS this time as I had pretty difficult issues with Pengwin & SUSE. If you are familiar with Linux, Ubuntu is a debian based Linux distribution & widely used for desktop systems. For our limited tests Ubuntu is a right choice.
Total download of Ubuntu 18.04 is around 270MBs & should be installed without giving any troubles.
Once “Ubuntu App” is installed you will be notified and you can immediately “launch” the app.
Ubuntu takes few minutes to finalize the installation & will prompt you to enter a username & password. Make sure you remember the username and password, forgetting may force you to reinstall Ubuntu.
Immediately after setting up a Linux username and password, we will make sure that the Subsystem is upgraded with all new packages.
(While apt & apt-get do almost the same thing, why “apt” is preferred? please read about it here)
Apache installation should not take more than few minutes & we will see how to configure it bit later.
MySQL installation
I faced multiple issues installing MySQL on my Ubuntu based WSL. Few were merely because I was ignoring few pre-requisites like checking for already open ports on my Windows & other were due to lack of adequate amount of experiences with installing software on Linux
After a couple of failed attempts, I landed upon this page, which neatly explains how to use MySQL PPA in the place of Ubuntu’s default repositories for MySQL
I will make some fresh screenshots, that is for recent versions of MySQL installation using the MySQL PPA, because there are few more MySQL versions are supported currently using the same PPA
Now we have a conflict to resolve. As on date, the MySQL 5.7 repository signature is invalid, for the same reason the repository will be disabled. (I don’t know what kind of issues this could produce, so not taking any risks). Next step we will get a valid signature for the disabled repository and re-enable it
Now we can start installing the MySQL 5.7 Server. Please note, if you already have an instance of MySQL running on your Windows, the port 3306 will be in use (unless custom ports are used) & you WILL never able to complete the MySQL installation on WSL. Many undocumented errors will stop the MySQL installation, apparently without giving you the least ideas of what went wrong. So, make sure that the MySQL server is stopped and the port is not listening to port 3306. I don’t know another way to address this situation.
You will be prompted for MySQL root account. I suggest using the same password across this particular setup so that you will not mess them up later stages.
Confirm the MySQL root password
That completes the MySQL 5.7 Server installation.
Now, let us try to start the MySQL 5.7 Server service.
MySQL 5.7 service is started now. So we can proceed to installing phpmyadmin, MySQL manipulation software.
As we are using Apache2 as web server, make the selection by tapping the spacebar and Ok
You will be asked whether the database for phpmyadmin should be configured, You should select Yes, unless you want to do it later.
You will be asked to provide the a password now, that is for the phpmyadmin, use the same MySQL root password here (you can use a new password, just to avoid confusion, I use the same password everywhere)
You have to confirm the password.
Now you will be asked to enter the MySQL administrator(root) password, supply it
Confirm & wait for the phpmyadkin to complete the installation
Installation will notify you about Apache not being running, you can ignore the notice.
Now we will start the Apache Server. Couple of things you should take care with Apache & I will try to list few of them below:
As the WSL runs as another software on Windows, it is bind to experience conflicts. For example, if you already have IIS server listening to port 80, without changing the port information for Apache, will not able to start the server until the ports information is corrected within the Apache configuration file.
If you already have MS SQL server installed with reporting, the reporting engine listens to port 80, so even if you would stop or disable the IIS/WWP services, there is a possibility that port conflicts will arise. This will also prompt you to alter the default port mentioned in the Apache configuration file
So let us see how we are going to address such conflicts:
Edit the Apache ports configuration file
[code language=”bash” gutter=”false”]
$sudo vi /etc/apache2
[/code]
I opted for port 8088 (You can choose a port that is NOT used by Windows. Issue netstat -aon to get a list of ports open/listening on Windows from CMD
100% sure that you are going get presented with an annoying notice “ Protocol not available: AH00076: Failed to enable APR_TCP_DEFER_ACCEPT” which is easily addressable.
We will edit the apache configuration file to address this issue
issue the command
[code language=”bash” gutter=”false”]
$sudo vi /etc/apache2/apache2.conf
[/code]
& add “AcceptFilter http none” by the end of the file.
Save the configuration file & restart the Apache service.
As we have completed all the installations and managed to start the services successfully after fixing the configuration files, it is time to reboot.
WSL unfortunately doesn’t let you use “init 0”, or “init 6” to shutdown or restart the instance, instead you must use the Windows Services MMC for the same.
This will close all open Ubuntu “app” windows. You can restart the Ubuntu from the app list.
Once Ubuntu restarted, let us start the services
[code language=”bash” gutter=”false”]
$sudo service apache2 start
$sudo service mysql start
[/code]
Once the services are started, we will try phpmyadmin. As I mentioned already, I have set the port 8088 for Apache, hence I can access the phpmyadmin from the link http://localhost:8088/phpmyadmin
You can safely ignore the warnings, as the current version of phpmyadmin we installed from Ubuntu repos have certain conflicts with PHP 7.2
Install “WordPress”
“WordPress” is one of the leading CMS (Content Management Systems) with unlimited possibilities. Recently we switched our decade long joomla based corporate website to “WordPress” & after few days of interactions with the technology, I feel I would never look anywhere else.
This will download the latest “WordPress” to your home folder
Now we have to extract the downloaded file to right htdoc root. We are talking about the default configurations available with apache configuration files. Hence the wordpress should be extracted to ‘/var/www/hmtl/’ folder, which is a protected path. We’ll change the folder permissions temporarily to facilitate the extracting
Now we have a problem, “WordPress” installation cannot write to “wp-config.php” file. This is due to linux file/folder permissions. Hence we will again change the permissions over ‘/var/www/’ folder
Now, go back to the previous page, furnish the details and “WordPress” should happily move ahead. Run the installation
That completes what we tried to achieve. “WordPress” running successfully from a WSL environment.
Now, it is time to ask the questions like “Why so much pain, when we can achieve the entire “WordPress” thing on Windows?”
Well, primarly “WordPress” performs better on Linux enviorment (personal observation), second & most important for me. I just love learning something new everyday. You are welcome!
Microsoft has added WSL with it’s Server 2016 (Version 1803) & the vision is pretty clear. Microsoft “wants” to provide a LINUX environment within Windows so that in the future, a separate LINUX Server requirement will NOT truly hurt the customers. Currently the WSL is NOT equipped with desktops/GUI & Pengwin like initiatives are sure making traction. If my guess will NOT go wrong, soon Windows Servers will be running “Linux” side by side & those Linux Servers are going to be as good as physical/Virtualized. We’ll wait eagerly, together.
Recently we started migrating our age old corporate website (Joomla based) to WordPress and one of the major challenges we faced was including “Arabic” text with certain pages. First of all, our theme didn’t come with a RTL option, plus, We didn’t need the entire site to be RIGHT to LEFT. Instead, just a portion of chosen pages displaying relevant Arabic text.
Here I am sharing a hack that helped us to address this requirement. As I mentioned, all we needed were few chosen blocks (Text boxes) displaying Arabic text in proper formatting, after few hours googling I landed on this page https://codex.wordpress.org/Right_to_Left_Language_Support which explains how to make a RTL CSS files from existing style.css from the theme that is used, to cater the RIGHT to LEFT requirements and making own rtl.css file following the instructions provided. As all I needed was to changed the properties of few text boxes, I continued searching and landed on this YouTube video
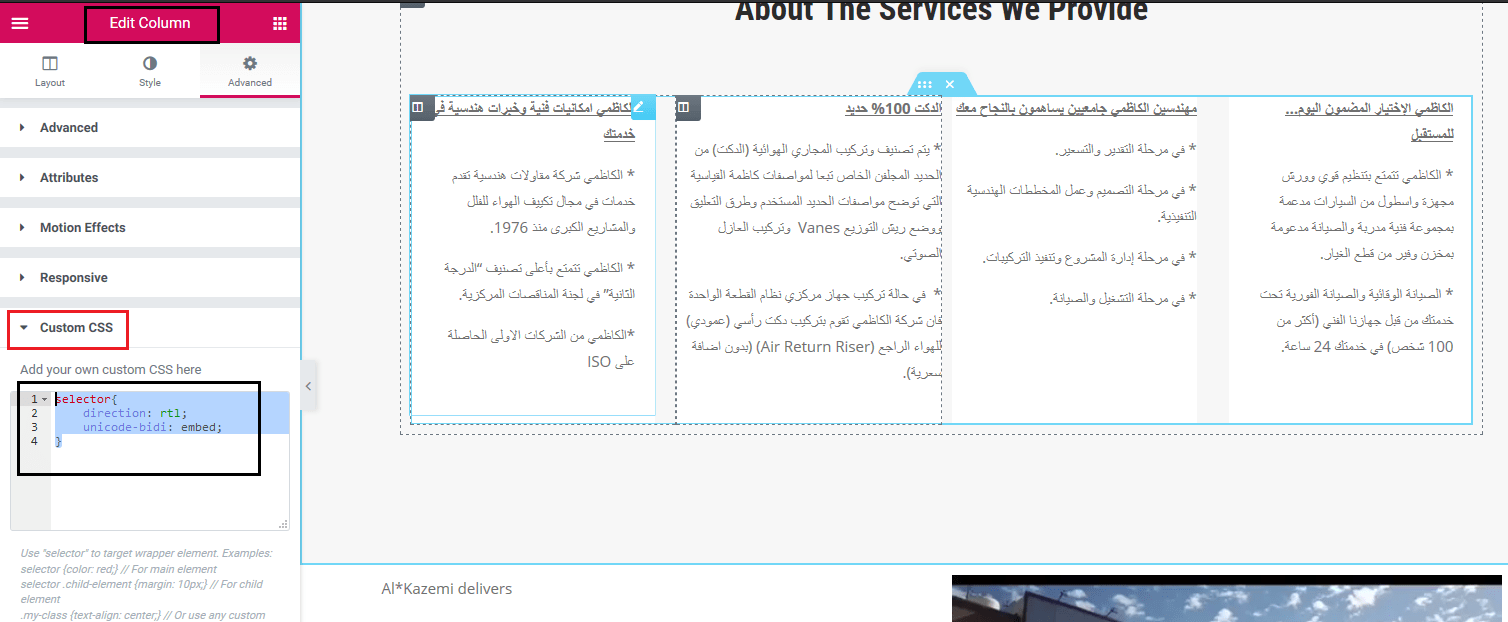
This video explains how to add custom CSS with different elements of Elementor editor & that was what I was looking for! I gave a try like following, chose a column which was having the text box, Advanced & under Custom CSS added the below code portion. That was it!
selector{ direction: rtl; unicode-bidi: embed; }
So if you ever come across such a requirement, know how to handle it without breaking your head & changing the current Theme with a RTL supported theme, which I know, will be a nightmare!
Hope this helps few WordPress enthusiasts out there!
After the hack(s) below, I realized that the X-Business Plus theme has 15px white space between the header and content sections. It took a while to crack it, well finally I was able to patch the style.css file to fix that last “annoyance” also (These hacks are applicable to most of the themes available in the market, only few name changes inside the style.css files and different names for functions those are called)
White space fix. Copy the style.css file to a new file (for backup)
Open the style.css file with a decent text editor like “Notepad++”
.page-content, .entry-content, .entry-summary { /* margin: 15px 0 0; Margin value was changed by Rajesh on 29th Jan 2019 to fix the white space between header and page content */ margin: 0 0 0; }
Save the CSS file & you are all good. Enjoy ;)
Hi guys
Recently we decided to revamp our Joomla based corporate website & as we don’t do any e-commerce stuff through our existing website, chose “WordPress” for the CMS
After cross examining couple of dozen WordPress themes, we decided to go with “X Business Plus”, that looked apt for our requirements. The biggest challenge came when we started designing pages for our subsidiary companies. All looked good, except the Header region that didn’t have a toggle switch to show or not to show on specific pages and much of the header region was not necessary for the business pages, except the main menu.
The developer has confirmed that, with the current release of their theme, it is not doable and the ONLY possible solution in front of me was to “hack” the theme to achieve what we were planning (We have had another option, go with another theme that supports toggling the header on and off for specific pages)
Create a new template. Every theme that you install will have standard structure(as far I know) & the templates those you associate with pages are available under
Following instructions about how to copy a template to new one, I copied the full-width-page.php to a new PHP file called corp-width-page.php & changed the name of the template within the newly created template file.
Although it looks like another comment, Template Name: is the string that WordPress reads to populate the available templates for the page. Notice the get_header(‘corp’) call within the 1st PHP block. I will come to that later. Once after the new template created, I copied the existing header.php to “header-corp.php” (This is in reference to the guidelines I obtained from WordPress developer document, that I mentioned earlier in this post)
Whatever string you will add after “header-” will be read by the template for the header part & that is the real hack. So in our case “corp” string forces the get_header() function to look for a header file named “header-corp.php” and if found, loads it, else loads the default header.php file!
Once after creating the new header-corp.php file, I started commenting do_action calls one after another until I came to the intended result…”hide the header on chosen pages”
So here is how it works. Open the page that you don’t want to see the theme header, change the page template to your newly defined template name. My case “Corporate Page” (Use WordPress’s “Edit” to make this change, which is neat and less confusing than a professional editor like Elementor)
Update the page. My new template is already calling ‘corp’ header page through get_header() function call, which has limited actions to suite the requirements.
One major issue I had with such a hack was, the header section was having the site’s primary menu. By not displaying the header, we lost access to the menu. So I had to add a navigation menu with every page that didn’t show the header. Easily doable with “Elementor” and navigation menu element.
Beside the thrill of another “hack”, I am eager to know how these hacks will affect the site when the theme is updated by the developer in the future. So to save some frustration, I have made a copy of everything that I copied and altered and kept in a safe place…who knows that would be waiting for me :)