As many of us know, starting from Windows 10 1803, Microsoft has made Windows subsystem for Linux running in the background even after the console windows are closed.
Definitely this is a gain for those developers who want to have a Linux environment available always, regardless whether the console windows open or not. My requirements towards the same is pretty limited, as I have live Linux systems for almost all my experiments. However, was never less motivated to explore the WSL environments.
Last time I posted a thread about installing and configuring Ubuntu 18.04 WSL and setting up apache, MySQL.
This time we will see how you could enhance your Ubuntu 18.04 WSL with a proper GUI (Desktop environment). I am sure, majority of the Windows users will appreciate a GUI to interact with Linux against the Linux geeks who prefer command line interactions. In addition, few editors like geany or gedit ONLY could be used in a GUI environment.
We will be using Xfce (light weight desktop manager) & XRDP to achieve the GUI requirements on Ubuntu 18.04 WSL
Fire up your Ubuntu 18.04, and update the instance to the latest
sudo apt update && sudo apt upgrade
This could take a while to complete depending upon your internet connection speed
Once the update & upgrade finished, we will install both Xfce & Xrdp in a single session
sudo apt install xfce4 xrdp
The installation should be pretty smooth and within few minutes everything should complete. Not a single attempt from my end failed to install both Xfce or Xrdp
Once the installation is over, we MUST make sure that the XRDP doesn’t use port 3389 which is used by Microsoft RDP (in case if your Windows 10 is already configured for RDP). Hence we will edit the XRDP configuration file with a different port, in our case 3390
sudo vi /etc/xrdp/xrdp.ini
Change the port from 3389 to 3390 & save the file.
Now we will try start the XRDP service
rajesh@rt04:~$ sudo service xrdp start
* Starting Remote Desktop Protocol server [20190509-12:13:49] [DEBUG] Testing if xrdp can listen on 0.0.0.0 port 3390.
[20190509-12:13:49] [DEBUG] Closed socket 6 (AF_INET6 :: port 3390)
[ OK ]
rajesh@rt04:~$
That’s it
Open Remote Desktop Connection from your Windows Machine & log on!
Supply your WSL username and password. You can use ONE of the existing WSL usernames, in case if your WSL have more than one user.
One of the main issues I found using Xfce4 was few goodies like print screen should be installed by the user prior screenshot capturing could be made (I took screenshots from the remote session & copied them to Windows for this post). This will include adding new keyboard shortcut keys.
We’ll quickly see how to resolve the above said
First install missing “xfce4-screenshooter”
sudo apt install xfce4-screenshooter -y
Once the package installation finished, we will define a new keyboard shortcut that binds “Print Screen” physical button on the keyboard to Xfce4 screenshot shooter package.
Launch Applications -> Settings -> Keyboard
and using the “Add” button, Create a new shortcut. Xfce4 supports different switches to be used with screenshooter package. I’m using the “-f”, for full screen captures.
Be careful when you define the keyboard shortcuts. There is a space between the command and switches, for example
xfce4-screenshooter -f
There is a space between xfce4-screenshooter & the switch “-f”. Once after entering the command and pressing OK will ask you to tap the physical keyboard button that you want to bind with the command. Tap “PrtScr” or other button of your choice & that’s all. Your screen capture should work now.
So why one would even need a GUI over WSL. Well, my answer is short. I always dealt with systems those came with GUI. Many business applications could only be installed over a GUI equipped system. Plus, I am not a geek & after hundreds of attempts I cannot deal with a console based editor like VIM. I feel comfortable with geany/gedit than feeling geeky at mind.
Cheers guys, now your WSL have a GUI. Start think about what YOU can’t do with WSL!
Almost a year back I posted about Linux Subsystem for Windows & interesting that I am revisiting the subject in the same period once again. Within an year time loads have changed with the Linux subsystem. Starting from Windows 10 version 1803, once started the Linux Subsystem is available in the background until a reboot! Sounds great?
This time we will see such an enhancement could be utilized on Windows for some extended “developments”, and I will walk you through setting up “WordPress” using WSL. Please note, I am opting “WordPress” as target ONLY for few reasons like:
“WordPress” is developed using PHP
“WordPress” mostly uses MySQL for database
“WordPress” is mostly hosted on LINUX environments
Windows SubSystem for Linux Installation
You must enable “Windows SubSystem for Linux ” through “Turn Windows Features on or off”, after which you will have to reboot your Windows box
Open “Windows Store” and search for Linux, that should bring up many results as seen with the image below
We’ll be using Ubuntu 18.04 LTS this time as I had pretty difficult issues with Pengwin & SUSE. If you are familiar with Linux, Ubuntu is a debian based Linux distribution & widely used for desktop systems. For our limited tests Ubuntu is a right choice.
Total download of Ubuntu 18.04 is around 270MBs & should be installed without giving any troubles.
Once “Ubuntu App” is installed you will be notified and you can immediately “launch” the app.
Ubuntu takes few minutes to finalize the installation & will prompt you to enter a username & password. Make sure you remember the username and password, forgetting may force you to reinstall Ubuntu.
Immediately after setting up a Linux username and password, we will make sure that the Subsystem is upgraded with all new packages.
(While apt & apt-get do almost the same thing, why “apt” is preferred? please read about it here)
Apache installation should not take more than few minutes & we will see how to configure it bit later.
MySQL installation
I faced multiple issues installing MySQL on my Ubuntu based WSL. Few were merely because I was ignoring few pre-requisites like checking for already open ports on my Windows & other were due to lack of adequate amount of experiences with installing software on Linux
After a couple of failed attempts, I landed upon this page, which neatly explains how to use MySQL PPA in the place of Ubuntu’s default repositories for MySQL
I will make some fresh screenshots, that is for recent versions of MySQL installation using the MySQL PPA, because there are few more MySQL versions are supported currently using the same PPA
Now we have a conflict to resolve. As on date, the MySQL 5.7 repository signature is invalid, for the same reason the repository will be disabled. (I don’t know what kind of issues this could produce, so not taking any risks). Next step we will get a valid signature for the disabled repository and re-enable it
Now we can start installing the MySQL 5.7 Server. Please note, if you already have an instance of MySQL running on your Windows, the port 3306 will be in use (unless custom ports are used) & you WILL never able to complete the MySQL installation on WSL. Many undocumented errors will stop the MySQL installation, apparently without giving you the least ideas of what went wrong. So, make sure that the MySQL server is stopped and the port is not listening to port 3306. I don’t know another way to address this situation.
You will be prompted for MySQL root account. I suggest using the same password across this particular setup so that you will not mess them up later stages.
Confirm the MySQL root password
That completes the MySQL 5.7 Server installation.
Now, let us try to start the MySQL 5.7 Server service.
MySQL 5.7 service is started now. So we can proceed to installing phpmyadmin, MySQL manipulation software.
As we are using Apache2 as web server, make the selection by tapping the spacebar and Ok
You will be asked whether the database for phpmyadmin should be configured, You should select Yes, unless you want to do it later.
You will be asked to provide the a password now, that is for the phpmyadmin, use the same MySQL root password here (you can use a new password, just to avoid confusion, I use the same password everywhere)
You have to confirm the password.
Now you will be asked to enter the MySQL administrator(root) password, supply it
Confirm & wait for the phpmyadkin to complete the installation
Installation will notify you about Apache not being running, you can ignore the notice.
Now we will start the Apache Server. Couple of things you should take care with Apache & I will try to list few of them below:
As the WSL runs as another software on Windows, it is bind to experience conflicts. For example, if you already have IIS server listening to port 80, without changing the port information for Apache, will not able to start the server until the ports information is corrected within the Apache configuration file.
If you already have MS SQL server installed with reporting, the reporting engine listens to port 80, so even if you would stop or disable the IIS/WWP services, there is a possibility that port conflicts will arise. This will also prompt you to alter the default port mentioned in the Apache configuration file
So let us see how we are going to address such conflicts:
Edit the Apache ports configuration file
[code language=”bash” gutter=”false”]
$sudo vi /etc/apache2
[/code]
I opted for port 8088 (You can choose a port that is NOT used by Windows. Issue netstat -aon to get a list of ports open/listening on Windows from CMD
100% sure that you are going get presented with an annoying notice “ Protocol not available: AH00076: Failed to enable APR_TCP_DEFER_ACCEPT” which is easily addressable.
We will edit the apache configuration file to address this issue
issue the command
[code language=”bash” gutter=”false”]
$sudo vi /etc/apache2/apache2.conf
[/code]
& add “AcceptFilter http none” by the end of the file.
Save the configuration file & restart the Apache service.
As we have completed all the installations and managed to start the services successfully after fixing the configuration files, it is time to reboot.
WSL unfortunately doesn’t let you use “init 0”, or “init 6” to shutdown or restart the instance, instead you must use the Windows Services MMC for the same.
This will close all open Ubuntu “app” windows. You can restart the Ubuntu from the app list.
Once Ubuntu restarted, let us start the services
[code language=”bash” gutter=”false”]
$sudo service apache2 start
$sudo service mysql start
[/code]
Once the services are started, we will try phpmyadmin. As I mentioned already, I have set the port 8088 for Apache, hence I can access the phpmyadmin from the link http://localhost:8088/phpmyadmin
You can safely ignore the warnings, as the current version of phpmyadmin we installed from Ubuntu repos have certain conflicts with PHP 7.2
Install “WordPress”
“WordPress” is one of the leading CMS (Content Management Systems) with unlimited possibilities. Recently we switched our decade long joomla based corporate website to “WordPress” & after few days of interactions with the technology, I feel I would never look anywhere else.
This will download the latest “WordPress” to your home folder
Now we have to extract the downloaded file to right htdoc root. We are talking about the default configurations available with apache configuration files. Hence the wordpress should be extracted to ‘/var/www/hmtl/’ folder, which is a protected path. We’ll change the folder permissions temporarily to facilitate the extracting
Now we have a problem, “WordPress” installation cannot write to “wp-config.php” file. This is due to linux file/folder permissions. Hence we will again change the permissions over ‘/var/www/’ folder
Now, go back to the previous page, furnish the details and “WordPress” should happily move ahead. Run the installation
That completes what we tried to achieve. “WordPress” running successfully from a WSL environment.
Now, it is time to ask the questions like “Why so much pain, when we can achieve the entire “WordPress” thing on Windows?”
Well, primarly “WordPress” performs better on Linux enviorment (personal observation), second & most important for me. I just love learning something new everyday. You are welcome!
Microsoft has added WSL with it’s Server 2016 (Version 1803) & the vision is pretty clear. Microsoft “wants” to provide a LINUX environment within Windows so that in the future, a separate LINUX Server requirement will NOT truly hurt the customers. Currently the WSL is NOT equipped with desktops/GUI & Pengwin like initiatives are sure making traction. If my guess will NOT go wrong, soon Windows Servers will be running “Linux” side by side & those Linux Servers are going to be as good as physical/Virtualized. We’ll wait eagerly, together.
We are using Oracle applications R12 12.0.6 with JDK 6.0 while most of the clients are using JRE 7/8 based on different business requirements (With full knowledge that there would be unexpected results due to the compiled versions). We’ve observed a peculiar issue with the JRE applet once after the upgrade to Windows 10 version 1803. The Java applet started showing too small fonts while launched from displays with high DPI resolutions.
Digging in brought me to the following discussion:
Although there are multiple recommendations, for EBS environment, Please follow the below instructions:
Launch the JAVA applet by opening a forms based module.
Open task manager and locate “Java(TM) Platform…”, right click and open properties. This will open the properties for “jp2launcher.exe”. Click on “Compatibility” and click on “Change high DPI settings”. Now check “Override high DPI scaling behavior. Scaling performed by:” to “Application”. Refer the image for more details.
Once the changes are made to the properties of the executable, restart the box. It could be specific case, the changes were not applied until a restart for me.
Although it fixes the font scaling issues, the toolbar area of the Oracle forms are remains scaled with pretty small icons. I am yet to find out a fix for this minor annoyance. May be quite soon.
Windows 10 gets more interesting day after day. I feel like Microsoft is slowly helping my HUGE beasty desktop machines to start looking like a MOBILE PHONE, well enough said.
One of the latest issues with Windows 10 version 1803 (build: 17134.81) is, one cannot add the .NET Framework 3.5 feature using “Turn Windows features…”, the attempts start reporting you are not connected to internet, which is not true (Microsoft should grow up)
So if you are looking for a quick solution to the said, don’t worry, Microsoft has truly messed up documentations available here:
Or if you don’t want to get confused, follow the instructions below:
Using the Windows Media Creation Tool for Version 1803, create ISO and mount it
Browse to sources\sxs folder within the ISO that’s been already mounted. Example, my ISO file is mounted on J: drive, hence the path to sources files is “J:\sources\sxs”
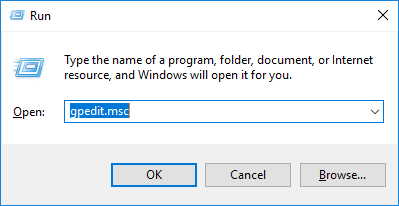
Copy the path and with an administrator account, open “LOCAL” group policy editor
Click Computer Configuration, click Administrative Templates, click System, and then double-click the Specify settings for optional component installation and component repair setting.
and once the LOCAL policies are updated, you have to apply it. Apply the policy changes using “gpupdate /force”. Don’t worry about domain policies (if you are using a domain joined computer)
Now try to install “.NET Framework 3.5”, should complete without giving more errors.
Our Oracle application R12 (12.0.6) instance has JDK 6 environment & We don’t have any plans to migrate to any recent versions of Oracle Application those are supported by later Java environments.
Almost all users those use Oracle applications are using JRE for many other engineering programs (Calculations programs by Vendors) & frequent updates of the JRE happens automatically at the user ends. We have a significant crowd that is still using JRE 1.6_20 as base JRE, who seldom have the following issue(s) discussed below.
Over Windows 10, Internet Explorer 11 fails to load HTML pages properly & many times after the logon to the application, the HTML menu page is loaded in the explorer, leaving a 4-5 white space lines. Refer the image below
Basically this issue is observed with boxes those have latest JRE (x86) installed and used with parameter -Djava.vendor=”Sun Microsystems Inc.”
Oracle blogs strictly says, Compatibility view for Oracle applications R12 shouldn’t be enabled for Internet Explorer 11. I have tried enabling the Compatibility view for the Oracle applications, without any positive changes.
As a last resort, I reset the Internet Explorer 11
and after restarting the computer, Oracle Application HTML pages started loading correctly, without leaving white spaces between the IE Window and application top frame.
Hi guys
To be very frank, though I started using Windows 10 from the Technical Preview days & was an insider for a long time. After each build, one of the best things I loved about Windows 10 was it’s ability to identify and install the best drivers (Occasionally requiring manufacturer drivers for additional enhancements (Sound, VGA, Wifi)) even for pretty old hardware components.
With the Creators update, started reading many frustrated users complaining about missing drivers which were not so loud till build 1603. Out of curiosity, I found that almost four devices were not recognized for my almost 5 years old work laptop, a Dell Latitude E6420.
Throughout my Windows 10 experiences, I hardly bothered to find Windows 10 specific drivers from DELL support because my product is not supported for Windows 10 & the latest available are for Windows 8. Well, almost all the executables by DELL are packed in a different way that Intel drivers & extracting the packages using 7-zip didn’t always let me point the device manager to extracted files locations and pick correct drivers. Hence, I just run the executable & take a chance with almost all missing drivers.
This time after patching the way mentioned above (Which can break your system, be warned & trust me, I know what I am doing, so just lost a whole partition 2 days back) I found one item under “Other devices” & it read “MAP SMS/MMS”. I tried to locate the hardware details, which has only a long string that read something more than mere google searches could help, until I came across this post today.
2nd page of the article, user vkgupta suggests to remove connected Bluetooth devices to see whether this “Other device” disappears after the unpair process.
I unpaired my LG G3 & the “Other device” disappeared. Paired it again, letting the Other device to reappear with a ? mark once again. So, if you are another someone who is trying to “find” a proper driver for your SMS/MMS other device, give this trick a try.
I have 3 Windows 10 Professional licenses (Yes, paid licenses). 2 of the licenses are used in two hardware devices & the 3rd one I am using with a VirtualBox VM machine.
My semi server class desktop computer at home has approximately 4.5T storage, consolidated from different disks. My Windows10 VM is frequently factory reset to try out different software (Mostly Oracle software at uncertified environments) & the particular partition on which I had the VM was running out of space & I planned to move the VM & the disks to a different partition with bigger free space.
Scenario: Move “Windows 10” VM from L: drive to M: drive
My nightmare started when the copy process stopped abruptly with Windows popping an error window stating there were read errors while copying disk1.vdi & I attempted again to realize that the disk1.vdi is has bad sectors or clusters.
I hurried to confirm that the VM is still accessible by restarting the VM couple of times & to my greatest pleasure the VM did start, did shutdown properly and I was able to access the Oracle database installation.
Fix:
A quick googling suggested that an attempt to repair the hard disks using “CHKDSK”, the old utility could fix the .vdi corruptions & without wasting more time I jumped in
At an elevated command prompt issued the command
> chkdsk L: /F
My partition is of 1TB & after 15-16 minutes the chkdsk completed with few messages like fixing some cluster information.
I tried to copy the disk1.vdi once again to M: drive, and this time the copy process managed almost 19GB out of 29.1GB and again presented me the read error.
Now, I was left with just one more option in front of me & it was to attempt recover the bad sectors, and there were chances that my virtual disk may get corrupt if the damages are more in numbers. knowing my VM is already Activated by Microsoft, I could try to reinstall Windows in a new virtual disk and retain the license as long as I am still using the other VM files as the id of the machine registered with Microsoft.
Please be informed, if you copy ONLY the vdi file, the activation will be nullified and you will be prompted to activate the copy of the Windows as soon as you start the new VM built using the copied VDI file!
So I proceeded to
>chkdsk L: /F /R
Windows suggested that it may take around 6 hrs for the repair process & I woke up next day morning to read multiple status messages about moving the corrupt sectors to new positions & some errors those could not be repaired.
I hurried to copy the disk once again & even though it seemed like forever, finally I was able to copy the disk1.vdi to M: drive!
So if you ever come across such a situation, give the above a try. If you are not cursed, most probably you will able to recover the virtual disk.
Microsoft started pushing Windows 10 Creators Update & one of the major bugs prevents taskbar volume control responding to mouse clicks. Ie, the user cannot control the volume using the taskbar icon.
After many attempts to re-install the drivers using Windows device manager, I had to download the Windows 8.x drivers from Dell support & the manual installation helped.
So if you are too eager to checkout the Creators Update, please be sure that many of the broken drivers could not be updated using the device manager, however using manufacturer provided driver packages. You can download the drivers for Windows 8.x & unzip the packages using 7-Zip and point to the extracted location incase if the package says it cannot install by normal terms.
Not many DBAs prefer Windows for their Oracle databases. Linux is most preferred by most of them & most of the DBAs I know setup the bash profile under Oracle user to setup the environment during each logon to the server.
Our legacy business application database runs on Windows 2003 & trust me, we never had a single database crash (Other than the physical hardware failure that forced us to recover the database once). Depending upon how huge the database and application, the choices for hosting the Oracle database differ from one business to other.
We decided to upgrade our Oracle 10g 10.1.x.x 32Bit database to 11g R2 & as usual I have replicated the environment using my home semi-server class desktop, before the Production environment at work.
Installed 10g 32Bit, created the database using dump export file (The total size of the database is less than 7GB, hence I avoided the hectic RMAN backup and restore part)
Configured RMAN against the new database & made full backup for archive logs and database.
Installed 11g 11.2.0.4 64Bit database (Software Only installation)
Created a new Windows Service using oradim
Restored the database from RMAN backups & upgraded the database to 11g
So far so good. I had to restart the computer & after rechecking the database was up and running, tried to access the instance using sqlplus & was presented with
ORA-12560: TNS:protocol adapter error
I setup ORACLE_SID=SID at the CMD window & sqlplus was happy after that.
Usually, Windows doesn’t need environment variables set exclusively for the database as Windows registry takes care of it. This is very efficient when the box has only one database running. If you have more than one database or multiple Oracle homes, the scenario changes.
In addition to, Oracle always looks for the executable based on the PATH information it reads. For example my box has 10g,11g,12c database software installed without any databases created during the installation time.
Let us consider the scenario like I didn’t re-order the PATH entries after the latest installation of 12c & try to open SQL or RMAN. The call will find the executable from 12c path entry BIN as default, and a beginner could have enough confusions due to it.
In my case, I needed my 10g instance first, hence I moved the 10g folder as the 1st entry for Oracle products, and once I finished with 10g moved 11g home folder to the 1st position.
Anyway, after confirming the path settings, my immediate attention was towards registry, as Oracle services completely depend upon the registry values for each service registered.
To my utter surprise, found the 11g Service entry didn’t have ORACLE_SID string created during the instance creation using ORADIM.exe
Oracle 11g 11.2.0.4 has a huge bug list and interim patches those should be applied before moving to Production instance. I really don’t know whether the missing ORACLE_SID string entry was due to one of such bugs.
So I stopped the Oracle service, added ORACLE_SID string entry with the value for my database
Restarted the service & sqlplus connected to the instance happily without setting up the environment variable like set ORACLE_SID=SIDNAME
While the easiest solution is to setup both ORACLE_HOME, ORACLE_SID when someone wants to use the sqlplus or RMAN exclusively as a part of the database access, the above method is a definite way to deal with “ORA-12560: TNS:protocol adapter error”
Even though my blog has reached 600k+ visits, I am one of those “lucky” tech bloggers who is hardly reached through emails for some specific tips and helps.
One of the recent were about migrating from Developer 6i developed web deployment to Windows 2008 R2, and the asker decided to approach me through email after reading my post about installing Developer 6i suite on Windows 7 and later OS
There were many emails until I realized they have a web deployment! Using Developer 6i & I was truly impressed. Developer 6i setup was one of the toughest, when I tried it by 2004-2005 period and I truly given up once after a number of failures to setup it properly and “googling” wasn’t as efficient as today when a single search fetches you hundreds of blog posts those explain such setups minutely so that a beginner can, without sweating much could, almost setup anything!
The hacks I posted with my blog towards installing Developer 6i on Windows 7/later and Windows Servers did have it’s own drawbacks. Many of the Oracle products like Oracle graphs doesn’t work with the .dll hacks & we experienced unexpected crashes and I have made sure that I did warn the enthusiasts about them with my blog. Did it stop people from taking risks? I don’t think so
Our legacy Oracle database server hardware was 14 years old when we decided to finally decommission it. Many places around the world businesses never listen to the Administrators complaining about the age of hardware and how difficult it is to maintain obsolete hardware and software. Oracle database(proprietary) must be one of the widely used database without proper licensing and I hardly believe many small organizations will ever pay the unbelievable prices Oracle tries to extract from customers when they want to do proper licensing. Many of those environments may have new admins and the entire development teams dispersed or the software company that has developed the software diversified and started selling fish. Anyway, my asker’s situation was not far different. His hardware was obsolete and the company has brought him a new hardware with 4GB memory and he was desperately looking for a method to migrate from his Windows 2003 server to Windows 2008 R2 server
Can you/should you take risks by trying to migrate to a newer OS because there are “few hacks” available over internet?
I work as information technology manager and I will not let it happen, knowing and after having bad experiences. Instead I will try to find better solutions, like converting your Windows 2003 physical machine into a Virtual Machine and going online from a newer hardware and OS
Mr. Asker’s scenario
Windows 2003 Server with Developer 6i Web deployment and Oracle database 10g and his hardware has just 2GB memory!
His requirement
Want to start using the new hardware and Windows 2008 R2. Can’t take risks
My suggestion to him
Use VMWare’s P2V converter, Convert the legacy server into a VM
From the new hardware, run the VM
While I am NOT at all happy with the 4GB physical memory, I will suggest anyone who wants to go with such an approach to upgrade their hardware to have minimum 8GB so that the Windows 2008 R2 can reserve 4GB for itself, 3GB maximum for the 32Bit Windows 2003 Server and tweaking the Oracle database SGA to 40% of from the 3GB reserved for the VM!
Let us consider the few advantages of converting legacy hardware to virtual machines quickly
One can always take a full backup of the VM, based on mission criticality, in addition to the database backups. Such backups will help the administrators to restore the whole “machine”, if something goes drastically wrong
No headaches to figure out how the deployment was made, especially when there are hardly any documentations available explaining the setups
My asker got so excited that he stopped answering my consequent mails checking about progresses. That’s the downside of free consultancy in most of the cases. Oh well, that was not my first experience anyway. This year itself I helped someone to setup a 12c environment and when he was online, he told me how he had tears in his eyes and later he stopped answering my calls
I hope I made some sense with this post and if you are someone who is frantically looking for a way to “Migrate” without risking much, give it a try. Have comments or need more clarifications? Use the comments area to let me know about them.