How to Properly Deregister Custom Tops in Oracle EBS manually

I’ve created a custom top for APEX integration with Oracle EBS R12 12.2.10 recently & by mistake choose 5001 instead of 50000+ for application id. Then I wanted to do it correct and proceeded with the documented procedures.

perl adDeregisterCustomProd.pl

This script errored out as the application id was less than 20000 (unfortunately, I didn’t copy the exact error messages). So, started a session with gemini3, that I recently subscribed. Well, although the AI helped to a great extend, finally I had to refer a blog that helped me to resolve the related issues & finally come up with a clean context file.

Lets’ see how it works. Shutdown the application instance & start deleting the custom top specific entries from related tables. As user “apps”

DELETE FROM fnd_product_installations WHERE application_id = 5001
/
DELETE FROM fnd_application_tl WHERE application_id = 5001
/
DELETE FROM fnd_application WHERE application_id = 5001
/
DELETE FROM fnd_oracle_userid WHERE oracle_id = 5001
/
commit
/

Now, delete the entry for your custom application from fnd_oam_context_custom, a step that shouldn’t be missed. Use the select statement to find out specific information about your custom application

DELETE FROM fnd_oam_context_custom WHERE upper(oa_var) LIKE '%XXAPEX%'
/
COMMIT
/

Now, as Oracle user “system” you need to drop the custom schema. I wanted to drop the custom schema “XXAPEX”

SELECT editions_enabled FROM dba_users WHERE username = 'XXAPEX'
/
DROP USER XXAPEX CASCADE
/

Now, remove the physical path for the custom application

rm -rf $XXAPEX_TOP

Usually, one should proceed with auto config and do an adop fs_clone to replicate the changes while using dual file systems. For me, after auto config, I was still seeing the custom top entry within the context file & no questions will help the AI to pinpoint my issue. Suggestions after suggestion auto config recreated the entry for the custom top inside the context file.

I gave the AI some rest time & started scavenging through blogs & came across the below one

Here the blogger is dealing with a situation that was raised while using “adDeregisterCustomProd.pl”. Fortunately, the blogger has copied the entire log of the activities and I found a very interesting entry

XXAR entry in topfile.txt is removed succesfully ..!

Well, that was it! I hurried to AI once again and asked for the physical location for the topfile.txt & removed the custom top entry from the list. Manually deleted the line from context file & ran auto config once again on “run” environment. Once the config completed, there were no more entries for the custom application to be found.

As we are using SSL for the EBS instance, restarted the application and proceeded with fs_clone. I am noting the fs_clone issues while using SSL to avoid another post. If you initiate the fs_clone without the application server being up using SSL, you are prone to hit the error

[user: applmgr] [VirtualHost: main] (13)Permission denied:  make_sock: could not bind to address [::]:443

The solution is simple, start the application server if it was shutdown & try fs_clone once again.

APEX Integration with Oracle EBS R12 12.2

Updated on 3rd February 2025 (Added additional information about running apex_ebs_setup.sql)

Updated on 29th January 2025

If you are using Oracle EBS R12 12.2.14 already, you may refer this document. It has much straight forward approaches documented.

Today we will see how to integrate Oracle APEX with an existing Oracle EBS R12 12.2.10 instance that is on top of Oracle database 19c. Recently I’ve posted a thread about how to install Apex on Linux and specified that it was done against EBS database. You can use the same thread for installing APEX, ORDS and Apache Tomcat for hosting.

Oracle provides a document that was last reviewed in 2019 with cryptic instructions to setup a custom schema for the APEX integration & gravely misses environments like ours where multitenant database is used! As usual I am not making any claims that this is the “certificated*” way of setting up APEX for EBS. This is just another attempt to connect the dots and do stuffs the right way after multiple attempts.

Oracle documentation instructs to create a new schema XX_APEX as part of setting up new workplace. This process creates a separate tablespace for the schema and this instruction contradicts with the instruction to setup the same as a custom application. EBS R12 12.2 “AD Splice” doesn’t respect custom tablespace definitions and defaults the tablespaces to APPS_TS_TX_DATA and APPS_TS_TX_IDX for custom schemas. So how do we circumvent this issue? Simple answer. Create a custom application using “AD Splice” bearing the name XX_APEX to meet the documentation preferences & use it with APEX workplace later. One of the best detailed instructions for creating a custom application using “AD Splice” could be found here

For additional references you may refer the below also.

I followed RishOraDev’s instructions and the custom application “XX_APEX” was created without any issues.

Once the custom application creation is over, we can proceed with creating a new workspace for APEX applications.

Logon to your APEX portal as Admin and proceed with create workspace.

Next step, choose Yes for “Re-use existing schema” and pick XX_APEX that you have created earlier.

Provide a meaningful username for Administrator. I am using Admin & this shouldn’t be confused with the APEX admin account. Select an existing Schema will grant additional rights to the schema that are essential for APEX.

You will have to change the password during the initial login. So use a temporary password and reserve your highly secret password for your permanent password :)

That’s it. A new workspace for APEX has been created!

You can execute apex_ebs_setup.sql and other supplementary scripts now to setup the example scenarios described in the white paper. If you try to execute apex_ebs_setup.sql prior setting up the schema for the workspace, the last statement will fail as the custom schema will not have CREATE VIEW rights. Grant the right to schema for such cases.

Now you can proceed with login as XX_APEX workspace admin and continue with defining developers accounts so that your team could start building applications. Please refer the whitepaper for understanding what you should and shouldn’t do with APEX while it is integrated with EBS.

There are few scripts offered by Oracle for APEX environment and one might feel tempted to try them, I cannot blame that urge. However, please note the whitepaper was never meant for a multitenant database and the instructions were clearly for 11G. If your EBS is already migrated to a multitenant setup, please make sure that you will be running the scripts as APPS user. Switch to APPLMGR, source the environment. Sample as below

[applmgr@erp-test ebs_apex_scripts]$ sqlplus apps/apps @apex_ebs_setup.sql

SQL*Plus: Release 10.1.0.5.0 - Production on Mon Feb 3 18:22:19 2025

Copyright (c) 1982, 2005, Oracle.  All rights reserved.


Connected to:
Oracle Database 19c Enterprise Edition Release 19.0.0.0.0 - Production

.  ____   ____           ____        ____
. /    \ |    \   /\    /     |     /
.|      ||    /  /  \  |      |    |
.|      ||---    ----  |      |    |--
.|      ||   \  /    \ |      |    |
. \____/ |    \/      \ \____ |____ \____
.
.
. Application Express E*Business Suite Integration Example Setup.
.................................................................
.

FOO3
--------------------------------------
apex_ebs_setup_2025-02-03_18-22-19.log

.
.  << Enter Criteria >>
.
.   Version of EBS [12.2]:
.   EBS APPS Username [APPS]:
.   Password for EBS APPS Username:
.   APEX Schema Name [XX_APEX]:
.   Password for APEX Schema:
.
.
... Ebnable editions in APEX Schema
.

PL/SQL procedure successfully completed.

.
... Conect to the APPS Schema
.
Connected.
.
... Create views for use in APEX Applications
.

View created.


Grant succeeded.


Grant succeeded.

.
... Create Sample APIs to be called from APEX applications
.

Package created.


Package body created.

No errors.

Grant succeeded.

.
... Create APEX Global package for use with EBS Responsibilities
.

Package created.


Package body created.

No errors.

Grant succeeded.

.
... Conect to the XX_APEX Schema
.
Connected.
.
... Create APEX View referencing the APPS View
.

View created.

Disconnected from Oracle Database 19c Enterprise Edition Release 19.0.0.0.0 - Production

Forget about the hacks to connect to PDB as sys in order to run the scripts :)

Have questions? let me know through comments.

*Certificated is a term that I made to name and shame people who always defend their ignorance by claiming whatever they cannot do or answer as not certified.

Oracle EBS R12 Vision Instance

Did you ever wish for having your own copy of Oracle EBS R12? Well, Oracle provides a copy that is all yours called VISION instance. The below post is one of the best I came across, explaining how to setup your own VISION instance on Oracle VirtualBox

I hope, it was an easy ride. Oracle’s virtual appliance is perfectly sized for moderate hardware, without GUI out of the box. We’ll see how to install GUI, configure the appliance for network access etcetera in this post.

Basically you get Oracle Linux 7.9 OS, EBS R12 12.2.10 with Oracle database 19.9 in this appliance. You must update the OS to latest before installing GUI. So, let us setup the environment for the update now.

Stop the running application and database instances.

su - oracle
cd /u01/install/APPS/scripts
./stopapps.sh
./stopdb.sh

Oracle has the appliance set to start the database and application instances automatically during every reboot. I strongly suggest you to disable the automatic start of these instances. Oracle starts “ebscdb” and “apps” services every time when the box restarts. We can disable these services using chkconfig command

chkconfig apps off
chkconfig ebscdb off

That’s it. Now, when you restart the box, Oracle services will not start automatically.

Shutdown the server. Change the network configuration for the sever like seen in the below image.

This means, your server will start sharing the host’s active connection(s). If your host machine has an active internet connection, your EBS server will able to access internet this way from it’s environment.

Start the EBS server and complete the OS update. This should be around 2.2GB total downloads and minimum 30-40 minutes, depending upon the hardware resources you have allocated for the virtual machine.

Once the box is update, proceed with “Server with GUI” group installation.

yum groupinstall "Server with GUI"

Restart the server after GUI installed. You can temporarily switch to graphical run level by issuing the command

systemctl isolate graphical.target

and to make the graphical interface as default, issue the below command as root

systemctl set-default graphical.target

Please note, your box doesn’t have VirtualBox extensions yet, which is a MUST for proper mouse integration and more. Prior installing the VirtualBox extensions, make sure to install kernel devel package. Issue the following command

yum install kernel-uek-devel

Additionally install the packages gcc, make & perl (pre-installed usually)

yum install gcc make perl -y

Reboot the server & install the VirtualBox extensions.

If you remember, we changed the network settings earlier for the update & if you try to start the database and application, this may not work. Depending upon how you want to access the VISION instance, you have to configure additional networking now. I suggest to leave the NAT configuration as it is and to configure an additional Network adapter for the intended connectivity.

For example, if you want to share the VISION instance with your teammates within a Class C network, do the following.

Use “Bridged Adapter” & select the adaptor that is connected to the network under “Name”. Recent computers have multiple network and WiFi adapters & selecting the correct adapter is very important for client connectivity. Make sure to setup “Promiscous Mode” to “Allow All”.

Find one free IP address and set up the same for your EBS VISION box. You will have to setup this information at multiple places.

For example, change the hosts file (most important)

Network settings. My box have NAT as first Network Adapter and Host Only network as 2nd Network Adapter. Hence my configurations are like below

For the NAT (Connection #1) I have the following setup

and for the Host Only network (Connection #2)

By having the NAT as first adapter, my box is able to connect to internet, shared from the host and my host can access the EBS instance from the virtual machine using the host only network.

That’s all folks.

Oracle Application R12 | The Function Is Not Available Under The Responsibility

Hello guys

It looks like I am getting something new everyday to blog…the latest is from Oracle Application R12 once after I added a new responsibilities to few users.

The Functions those are listed under new responsibility from the HTML page will not launch, instead a popup window appears with the statement “The Xyz Function Is Not Available Under The abcd Responsibility”

I recently had a nightmare with a custom form, that was revamped almost after 6 years of usage. Although the compiling on Production instance doesn’t have any issues, only portions of the form would load & the only few elements displayed were totally misaligned and the cells looked like just a plain straight line…

After many failed attempts, I tried to clear the cache, which we didn’t from a long time. The culprit was the cache. After releasing the cache, I recompiled the form & everything was fine.

With the above issue also, our issue was with the cache. After releasing the cache, the users were able to launch the form from the HTML page itself. If, this didn’t resolve your issues, have a look here

https://knoworacle.wordpress.com/2012/11/03/the-function-is-not-available-under-the-responsibility/

regards,

rajesh

Oracle Application R12(12.0.x) | JRE | UNKNOWN Publisher

Hi guys

This time I am going to post a solution towards one of the nagging annoyances with Oracle application R12 (12.0.6 in our specific case) & JRE securities those were implemented by JRE 7 (1.7.x)

Our instance was upgraded to use JRE 6 almost 5 years back during 12.0.4 to 12.0.6 upgrade and ever since there were dozens of JRE updates & the current JRE 1.8.0_161 (AS on 19th January 2018) & with each update, whatever the runtime parameters we add specifically for Oracle Application used to get removed, forcing us to renter it for each user.

I’ve been searching for a proper solution, not only towards the runtime parameter fix, for the security prompts those started annoying our end users whenever they tried to launch the forms, once after we forcefully updated many users who were sticking to 1.6 JRE

So after referring many documents, using some of the past experiences dealing with security certificates, I believe, have figured out how to get rid of those annoyances, minimum for a while.

Solution 1

Runtime parameters being removed after each JRE update

jre

Add a new environment JAVA_TOOL_OPTIONS with a value -Djava.vendor=”Sun Microsystems Inc.”

You may add it under your specific user or system wide, which I usually prefer so that I don’t have to worry about the next user who will be using the same system (for some reasons)

ENV

Solution 2

Addressing JAVA security prompts

Trying to open the forms with latest JRE without adding exceptions will produce the following JAVA security error

1.png

Now we need to add the application URL with complete port details to the security tab of JRE

2

Now, we will be presented with the “toughest” situation to resolve, which will be explained later.

3

Clicking the More Information, JAVA presents more details about the digital certificate issues, stating the publisher of the digital certificate as UNKNOWN, hence this warning appears for the end user each time whenever the user tries to open a Forms based module.

4

You may require Domain Administrator/Administrator privileges to continue the below fixes

1st we have to retrieve the certificate from Oracle application server. Login as application manager user to LINUX environment (We’re setting up the entire stuffs for R12 application that is running on 64Bit Linux)

download $APPL_TOP/admin/appltop.cer file to local computer (If your implementation team has cloned the instances across, the appltop.cer will remain the same across different servers, so the single certificate integration with the user computer should deal with all different instances of the Oracle application (Test, Development & Production)

Once the certificate is downloaded or copied to the local computer, you need to install it. We’ll install the certificate twice, in two different locations.

Follow the images below for more details

5

We will install the certificate for the “Local Machine”, so that all users using the same computer will get benefitted

6

For the 1st instance, We MUST install this certificate to “Trusted Root Certification Authorities” Container.

For 78


9

Once the certificate is imported, We should install the certificate once again, Select “Local System” and follow the prompts. We don’t have to specify the container this time.

10

Now, trying to open a forms based module will present you another warning

11

Checking “Do not show this again for apps from the publisher and location above” will suppress this dialog until the certificate remains the same for the application server.

Hope this helps few out there!

regards,

rajesh


Java runtime 1.8.0.91 | Oracle EBS R12 (12.0.6)

Hi guys

You could run into a situation after the latest Java client runtime update, your R12 instance failing to load forms, complaining about the lower version of JRE. This is mainly due to the fact that, if your Windows OS is 64Bit, the latest java runtime update installs both 64Bit & 32Bit and most of the R12 environments run against 32Bit JRE.

Internet explorer (the only one browser that runs the JRE properly for EBS R12) loads the 64Bit java runtime by default from a 64Bit Windows OS & eventually the forms will fail to load.

At present the only possible solution to address this situation is to uninstall the 64bit version of java runtime, using “Programs and features” or “Add remove programs” based on the version of Windows you are using.

Hope this helps few out there :)

regards,

rajesh


Oracle R12 Cloning | dbTier "ouicli.pl INSTE8_APPLY 1"

Hi guys

There could be thousands (exaggerated) reasons why a Oracle cloning process could go all bad. I’m not an application DBA, however, have enough experience with the architecture, technology as I interact with it everyday as a part of my job.

Few months back, I started doing something what a DBA should do, cloning. My prior attempts were mostly at home, using virtual machines and test instances and they were NOT as mission critical as what we do at work.

So, after the storage device was revamped with new partition structures I was asked to do a cloning for the production instance. Let me explain how the application was deployed prior the storage restructuring

  1. We had the database tier on mount point /u05
  2. Application on /u06 mount point

So, I recreated the same mount points and started the cloning process for dbTier and the process got terminated at 2% and the log files shown me an error that I was not familiar with.

“ouicli.pl INSTE8_APPLY 1”

Google searches fetched me hundreds of results for “ouicli.pl INSTE8_APPLY”, however the error codes were mostly for 255 or “-1” and apparently I didn’t have any clue what was going wrong.

So I unzipped the tar ball for database tier once again, and the cloning process got aborted at 2%,  and I was getting nervous as I was expected to make the instance online by early morning 7AM

Most of the reference materials were explaining about non-existent Oracle inventory locations, and I confirmed that it was not the case from my part (Obviously, I was overlooking at this constrain itself!)

After half a dozen times tasting failure, finally I tried to see what was written inside the oraInst.loc file

oraprod@erp-prod:/home/oraprod&gt;cd $ORACLE_HOME
oraprod@erp-prod:/u05/oraprod/PROD/db/tech_st/10.2.0&gt;cat oraInst.loc
inventory_loc=/u01/oraprod/PROD/db/tech_st/10.2.0/admin/oui/PROD_erp-prod/oraInventory

and I realized that inventory location was wrongly pointing towards an non-existing mount point and physical location!

I modified the oraInst.loc content with the correct mount point

inventory_loc=/u05/oraprod/PROD/db/tech_st/10.2.0/admin/oui/PROD_erp-prod/oraInventory

and the cloning process went ahead without giving another errors.

We had an instance that was running from last 6 years, which was only once cloned from a cold backup during the storage device change, and somehow the inventory location remain unchanged with the repositories.

I hope this finding could help few newbies like me out there

regards,

rajesh

Oracle EBS R12, Install/Clone on Oracle/Red Hat Linux 7.x

Hi guys

Last reviewed on: 10th January 2022

Made changes to the body for Oracle Linux 7.9

References: http://www.slideshare.net/tianpan/oracle-ebs-r1213installationlinux64bitpantian

(and dozens of EBS R12 related blogs and oracle community posts)

As far I could recollect, Oracle EBS R12.0.x & R12 12.1.x are not certified yet for Linux 7.x, let it be Red Hat Linux or Oracle enterprise Linux. Does the certification path really make guys like us trying to clone, install EBS R12 over yet to be certified platforms? Well, my case, I always did attempt & succeeded to a certain levels. Starting with Oracle 10g over Windows 7, 8 etc.

This time, my attempt was to clone our existing EBS R12 12.0.6 instance from Red Hat linux Enterprise 5 64Bit to Oracle Enterprise linux 7 64Bit.

I can’t say whether it is a rightful thing for you or for your environment. For me it was a fun project, that I achieved to a maximum satisfactory level.

Environment: Source System

Red Hat Linux 5.11 64Bit, 48GB physical memory, HBA interfaced external storage, single node EBS R12 12.0.6 with Oracle database 10.2.0.3 database

Environment: Target System

1. Oracle VirtualBox VM with 4 processors, 10GB memory, Oracle Enterprise Linux 7.9 with GUI on demand

VDI fixed size of 1.3T holding both application tier & database tier files copied from source system

2. A Desktop machine with i7 Processor, 4.5 TB Storage, 16GB physical RAM for real hardware performance testing

How to?

Definitely, this is not for a production instance, not for a production instance, not for a production instance & REMEMBER, even if you have valid Oracle support, Oracle will NOT support YOU as the platform is NOT certified for 12.0.x or 12.1.x

Oracle Enterprise Linux 7.x is not certified for EBS R12.0.x , hence I was unable to find the pre-requisites install for EBS R12 for the OS. The hacks started from this point onward

Update(10th January 2022): Oracle Linux 7.9 has the “Add-on” repository that allows you to install the pre-requisites package, however meant for later certified versions of Oracle EBS. Hence, stick to Oracle Linux 6 public yum repository based package installation as mentioned below.

(Please make sure that you fully updated your OEL 7.x box prior the attempts listed below)

As root switch the directory to

cd /etc/yum.repos.d

Go to

http://public-yum.oracle.com/ and install the ol6 repo following instructions provided. The instruction might get in to folds, just follow the below.

cd /etc/yum.repos.d/
wget http://yum.oracle.com/public-yum-ol6.repo

Please note public yum repositories will be soon removed, if you are reading this post much later, make sure that you will find relevant sources to install the pre-requisites.

Open the ol6 repo file using gedit/vim and enable the add-on repo. Make sure the OEL7 repo doesn’t have the add-ons enabled. If you miss this, you might end up rebuilding the Linux Server (That’s what I did!)

install pre-requisites for EBS R12 by issuing the following command

yum install oracle-ebs-server-R12-preinstall -y

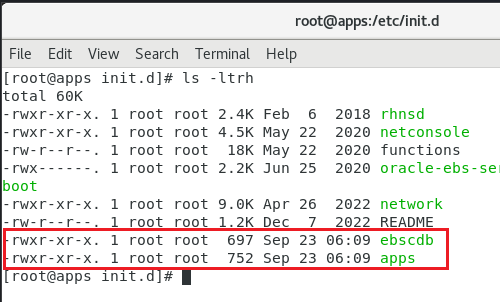
Once the installation completed, you will notice that you have two new users created

oracle

applmgr

If your cloned instance was having different user names for both application and database, create same usernames and add them to relevant groups

for example applprod to oinstall group and oraprod to dba, oinstall groups (mandatory)

Special note: If you are attempting these hacks for Production instances, sorry buddy, YOU will never be supported by Oracle as they have recently confirmed to me through a private message that they don’t have any plans to certify 12.0.x versions on OEL 6 or 7

Prior you attempt to clone or install the 12.0.6 instance on OEL 6, 7 make sure that you have taken care of few things prior the attempt. There are few OS level files formatting mandatory for Oracle applications, those caused me almost 3 weeks of reading various blog posts, and NOT a single solution to address a weird error associated with “Error: Missing ormi[s]://<host>:<port>” error while shutting down the application services using adstpall.sh script file! And the reason was default formatting of /etc/hosts file by OEL 7 installation!

Few errors you should see when the /etc/hosts file is NOT formatted as per Oracle’s installation notes…

Executing service control script:
 …../admin/scripts/adoacorectl.sh stop
 Timeout specified in context file: 100 second(s) 

script returned:

  ERROR : Timed out( 100000 ): Interrupted Exception
  You are running adoacorectl.sh version 120.13 

So the /etc/hosts file must be formatted like below with your OEL/RHEL 6.x & 7.x installations

127.0.0.1 localhost.localdomain localhost 
::1 localhost6.localdomain6 localhost6 
192.168.10.15 erp-prodbak.xyz.com erp-prodbak #Your box 
192.168.10.16 erp-prod.xyz.com erp-prod #Your production server, if at all required 

Rest of the network related mandatory elements specified in the reference documents could be ignored, or you may format them as well. If you are going to touch your /etc/resolv.conf file at all, make sure that after changing the content of the resolv.conf, you make it read-only by issuing the following command

chattr +i resolv.conf 

else after a reboot, this file be rewritten by the networking admin services

Now let us refer to the /etc/sysctl.conf & /etc/security/limits.conf files, which are setting system level parameters for the application. While I noticed that the previously configured parameters were causing performance degradation once after the clone, I just copied these elements from a 12.1.3 vision instance and replaced to find that, my cloned instance started flying, giving me much better performance than our Production instance that has the latest hardware and 48GB physical memory!

Once again, thoroughly check the below parameters, if something looks not appropriate for your environment, refrain from updating

as a precaution, do a backup for both the above mentioned files

cp /etc/sysctl.conf /etc/sysctl.conf.original 
cp /etc/security/limits.conf /etc/security/limits.conf.original 

Now using your favorite editor, replace the content of you sysctl.conf file with following

# Kernel sysctl configuration file for Red Hat Linux
#
# For binary values, 0 is disabled, 1 is enabled.  See sysctl(8) and
# sysctl.conf(5) for more details.
#
# Use '/sbin/sysctl -a' to list all possible parameters.

# Controls IP packet forwarding
net.ipv4.ip_forward = 0

# Controls source route verification
net.ipv4.conf.default.rp_filter = 1

# Do not accept source routing
net.ipv4.conf.default.accept_source_route = 0

# Controls the System Request debugging functionality of the kernel
kernel.sysrq = 0

# Controls whether core dumps will append the PID to the core filename.
# Useful for debugging multi-threaded applications.
kernel.core_uses_pid = 1

# Controls the use of TCP syncookies
net.ipv4.tcp_syncookies = 1

# Controls the default maxmimum size of a mesage queue
kernel.msgmnb = 65536

# Controls the maximum size of a message, in bytes
kernel.msgmax = 65536

# Controls the maximum shared segment size, in bytes

# Controls the maximum number of shared memory segments, in pages
kernel.shmall = 4294967296

# oracle-ebs-server-R12-preinstall setting for fs.file-max is 6815744
fs.file-max = 6815744

# oracle-ebs-server-R12-preinstall setting for kernel.sem is '256 32000 100 142'
kernel.sem = 256 32000 100 142

# oracle-ebs-server-R12-preinstall setting for kernel.shmmni is 4096
kernel.shmmni = 4096

# oracle-ebs-server-R12-preinstall setting for kernel.shmall is 1073741824 on x86_64
# oracle-ebs-server-R12-preinstall setting for kernel.shmall is 2097152 on i386

# oracle-ebs-server-R12-preinstall setting for kernel.shmmax is 4398046511104 on x86_64
# oracle-ebs-server-R12-preinstall setting for kernel.shmmax is 4294967295 on i386
kernel.shmmax = 4398046511104

# oracle-ebs-server-R12-preinstall setting for kernel.msgmni is 2878
kernel.msgmni = 2878

# oracle-ebs-server-R12-preinstall setting for net.core.rmem_default is 262144
net.core.rmem_default = 262144

# oracle-ebs-server-R12-preinstall setting for net.core.rmem_max is 4194304
net.core.rmem_max = 4194304

# oracle-ebs-server-R12-preinstall setting for net.core.wmem_default is 262144
net.core.wmem_default = 262144

# oracle-ebs-server-R12-preinstall setting for net.core.wmem_max is 1048576
net.core.wmem_max = 1048576

# oracle-ebs-server-R12-preinstall setting for fs.aio-max-nr is 1048576
fs.aio-max-nr = 1048576

# oracle-ebs-server-R12-preinstall setting for net.ipv4.ip_local_port_range is 9000 65500
net.ipv4.ip_local_port_range = 9000 65500

Save the file and issue the following command

sysctl -p

Now, change the limits.conf file with following content

# /etc/security/limits.conf
#
#Each line describes a limit for a user in the form:
#
#            
#
#Where:
# can be:
#        - a user name
#        - a group name, with @group syntax
#        - the wildcard *, for default entry
#        - the wildcard %, can be also used with %group syntax,
#                 for maxlogin limit
#
# can have the two values:
#        - "soft" for enforcing the soft limits
#        - "hard" for enforcing hard limits
#
# can be one of the following:
#        - core - limits the core file size (KB)
#        - data - max data size (KB)
#        - fsize - maximum filesize (KB)
#        - memlock - max locked-in-memory address space (KB)
#        - nofile - max number of open file descriptors
#        - rss - max resident set size (KB)
#        - stack - max stack size (KB)
#        - cpu - max CPU time (MIN)
#        - nproc - max number of processes
#        - as - address space limit (KB)
#        - maxlogins - max number of logins for this user
#        - maxsyslogins - max number of logins on the system
#        - priority - the priority to run user process with
#        - locks - max number of file locks the user can hold
#        - sigpending - max number of pending signals
#        - msgqueue - max memory used by POSIX message queues (bytes)
#        - nice - max nice priority allowed to raise to values: [-20, 19]
#        - rtprio - max realtime priority
#
#                 
#

#*               soft    core            0
#*               hard    rss             10000
#@student        hard    nproc           20
#@faculty        soft    nproc           20
#@faculty        hard    nproc           50
#ftp             hard    nproc           0
#@student        -       maxlogins       4

# * hard nofile 65535
# * soft nofile 4096
# * hard nproc 16384
# * soft nproc 2047


# oracle-ebs-server-R12-preinstall setting for nofile soft limit is 4096
oratest   soft   nofile    4096
appltest   soft   nofile    4096

# oracle-ebs-server-R12-preinstall setting for nofile hard limit is 65536
oratest   hard   nofile    65536
appltest   hard   nofile    65536

# oracle-ebs-server-R12-preinstall setting for nproc soft limit is 16384
# refer orabug15971421 for more info.
oratest   soft   nproc    16384
appltest   soft   nproc    16384

# oracle-ebs-server-R12-preinstall setting for nproc hard limit is 16384
oratest   hard   nproc    16384
appltest   hard   nproc    16384

# oracle-ebs-server-R12-preinstall setting for stack soft limit is 10240KB
oratest   soft   stack    10240
appltest   soft   stack    10240

# oracle-ebs-server-R12-preinstall setting for stack hard limit is 32768KB
oratest   hard   stack    32768
appltest   hard   stack    32768


# End of file

Install unzip version 5 from https://oss.oracle.com/el4/unzip/unzip.html

(This is mandatory as 12.0.x doesn’t support unzip versions above 5, and your cloning will fail with error notifying unzip is not supported)

Source the libdb.so.2 library file to /usr/lib from your source system, as the libgdbm.so.4.0.0 soft link hack will not work. If the libdb.so.2 is already a soft link in your source system, move the source file “libgdbm.so.2.0.0” from source to target box and create the soft link.

Now go ahead and enjoy the cloning/installation of your R12 12.0.x, or R12.1.x releases over OEL/RHEL 7.x (CENTOS is GNU release of RHEL, so you may experiment with that distro as well, nothing guaranteed though)

Please be warned, I have read many places that, few modules do not work on Linux 6,7 releases. Hence, the entire exercises you painfully executed may turn futile at later stages, and once again, if you have a live Oracle support, do not attempt such with your Production instance!

Enjoy guys :)

for Windows7bugs

rajesh