One of the teething issues a developer will face while using Visual Studio 2022 is related to IIS Express SSL certificate. My primary role as an Oracle developer, developing .Net applications was always a side kick, that complemented the inhouse extensions for Oracle EBS. This time I was trying to upgrade such a project once after getting a new development laptop at work. This project was framed using Visual Studio 2019 community edition years back, however I chose Visual Studio 2022 community edition this time. After the mandatory upgrades, testing failed throwing the error “net::ERR_CERT_INVALID” using Microsoft Chrome browser. This was not the first time I came across this error and somehow, I forgot to document the steps that resolved this issue for me last time.
Few of my Google searches were not landing me on a proper solution, hence I tried Microsoft Copilot this time.
Obviously, my issues were resolved by the steps 1 and 2. Just make sure that Visual Studio is closed while attempting these steps.
Once the repair is over, open “Developer Command Prompt for VS 2022” as administrator. You can do this by pressing the CTRL key while clicking “Developer Command Prompt for VS 2022”
Now, run the first command
Accept the prompt.
Now, run the second command
You should accept to install the certificate. Open Visual Studio now and continue with the debugging that should work as expected this time.
I don’t remember experiencing SSL related issues with Visual Studio 2019, that I used for years.
One of the major benefits of getting exposed to Linux was coming across some fabulous tools for managing and manipulating files. Let it be a simple utility that could replace strings within hundreds of files within a path or find and delete files matching patterns, age etcetera was out of the box available on most of the Linux distributions. Windows Operating System lacks such tools out of the box & next possibility is to write own scripts, which is not very possible for many users.
“Purger” is a file shredding project that I devised few years ago, while we were still hosting our Oracle 11g R2 version on Windows for multiple custom business applications, that generated multiple log files. Today I am sharing a working version of the software with you!
This software can, recursively scan and list files that match the age specified by the user & delete them from the file system. I’ve a minimalistic help file (PDF) under the help section of the software, please make sure that you will read it before using the software.
I’ve tried my level best to ensure that the software doesn’t give the user surprises. Regardless, observe caution when you are using the same as the software is expected to “delete” or “purge” files from your system permanently. If you are not using the “Send to Recyclebin” option, you might end up using tools like Recuva to recover the files deleted!
Few days back I posted couple of articles related to Oracle APEX & realized that my test database doesn’t have sample schemas other than HR. So, I decided to download and setup them. Once after extracting the archives from github for 19c, the installation thrown many errors about SQL files not being found in the path “__SUB__CWD__“
So I opened couple of the files and found entries like this
A quick search landed me on oracle-base article about installing samples schemas. This article explains how to replace “__SUB__CHD__” string with the present working directory (pwd) value. Unfortunately, Windows doesn’t have a built-in tool for such & I decided to make one for myself. “winreplace” is a Windows executable developed using C# (C Sharp). I’ve used Visual Studio 2019 community edition for developing this application. You may use later versions and higher .Net framework versions as it suits your requirements. This utility can iterate through files and sub-folders within a directory and replace strings. I avoided command line arguments as maintaining the position and spaces could be challenging at times. All arguments expected by the application are accepted through individual prompts and they must be entered without quotes. Below code was last modified on 6th January 2024. The latest build insures that ONLY the files modified.
using System;
using System.Collections.Generic;
using System.IO;
using System.Text.RegularExpressions;
namespace winreplace
{
class Program
{
static void Main(string[] args)
{
//Console.WriteLine("Hello World!");
//https://learn.microsoft.com/en-us/dotnet/api/system.io.directory.enumeratefiles?view=net-8.0&redirectedfrom=MSDN#overloads
//https://stackoverflow.com/questions/59734757/save-with-different-name-in-c-sharp-form-application
//Accept user inputs
//We'll not do extensive validations for this release. User have to insure the validity of information passed as inputs
Console.WriteLine(@"winreplace by simpleoracle.com, Version 1.0, December 31, 2023");
Console.WriteLine(@"This utility could be used for replacing specific strings recursively within a given file path. This utility creates a "".bak"" file for each file it iterates through regardless whether a match found or not. Fix expected.");
Console.WriteLine(@"This utility is provided as it is and you are adviced to use the same with caution. Although the software creates a backup for every file it accesses, making additional backups for important files is totally user's responsibility. Simpleoracle.com will not able to fix/repair or recover your files under any circumstances once after they are modified.");
Console.WriteLine("\n");
Console.Write(@"Files Path(eg: D:\My Text Files are here): ");
sourceDirectory = Console.ReadLine();
Console.Write(@"String to search for(eg: domain name): ");
searchString = Console.ReadLine();
Console.Write(@"String to replace with(eg: simpleoracle.com): ");
replaceString = Console.ReadLine();
try
{
var txtFiles = Directory.EnumerateFiles(sourceDirectory, fileType, SearchOption.AllDirectories);
foreach (string currentFile in txtFiles)
{
string fileName = currentFile.Substring(sourceDirectory.Length + 1);
//Directory.Move(currentFile, Path.Combine(archiveDirectory, fileName));
//Comment the below line if you don't want to create backup files.
ReplaceInFile(currentFile, searchString, replaceString);
//Console.WriteLine(fileName);
}
}
catch (Exception e)
{
Console.WriteLine(e.Message);
}
}
static public void ReplaceInFile(string filePath, string searchText, string replaceText)
{
//We will get the content from the plain text type file.
StreamReader reader = new StreamReader(filePath);
string content = reader.ReadToEnd();
reader.Close();
//Now we will check whether the content read from the file
//has matches for the string that we are searching for.
MatchCollection matches = Regex.Matches(content, searchText);
int count = matches.Count;
//We will attempt to replace the strings only if matches exist
//Each file that is modified will be backed up with an extension ".bak"
if (count > 0)
{
try
{
Console.WriteLine("{0} has {1} Matches. File will be backed up", filePath, count);
File.Copy(filePath, filePath + ".bak", true);
content = Regex.Replace(content, searchText, replaceText);
StreamWriter writer = new StreamWriter(filePath);
writer.Write(content);
writer.Close();
}
catch (Exception e)
{
Console.WriteLine("There was an error. Please check whether the file is read only.");
}
}
}
}
}
You can download a published version from this link. Extract the contents to a single folder, eg: D:\winreplace. This application can work ONLY with plain text files like .txt, .sql, .log and files of same nature. This software cannot be used for Microsoft documents/PDF or documents of such complex architecture. Read more about Microsoft documents/PDF here
Now add this path to PATH environment variable, that will help you to access the executable from any command prompt.
You can call the executable as demonstrated in the image below.
I was pretty happy, being able to fix the sql, dat files as mentioned in the oracle-base article using “my own” utility.
Please note, there are hardly any error handling included with the application. Please ensure to make backups for your important files prior using this utility. I’ve added a no liability clause with the software (not visible with the images above as it was added later)
You must run the executable each time for different types of files. If the application fails, default error messages will be displayed, giving you a hint about what went wrong.
Recently, while dealing with some nasty issues related Widows 11 Snipping Tool recording, an interesting visitor said something like “while debugging snipping tool” & it caught my attention! So I did a quick research and realized that I can use VS(Visual Studio) to open an EXE file and do the “debugging”! So let us see how this “debugging” works. Please note, this is not as in you are going to fix anything yourself, instead the whole process gives you an idea about what is going wrong.
We will use “Snipping Tool” for this exercise. Start Snipping Tool and keep it minimized. From the Task manager, let us see where is the physical location for the executable.
Use the “Copy as path” for getting the whole path for the executable.
Open up Visual Studio, I am using Visual Studio 2019 Community edition.
Once the file opened, you will see a screen like below
Now, we need to attach this opened EXE with a running process. Click on the “Attach…” button now, that will open up a window with currently running processes.
Now go back to your application. In our case, “Snipping Tool” and try to do a screen recording.
My current setup doesn’t work for Snipping Tool screen recording and the above error display doesn’t tell the user what went wrong. Windows Event Viewer is not much help either in this case of Snipping Tool. So, let us go back to Visual Studio and see whether we can get more information about the exception.
Now, we know what went wrong, right? Interested to fix it? Well, I think we are at the mercy of Microsoft to fix such issues with their application. According to the visitor, the failing call is due to the intel driver and he has created a Microsoft Feedback entry already listing them.
So, this is one of the most inexpensive ways to understand why a particular EXE is failing & as as I stated in the beginning of the article, not truly “debugging” as in debugging. Hope, you enjoyed this article!
You might come across this error when trying to attach an existing MDF file.
TITLE: Microsoft SQL Server Management Studio
------------------------------

Failed to retrieve data for this request. (Microsoft.SqlServer.Management.Sdk.Sfc)

For help, click: https://go.microsoft.com/fwlink?ProdName=Microsoft%20SQL%20Server&LinkId=20476

------------------------------
ADDITIONAL INFORMATION:

An exception occurred while executing a Transact-SQL statement or batch. (Microsoft.SqlServer.ConnectionInfo)

------------------------------

CREATE FILE encountered operating system error 5(Access is denied.) while attempting to open or create the physical file 'D:\Microsoft SQL Server\MSSQL\Data\AM8K.mdf'. (Microsoft SQL Server, Error: 5123)

For help, click: https://docs.microsoft.com/sql/relational-databases/errors-events/mssqlserver-5123-database-engine-error

------------------------------
BUTTONS:

OK
------------------------------
Please do the following:
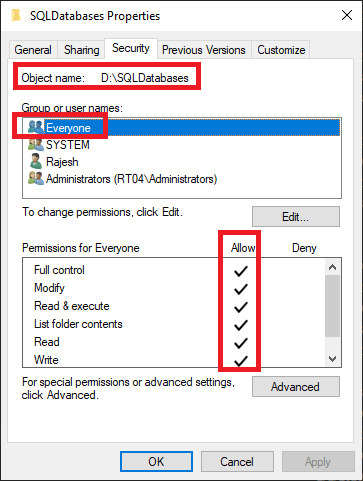
Make sure currently logged in Windows/Domain user has access to the physical folder where the MDF file resides.
Start “Microsoft SQL Server Management Studio” as administrator.
Now, try to attach the MDF file, this should resolve the Access Denied error.
Special Note: If you want ONLY get the currently logged in Windows username (useful for Windows domain networks) all you need is to change the website’s authentication to Windows & calling “User.Identity.Name”. The below example mostly looking at how to implement HttpContext in a project.
Recently we decided to retire our Classic ASP intranet application & opted ASP.NET Core for the upgrade. As a Business, we are totally in to Oracle technologies and hardly had much exposure towards .NET development. With the help of netizens, blogs and forums, we figured out the basics of CRUD operations using ASP.NET Core. However, were totally bowled out while getting currently logged in Windows usernames (domain accounts) for the application. Then we came across this post
Using the above post, we managed to figure out way to “get” the Windows username using HttpContext & realizing the above link (although helped us), was too technical for beginners and decided to make a post that simplifies the instructions further a level. So, here it is.
Please note, I am using 2019 community editions for both Visual Studio and MS SQL Database. If you are using a previous versions of Visual Studio, may not able to open the sample solution provided with this post. A note of caution. We are as fresh as possible with ASP.NET Core development & would appreciate pointing out our mistakes instead lamenting. Thank you.
So let us start creating a new ASP.NET Core project that uses C# (ASP.NET Core Web App (Model-View-Controller)
Give a meaningful name for your solution
Select “Windows Authentication” for your solution (must)
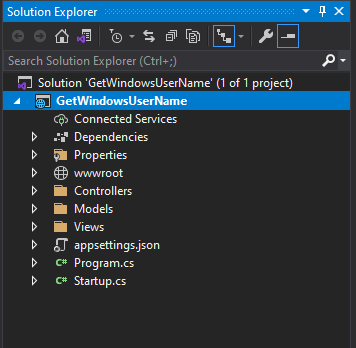
Your project explorer should look like this
Open Startup.cs file and modify “ConfigureServices” method like below
 public void ConfigureServices(IServiceCollection services)
        {
            services.AddControllersWithViews();
            //Rajesh Added the below
            services.AddHttpContextAccessor();


        }
To keep it clean and simple, we will use a class specific to establish HttpContext.
Add a new class to Models, and let us call it “WindowsUserClass”
Add Microsoft.AspNetCore.Http namespace to the class before adding the below properties initializing the class.
using Microsoft.AspNetCore.Http;
using System;
using System.Collections.Generic;
using System.Linq;
using System.Threading.Tasks;

namespace GetWindowsUserName.Models
{
    public class WindowsUserClass
    {

        private readonly IHttpContextAccessor _httpContextAccessor;
        private readonly string _userName;
        public WindowsUserClass(IHttpContextAccessor httpContextAccessor)
        {
            _httpContextAccessor = httpContextAccessor;
            _userName = httpContextAccessor.HttpContext.User.Identity.Name;
        }

        public string GetUserName()
        {
            return _userName;
        }
    }
}
We will use the Controller construct dependency injection (read it, going to be difficult to understand if you are a beginner like us :) ) to initialize the WindowsUserClass by passing IHttpContextAccessor as a parameter.
HomeController constructor before adding IHttpContextAccessor
After modification
You have to add Microsoft.AspNetCore.Http namespace to the controller also.
Now we should able to call the GetUserName() function from WindowsUserClass from the HomeController! Let us give it a try
We’ll modify the Index view call slightly by passing the “yourusername” string.
We’ll modify “Index” view to show our Windows username now. You can call the view directly referring the GetUserName() function also. That will avoid an additional variable declaration.
@model string
@{
    ViewData["Title"] = "Home Page";
}

<div class="text-center">
    <h1 class="display-4">Welcome @Model</h1>
    <p>Learn about <a href="https://docs.microsoft.com/aspnet/core">building Web apps with ASP.NET Core</a>.</p>
</div>
Before executing your project, we must change one more existing file!
Open launchSettings.json file and modify the content like below
You must change the windowsAuthentication string value to “true” and anonymousAuthentication to “false”. Save the changes.
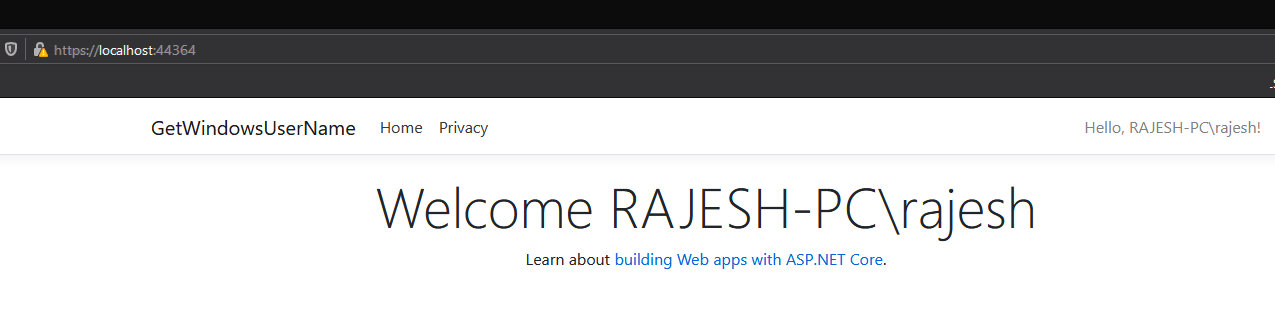
You can build the solution and run to debug to check whether the solution is working as per expectations. One of the most important things you MUST understand now, for HttpContext to fetch you the intended results, your website should not be configured for Anonymous authentication. Here is the screen once after you enter the windows username and password when prompted!
You must change the website’s authentication methods prior publishing using IIS. For example
Hope this helps few out there! If the situation permits, I might record a video with instructions soon for the same. Stay tuned folks. For those who cannot open the Visual Studio 2019 solution using their versions of VS, find the page codes below. This way of calling HttpContextAccessor is supported from ASP.NET Core 3.1
Startup.cs
using Microsoft.AspNetCore.Builder;
using Microsoft.AspNetCore.Hosting;
using Microsoft.AspNetCore.HttpsPolicy;
using Microsoft.Extensions.Configuration;
using Microsoft.Extensions.DependencyInjection;
using Microsoft.Extensions.Hosting;
using System;
using System.Collections.Generic;
using System.Linq;
using System.Threading.Tasks;

namespace GetWindowsUserName
{
    public class Startup
    {
        public Startup(IConfiguration configuration)
        {
            Configuration = configuration;
        }

        public IConfiguration Configuration { get; }

        // This method gets called by the runtime. Use this method to add services to the container.
        public void ConfigureServices(IServiceCollection services)
        {
            services.AddControllersWithViews();
            //Rajesh Added the below
            services.AddHttpContextAccessor();


        }

        // This method gets called by the runtime. Use this method to configure the HTTP request pipeline.
        public void Configure(IApplicationBuilder app, IWebHostEnvironment env)
        {
            if (env.IsDevelopment())
            {
                app.UseDeveloperExceptionPage();
            }
            else
            {
                app.UseExceptionHandler("/Home/Error");
                // The default HSTS value is 30 days. You may want to change this for production scenarios, see https://aka.ms/aspnetcore-hsts.
                app.UseHsts();
            }
            app.UseHttpsRedirection();
            app.UseStaticFiles();

            app.UseRouting();

            app.UseAuthorization();

            app.UseEndpoints(endpoints =>
            {
                endpoints.MapControllerRoute(
                    name: "default",
                    pattern: "{controller=Home}/{action=Index}/{id?}");
            });
        }
    }
}
HomeController.cs
using GetWindowsUserName.Models;
using Microsoft.AspNetCore.Http;
using Microsoft.AspNetCore.Mvc;
using Microsoft.Extensions.Logging;
using System;
using System.Collections.Generic;
using System.Diagnostics;
using System.Linq;
using System.Threading.Tasks;

namespace GetWindowsUserName.Controllers
{
    public class HomeController : Controller
    {
        private readonly ILogger<HomeController> _logger;

        WindowsUserClass windowsUserClass = null;
        public HomeController(ILogger<HomeController> logger, IHttpContextAccessor httpContextAccessor)
        {
            _logger = logger;

            windowsUserClass = new WindowsUserClass(httpContextAccessor);
        }

        public IActionResult Index()
        {

            string yourusername = windowsUserClass.GetUserName();

            return View("Index",yourusername);
        }

        public IActionResult Privacy()
        {
            return View();
        }

        [ResponseCache(Duration = 0, Location = ResponseCacheLocation.None, NoStore = true)]
        public IActionResult Error()
        {
            return View(new ErrorViewModel { RequestId = Activity.Current?.Id ?? HttpContext.TraceIdentifier });
        }
    }
}
WindowsUserClass.cs
using Microsoft.AspNetCore.Http;
using System;
using System.Collections.Generic;
using System.Linq;
using System.Threading.Tasks;

namespace GetWindowsUserName.Models
{
    public class WindowsUserClass
    {

        private readonly IHttpContextAccessor _httpContextAccessor;
        private readonly string _userName;
        public WindowsUserClass(IHttpContextAccessor httpContextAccessor)
        {
            _httpContextAccessor = httpContextAccessor;
            _userName = httpContextAccessor.HttpContext.User.Identity.Name;
        }

        public string GetUserName()
        {
            return _userName;
        }
    }
}
You may download the sample solution from this link.
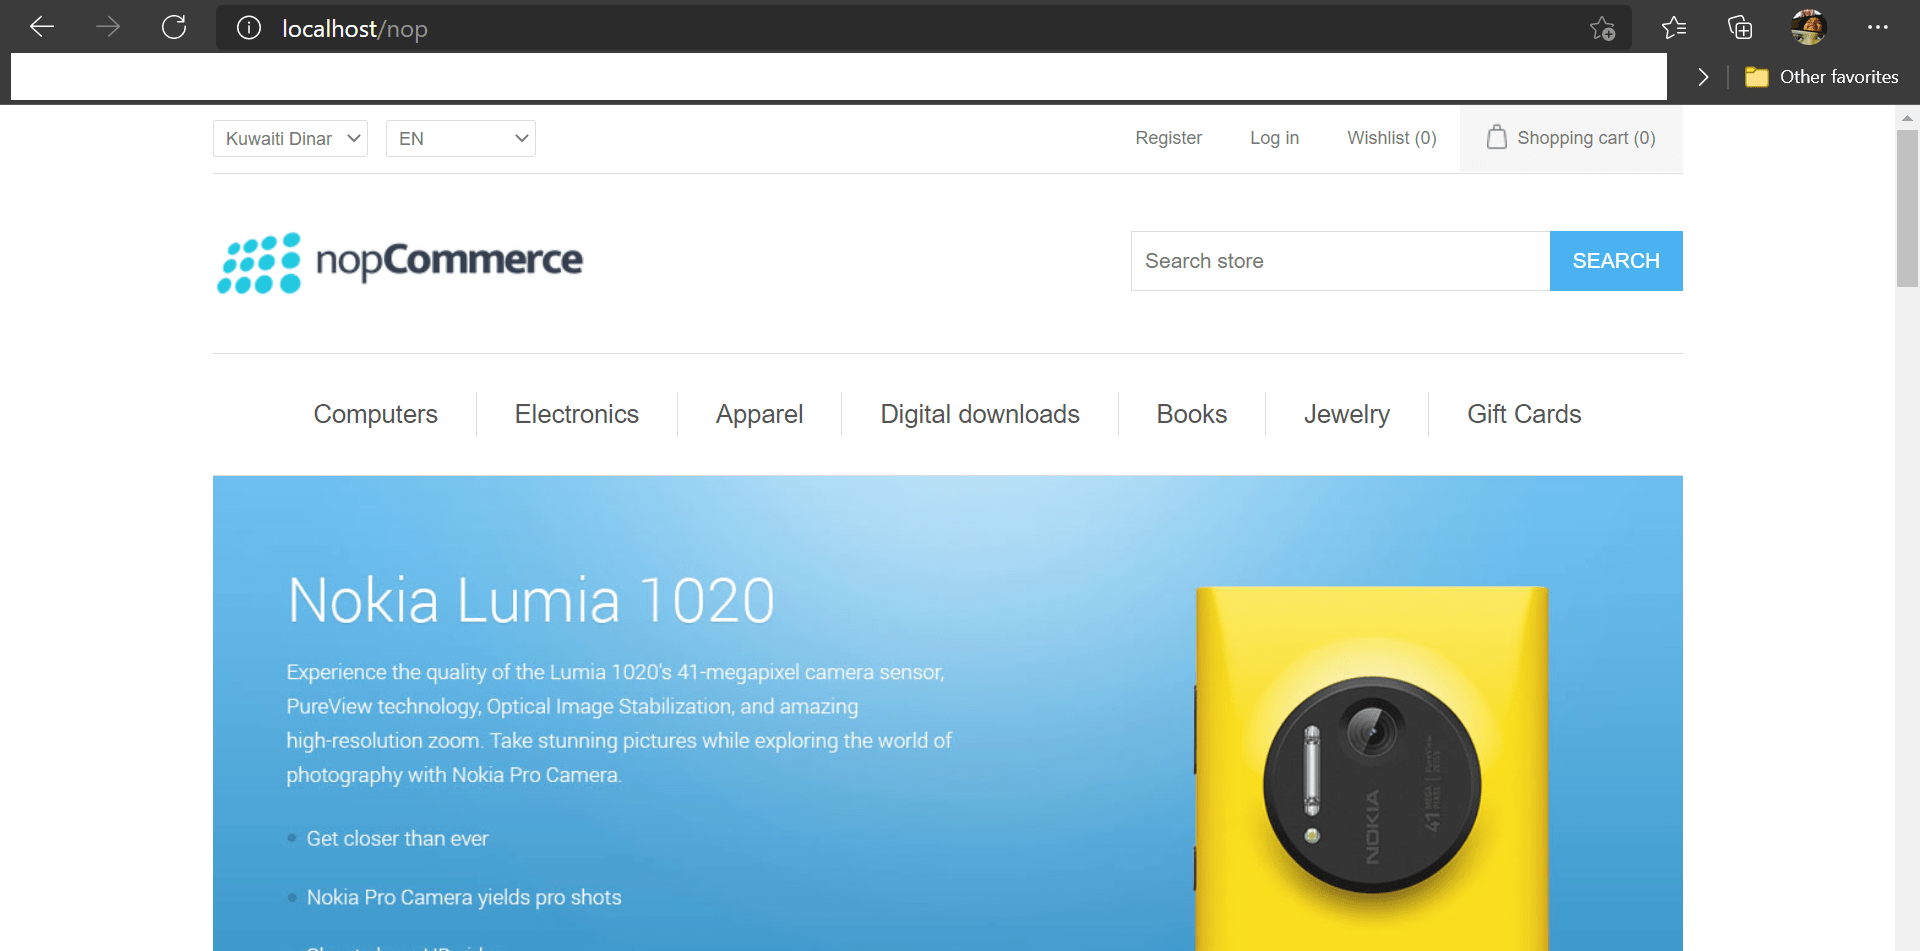
nopCommerce is one of the free and open-source eCommerce platforms that you can instantly publish and go online with. Please follow the below steps to publish nopCommerce using IIS
Download nopCommerce. If you are not going to develop the suite further, better download package without source code.
Unzip the package.
Based on your choice, you can move this folder to C:\inetpub\wwwroot\. For example, I renamed the folder and current path for nopCommerce is C:\inetpub\wwwroot\nop
You can have this folder anywhere in your computer. Just make sure that you changed the permissions as specified below. Full control is only recommended for development environments.
The most important element of publishing nopCommerce successfully is how you setup the folder access to IIS_IUSRS. Right click on the folder and change the permissions to either Full Control or Read, Write. Failing will fail the nopCommerce suite from launching. You will keep getting “HTTP Error 500.30 – ASP.NET Core app failed to start” until you change the folder permissions.
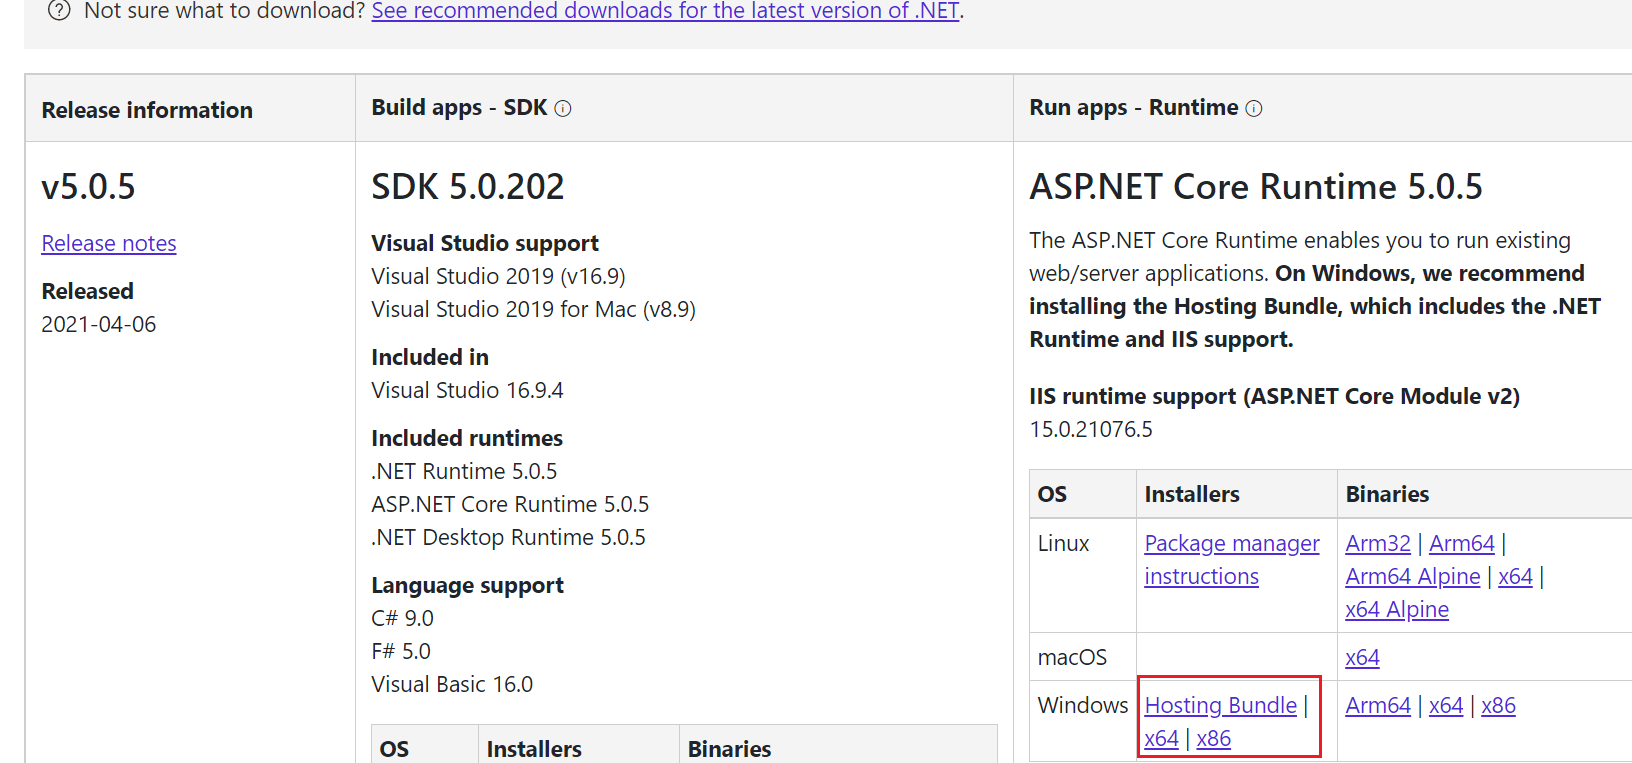
Now, install DOTNET Core Hosting Bundle. While writing this article, the latest stable version was 5.0.5 and you can download the same from here. Just make sure that you download the correct Hosting Bundle.
Install the bundle, that takes hardly couple of minutes. Once the bundle is installed, restart the IIS service.
Create a database on your SQL Server, exclusively dedicated for nopCommerce. You have to provide these details while setting up nopCommerce for the first time. You may skip creating the database yourself, as the installer offers to create a new database during the installation. However, you must be ready with the connection credentials. nopCommerce supports both integrated security and user/password based security approaches.
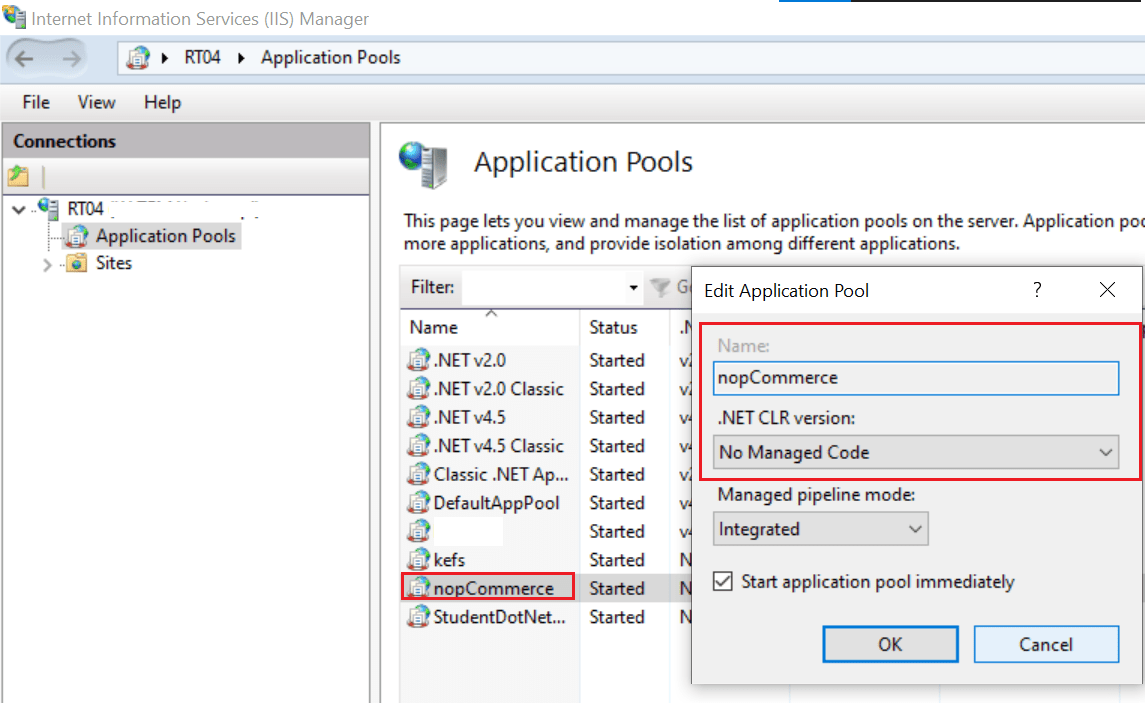
Create a new Application pool. Make sure the Application pool has .NET CLR Version set as “No Managed Code”. I can confirm that nopCommerce works with .NET CLR Version set as well. However, all the documents are asking you to setup “No Managed Code”
Finally you can publish nopCommerce. You can either publish nopCommerce as an application with an existing website or create a new website and publish it. For my development machine, I opted to publish it with existing website.
Open your favorite browser and point to http://localhost/nop or http://localhost based on how you published the application & you must be taken the nopCommerce installation. Follow the instructions & I suggest you to select sample items during installation. This will give you an idea of how the items are presented over your portal. You can remove those sample items anytime. Make sure that you will enable the https switch in the application before implementing https for the application with IIS.
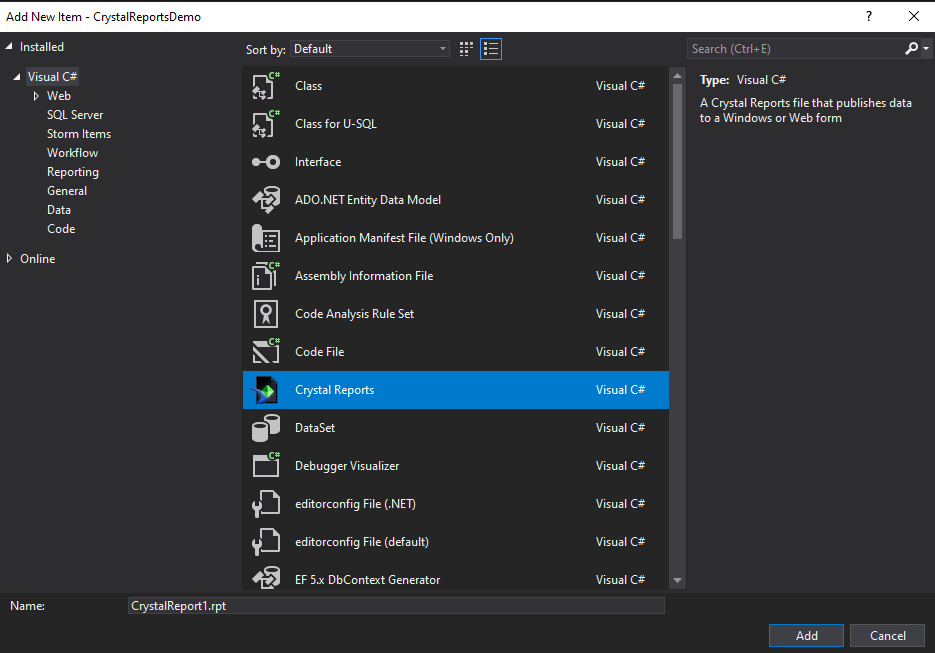
This is the 2nd part of my experiences with SAP Crystal Reports for Visual Studio. I’ve posted about installing & creating a simple Crystal Report earlier, if you haven’t read it yet, please find it here.
One of the major confusions around passing values to a Crystal Report was contributed by multiple questions and answers available on StackOverFlow. The ones which came nearest to my requirements had only “teasers”, not real solutions! Finally on the 3rd or 4th day, I realized that, the parameters were called based on the index numbers and the finding the index numbers for parameters were as simple as counting the 1st parameter as “0” & incrementing the index number with 1 for subsequent parameters.
Example Scenario:
I am using a stored procedure with the crystal report that accepts more than 1 parameter to select data from different tables
Here with this example, I am trying to list the salaries for employees based on the year, month & company section in which they are working as filters. An end user will pick up those filters from a web form and pass to the crystal report before the final report is generated.
Crystal report has a very simple method to pass the parameters & I am limiting this post to “Stored Procedure” based reports. The same should apply to table/dataset based reports as well until you have sub-reports involved.
In this example, you could see that I have @pProcessYear, @pProcessMonth & @pProcessSection as parameters for the report. Notice the order they are listed (refer the picture)
@pProcessYear is listed first, followed by @pProcessMonth & @pProcessSection. So the index number for @pProcessYear is 0 and @pProcessMonth is 1 & @pProcessSection is 2!
Now, let us see how we will pass values to these parameters from a WebForm.
using CrystalDecisions.CrystalReports.Engine;
using CrystalDecisions.Shared;
using System;
using System.Collections.Generic;
using System.Linq;
using System.Web;
using System.Web.UI;
using System.Web.UI.WebControls;
using Table = CrystalDecisions.CrystalReports.Engine.Table;

namespace insert_demo
{
    public partial class ShowEmp : System.Web.UI.Page
    {
        protected void Page_Load(object sender, EventArgs e)
        {
            if (!IsPostBack)
            {
                ReportDocument reportDocument = new ReportDocument();
                reportDocument.Load(Server.MapPath(@"~/CrystalReport2.rpt"));
                reportDocument.SetParameterValue(0, 2020);
                reportDocument.SetParameterValue(1, 1);
                reportDocument.SetParameterValue(2, 3);

                reportDocument.DataSourceConnections[0].SetConnection("RAJESH-PC", "MenaSS", true);
                CrystalReportViewer1.ReportSource = reportDocument;

            }
        }
	}
}
Notice the intellisense suggestion for Crystal Reports document parameter. Definitely “ReportDocument.SetParameterValue” expects an integer value for the index, when much of the examples available with StackOverFlow were passing report parameter names in the place of index, which didn’t work at all. I am forced to believe, Crystal Reports used to accept this for previous versions of Crystal Reports for Visual Studio & may be not many are using Crystal Reports with Visual Studio anymore…? Interestingly most of the questions related to the subject were many years old.
So, it is as simple is going through the order of the parameters as they are listed on the report design form (the order never changes, unless you delete and recreate them), starting with the index number 0 for the first parameter, increase by 1 until the last parameter & pass the values accordingly & you are done!
With my next post, I will try to talk about sub-reports and complex formatting using available Crystal Report tools.
My .Net developments were ALWAYS at risk! Whenever I am doing it good, the project gets cancelled & I return to the Oracle world.
Anyway, for the last project that is about be shelved, I chose SAP Crystal Reports in addition to Microsoft’s RDLC for few reasons. Microsoft has stopped shipping Report components with their IDE Visual Studio & getting it work by installing Nuget packages and extension methods are not going to be very easy for most of the newbies (I am a life long newbie when it is all about .NET development)
On the other hand, installing & going online with SAP Crystal Reports for Visual Studio is pretty straight forward. Download the package from SAP, install it and you are all set to go. Well definitely not!
Let us quickly see how to install & get the most out of SAP Crystal Reports.
Installation
Server Runtime
Your 1st Crystal Report
POST BACK and hacks
Installation
Register & download SAP Crystal Reports for Visual Studio. Make sure you install the runtime engine which is prompted during the installation. Simple as it is.
Server Runtime
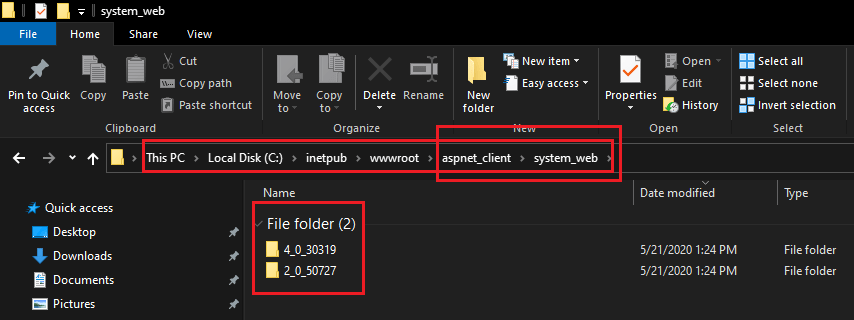
If you are publishing your application with SAP reports from another computer/Server make sure you install the Runtime package.
If you’ve installed the runtime, this will create the below structure under inetpub\wwwroot folder
Your 1st Crystal Report
If you are a .Net developer, already familiar with dragging and dropping controls from the Toolbox node(s). Crystal Reports is not different. Just drag and drop “CrystalReportViewer” control to your page & you are all set to go.
Dropping the control to the page adds many references to your project. You may scroll through the references to identify them. All the references have “Crystal” in the name.
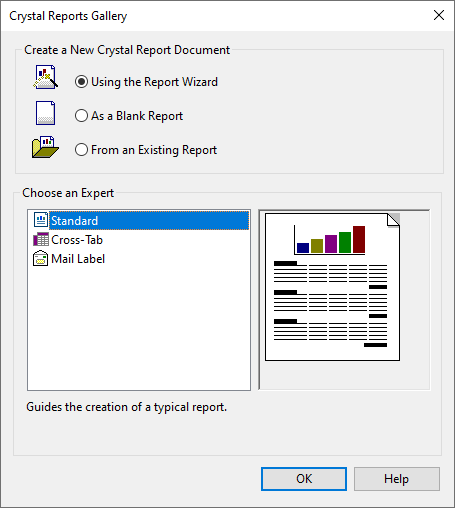
Now let us create a sample report & view the report on the web.
If this is your 1st attempt to create a report, select the default & continue. Based on the connections already available in the environment, you will be provided existing connections or an option to create a new connection.
Here is the catch. If the database (MSSQL or other) is configured for integrated security & you prefer to continue using the same for your project, you must make sure that from your webform/page you will be sticking to the same authentication method. Said, you cannot use integrated authentication during design and username/password login during the runtime. So be careful when you are creating connections.
We will create a new connection using username and password to local MS SQL server.
You don’t have to change anything here. Just click the “Finish” button to complete the connection.
That’s it. This creates a new connection and the same will be available under “My Connections”.
Now from the connection, you can select a table, view or stored procedure for your report as source. I have selected a table “bal2020” as you could see with the below image.
Once you click the OK button, you will be taken back to object browser window.
You can see that the table you have selected is shown under “Database Fields” node and expanding the Table node will show you the available columns those you could add to the report.
Drag and drop the columns you want to add in the “Section 3 (Details)” area and the act creates relevant titles in the “Section 2 (Page Header)” area. You can always modify the titles.
Unlike RDLC, you can immediately preview your reports from the design window itself by switching to “Main Report Preview” tab.
Let us see how this report viewed from a webform/page.
As we are trying to create a report for the first time, I suggest you to use the GUI for linking your newly created report with the webform/page.
Select “New Report Source” form “Choose Report Source” and select your newly created report. Leave the names as seen for this exercise.
Prior attaching the report, the Crystal Report Viewer control code was minimal like below
As there are not complex code involved as in with stored procedures, your page will load the report. You can save the webform & try to see whether it truly gets loaded on the browser.
Save everything & build the solution & debug the page that you have just created. Do not use Internet Explorer for debugging. You may end up with “N” number of errors by using IE.
Something is wrong, right? let us see why the report is not loading. With this specific case, an empty page in the place of report viewer is due to missing runtime binaries. If you remember, I asked you to install the runtime while installing the report developer. So there is something wrong…
I don’t have the technical knowledge to confidently say it is a bug , however looks like one, with certain solutions, the symbolic link to rootdrive:\inetpub\wwwroot\aspnet_client is not created within the solution folder after Crystal Report Viewer control is added. Failing to find “aspnet_client” symbolic link to the actual path where the runtime binaries are kept results in failing to load the report on the browser, unfortunately without generating visible errors. While missing the symbolic link being one of the major reasons, there could be few other reasons as well like application pool configured for both 32 Bit & 64 Bit. I have noticed that if your default application pool is configured to cater both 32 & 64 Bit, the 64 Bit runtime will not load & errors will be generated while trying to load reports. If you have installed 64 Bit SAP components, create a new application pool exclusively for 64 Bit only.
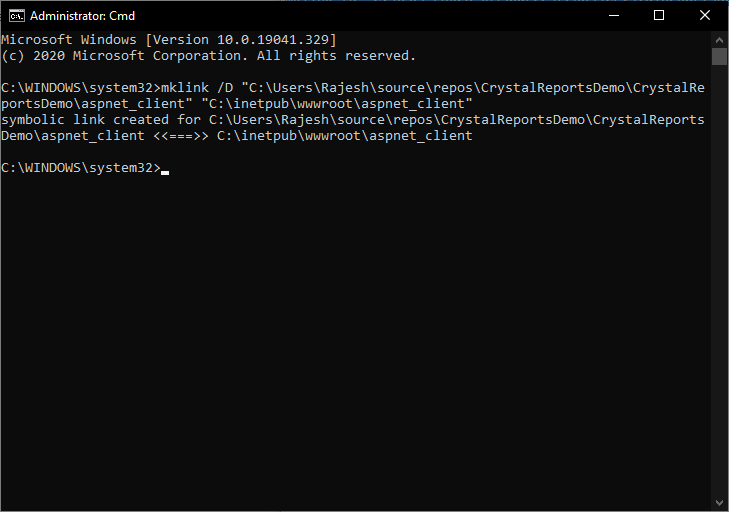
To resolve the issues due to runtime binaries, we can either create a symbolic link to “rootdrive:\inetpub\wwwroot\aspnet_client” or copy the entire aspnet_client folder to project, which is approximately 17-18 MBs in size.
I will always prefer the 1st option. So let us see how we can create a symbolic link to “rootdrive:\inetpub\wwwroot\aspnet_client” from our project.
The above symbolic link is explained as below.
Your project is created under user’s home folder. For example, my username is Rajesh. Hence Visual Studio has created a path “sources\repos” where all new solutions will be created and stored (unless I change the VS options)
As I have chosen “CrystalReportsDemo” as my solution name, a folder with the same name is created inside “sources\repos” and the solution related files and folders are kept within a subfolder with the solution name. Finally, the path will look like below once after the solution is created.
We are expected to create the symbolic link to “aspnet_client” folder inside the “CrystalReportsDemo” subfolder.
The symbolic link must have a name, hence you will provide “aspnet_client” as the link name (no other names please!) and refer the original path of aspnet_client as source.
I know it sounds bit complex and I hope you will get a hang of it with practice. A successfully created symbolic link will look like below. If you have grouping enabled for the files in explorer, the newly created symbolic link will be listed under folders.
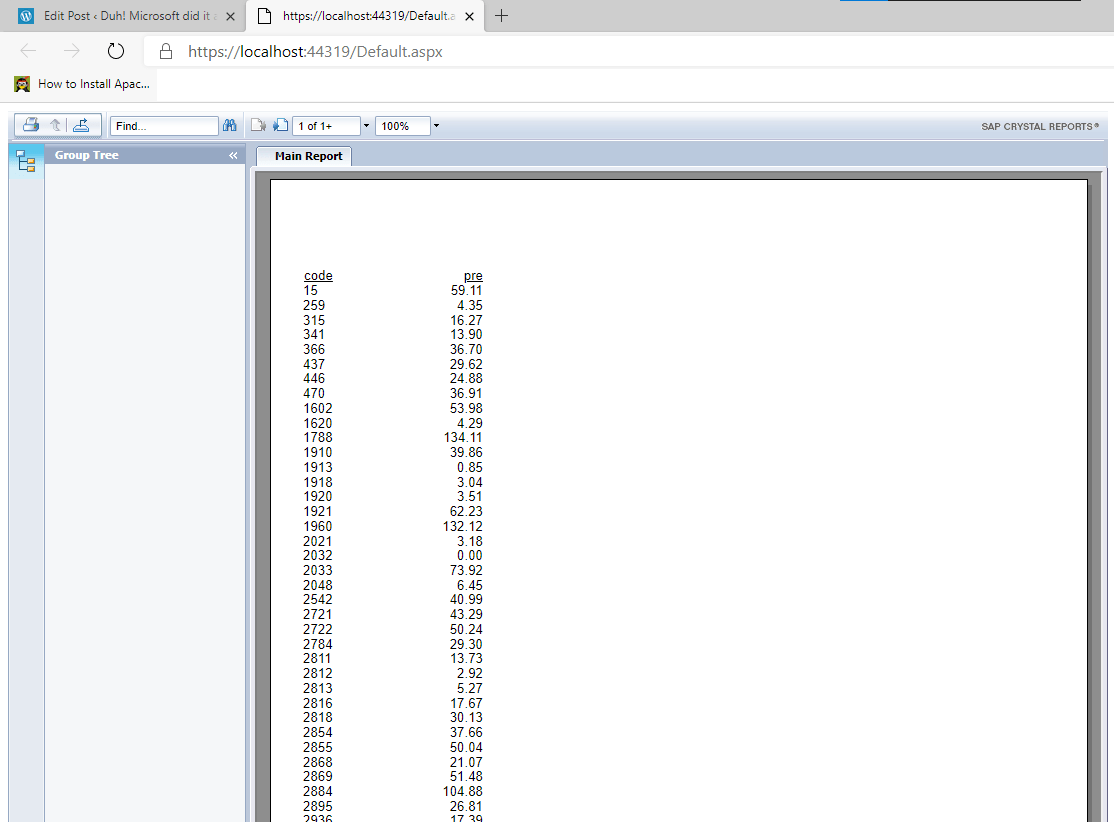
Let us try to view the webform once again after creating the symbolic link.
Basically, when you add a crystal report to your solution, it is treated as an “Embedded Resource” & not copied to output directory. Unless you change these properties, your published application will not able to access the reports. Let us see quickly how these changes are made.
Now the output directory will copy the report files each time the solution is built.
PostBack & hacks
What is PostBack? PostBack is the name given to the process of submitting an ASP.NET page to the server for processing. This has a big effect on how Crystal Reports behave.
Consider a case when you have a webform that has few user choices & a crystal report attached to it. By default much of the ASP.Net controls support “AutoPostBack” property & very useful when a developer wants to refer to other controls values programmatically. Well, each instance of AutoPostBack causes the Crystal Report to refresh itself.
As you are already aware ASP.Net is stateless and Crystal Report will loose all functionalities like progressing to next page or previous page etc when associated buttons on the toolbar is pressed immediately after a postback. In addition to losing these functionality, you may be prompted to enter the database connection details. SAP recommends using Page_Init() instead of Page_Load() method in addition to using session variables to load the report after postback. We will see a complex sample now, which is from a production environment.
Scope of the report
Generate a report for Finance department that lists all salary elements for a chosen company, department & few other selections by the end user.
So this particular report has a total of 5 parameters received from the user & clicking the “Print Report” should show the report with relevant data.
The above report uses multiple stored procedures to fetch the relevant data for the report & copying the script here will defy the intend. Hence I will copy a sample that I posted as an answer to my own question over StackOverFlow & explain it.
The below example generates the same report sample you have seen above, however much of the parameters are hardcoded & the only user interactable control is the button. This report uses database stored procedures for report data.
using CrystalDecisions.CrystalReports.Engine;
using System;
using System.Collections.Generic;
using System.Configuration;
using System.Data;
using System.Data.SqlClient;
using System.Linq;
using System.Web;
using System.Web.UI;
using System.Web.UI.WebControls;
namespace CrystalTest
{
    public partial class c4 : System.Web.UI.Page
    {
        protected void Page_Init(object sender, EventArgs e)
        {
            if (IsPostBack)
            {
                CrystalReportViewer1.ReportSource = (ReportDocument)Session["Report"];
            }
        }
        private void ShowReport1()
        {
            string ConnectionString = ConfigurationManager.ConnectionStrings["menass"].ToString();
            using (SqlConnection con = new SqlConnection(ConnectionString))
            {
                using (SqlCommand cmd = new SqlCommand("GETMONTHSALARY", con))
                {
                    cmd.CommandType = CommandType.StoredProcedure;
                    cmd.Parameters.Add("@pProcessYear", SqlDbType.Int).Value = 2020;
                    cmd.Parameters.Add("@pProcessMonth", SqlDbType.Int).Value = 1;
                    cmd.Parameters.Add("@pProcessSection", SqlDbType.VarChar).Value = "9";
                    cmd.Parameters.Add("@pProcessSite", SqlDbType.VarChar).Value = "1";
                    cmd.Parameters.Add("@pProcessCatg", SqlDbType.VarChar).Value = "1";
                    SqlDataAdapter adapter = new SqlDataAdapter(cmd);
                    DataSet ds = new DataSet();
                    adapter.Fill(ds, "SalaryDT");
                    ReportDocument oRpt = new ReportDocument();
                    oRpt.Load(Server.MapPath(@"~/dataset/CrystalReport1.rpt"));
                    oRpt.DataSourceConnections.Clear();
                    oRpt.SetDataSource(ds);
                    oRpt.Subreports[0].SetDataSource(FillOverTime());
                    CrystalReportViewer1.Visible = true;
                    CrystalReportViewer1.ReportSource = oRpt;
                    Session["Report"] = oRpt;
                }
            }
        }
        private DataSet FillOverTime()
        {
            string ConnectionString = ConfigurationManager.ConnectionStrings["menass"].ToString();
            using (SqlConnection con = new SqlConnection(ConnectionString))
            {
                using (SqlCommand cmd = new SqlCommand("GetEmployeeOverTime", con))
                {
                    cmd.CommandType = CommandType.StoredProcedure;
                    cmd.Parameters.Add("@pEmployeeCode", SqlDbType.VarChar).Value = DBNull.Value;
                    cmd.Parameters.Add("@pProcessYear", SqlDbType.Int).Value = 2020;
                    cmd.Parameters.Add("@pProcessMonth", SqlDbType.Int).Value = 1;
                    SqlDataAdapter adapter = new SqlDataAdapter(cmd);
                    DataSet ds1 = new DataSet();
                    adapter.Fill(ds1, "OverTimeDT");
                    return ds1;
                }
            }
        }
        protected void Button1_Click(object sender, EventArgs e)
        {
            ShowReport1();
        }
    }
}
The above sample uses 2 different stored procedures to generate data for main report and a sub report. ShowReport1() method is triggered when the button is clicked. Once the report is generated, it is saved into a session object & whenever a post back happens, this saved object is assigned to report source. Simple as it is. Each button click on the reports toolbar is treated as post back, triggering the report source being assigned again and again. You might notice that I don’t have a Page_Load() method with the code behind!
I know this is just a beginning & including more detailing might make the post irrelevant. With my next post, I will try to explain Crystal Reports parameters, sub-reports etc.
At times we have to have a recent backup of the SQL database on a development machine to insure that our testing is false-proof prior the same is pushed to a production instance. As SSMS (SQL Server Management Studio) doesn’t allow remote backup functionality out of the box, we can try the following (applies to both home networks and windows domain networks)
From your local machine, setup a shared folder, giving full read/write access to the entity “Everyone”
Now, prior attempting below instructions, be sure of your privileges against the target database. Are you a sys admin? Does your database account have the rights to make a backup? If yes, go ahead
Now, start SSMS & proceed with the backup task
Depending upon the security constraints, you may disable the sharing of local folder immediately after the backup completion.