Last updated on 7th January 2026

The most awkward thing about the entire exercise is, we don't use Weblogic with a combination of Forms & Reports 12c/14c at work. The only Weblogic instance that we use is tied to Oracle EBS R12 & that's an ancient version.

Today I am expanding the article with initial setup (only for lab purposes), instructions for publishing a sample application & few issues related to reports. I lost the Windows 11 VM on which I had the  Weblogic installation on C:\ Drive. On the new VM I installed the stack on my default path "D:\Weblogic\Middleware\Oracle_Home". I hope the instructions that refer this path will not confuse you.
If you did refer my previous post(s) for Oracle Forms & Reports 12c installation, this note is not going to be much different other than for few more options one must choose in order to install the stack!
- Your Windows Box, let it be desktop or server OS, patched to the latest.
- Static IP address, proper hostname.
- Minimum 8GB memory available for database + Middleware processes. More is merrier!
- Always use old command prompt (cmd.exe) for installing, setting up and start weblogic services. You are warned!
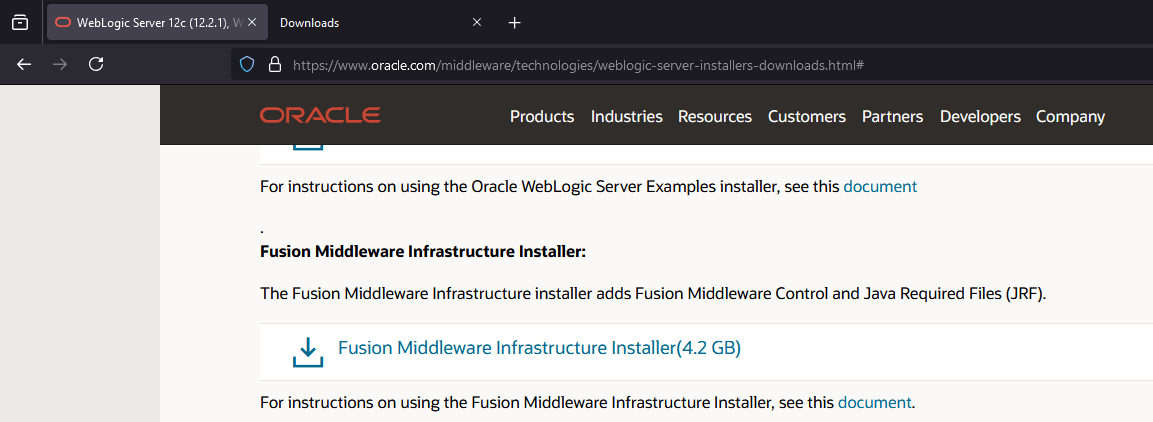
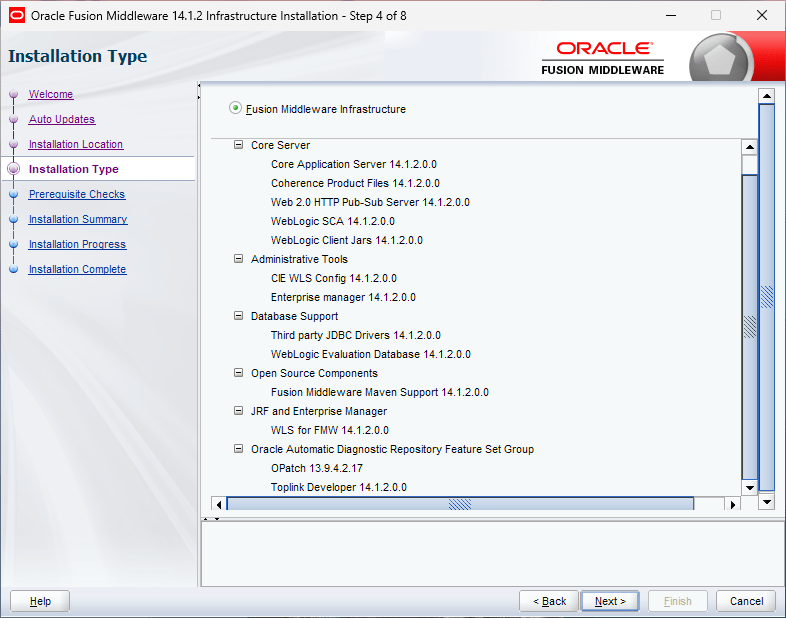
We will be installing Oracle Fusion Middleware 14.1.2/Weblogic Server using Oracle JDK version 21, that is the highest version supported as on date. You should download Fusion Middleware Infrastructure Installer, or Weblogic Installer from Oracle e-delivery portal for Windows. Please do the same for Oracle Forms & Reports also.
This time I installed the entire stack including a fresh 19c database instance on a fresh Windows 11 23H2 VM, to make sure no other Oracle products installed were interfering with the setup. Please refer this document ensure you have all the prerequisites met for the installation. To make is easier, if your Windows box is up to date, then you need to install Visual C++ run-time as mentioned in the document. Please note, these instructions are only valid for the current version of Weblogic/Fusion Middleware installation. You must refer updated documents for newer versions.

Once JDK 21 installed, make sure that you will adjust the PATH with JDK 21 being the first entry.

Let us start by Installing Weblogic/Fusion Middleware. Open an elevated command prompt and switch to the path where you have JDK installed. I usually always install JAVA software on C:\Java path. If you are on Windows 10 or Windows 11 use copy as path feature to get the filename along with complete path and proceed with the command. Please modify to suite your setup. Example
java -jar "D:\Oracle_Installers\Fusion_MiddleWare14\V1045135-01\fmw_14.1.2.0.0_infrastructure.jar"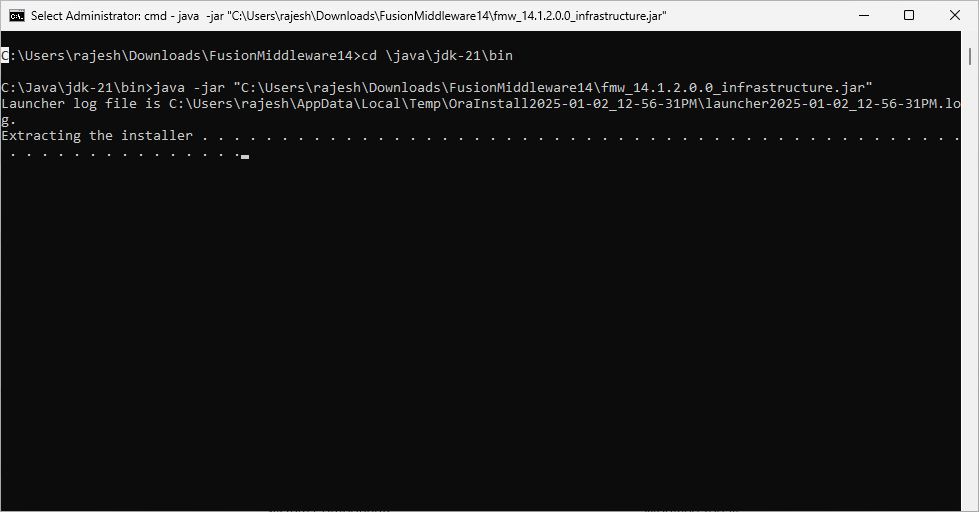
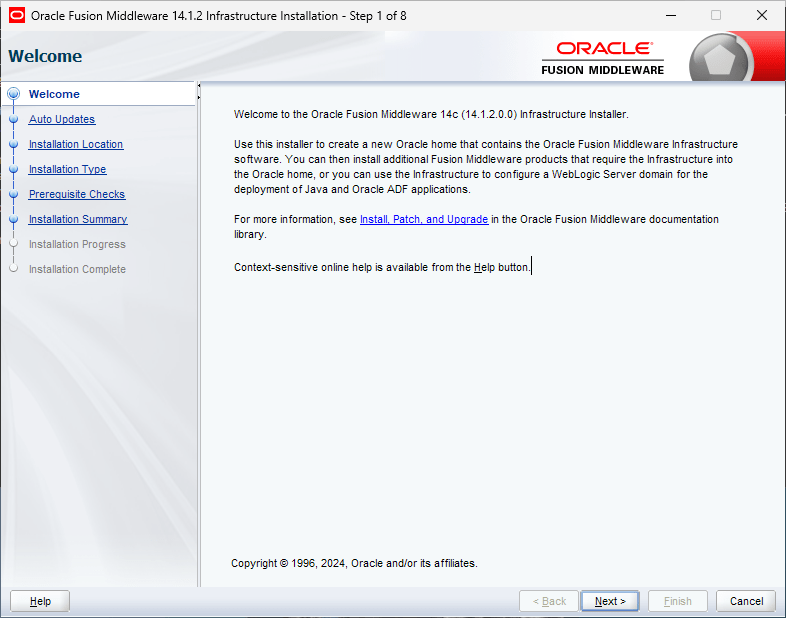
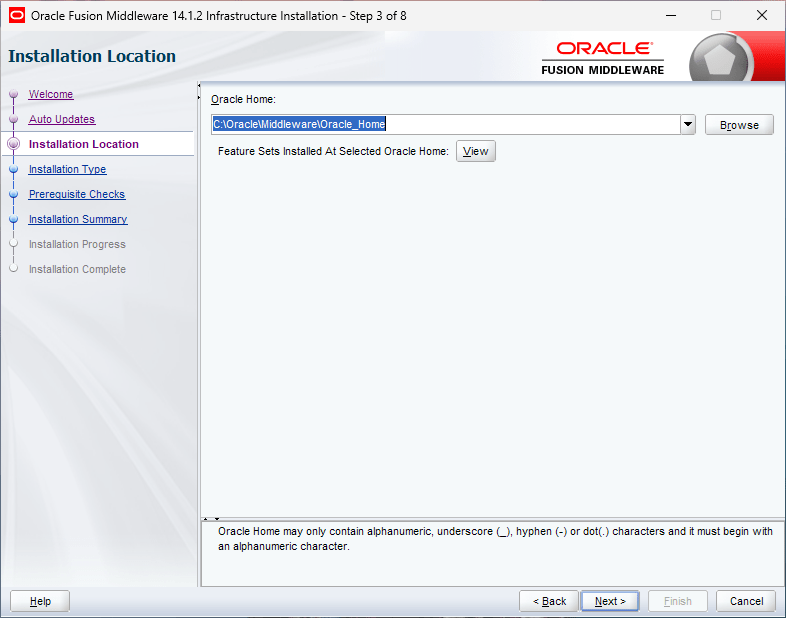
This could take a while based on the hardware resources available and soon you will be presented with the usual Oracle welcome screen. As this installation is “eventless”, I will not have much to explain further for the Weblogic installation. My new VM had only one partition C:, hence I installed Oracle database in C:\oracle folder and chose the same path for rest of the software as well.
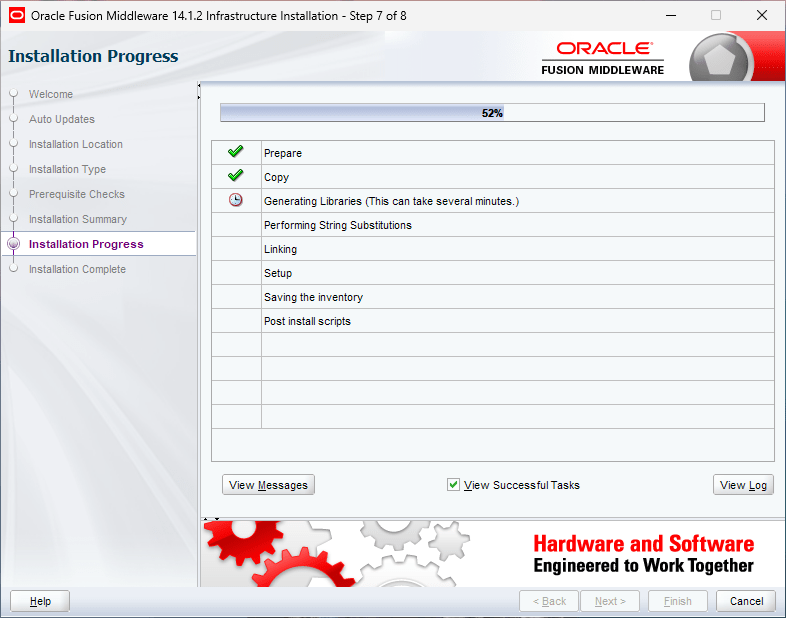


That’s all folks. As I mentioned earlier, installation of Weblogic 14.1.2 on a fully patched Windows OS is eventless. We will proceed with Oracle Forms and Reports 14.1.2 installation now. This is another installation that is as eventless as the previous one :)
Right click the installer and start as Administrator is the only geeky instruction for this installer.

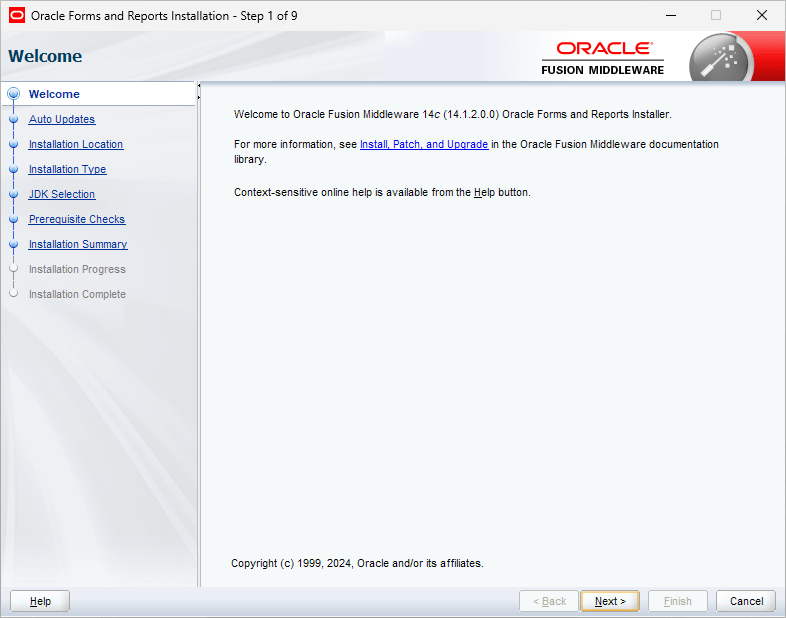

You must make sure that forms & reports are getting installed on the same home where we have already installed Weblogic server. So when the installer prompts for the Oracle Home, pick the one from the dropdown list.

Oracle offers the developers to install the Forms developer as a standalone product, that will not serve our current purpose. Hence, select Forms and Reports Deployment.

Select the default JDK


That completes the Oracle Forms and Reports Installation.
Special note. Unless registered as service and database, many connections to the PDB will fail during and post setup, especially while Weblogic Admin Server startup. Make sure to add the listener port exception in the defender firewall for incoming connections also. I have added the PDB as a service and registered the same as Database with Listener prior setting up the REPO for the classic domain.

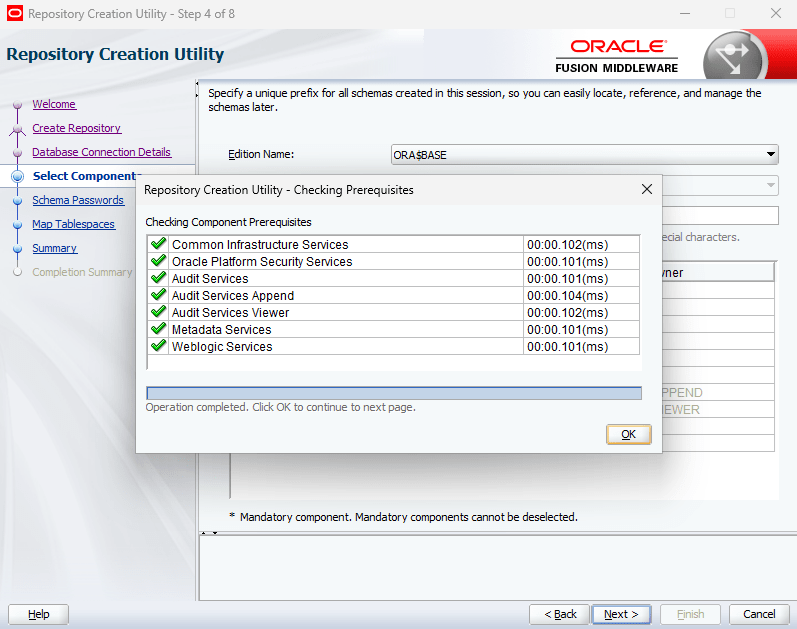
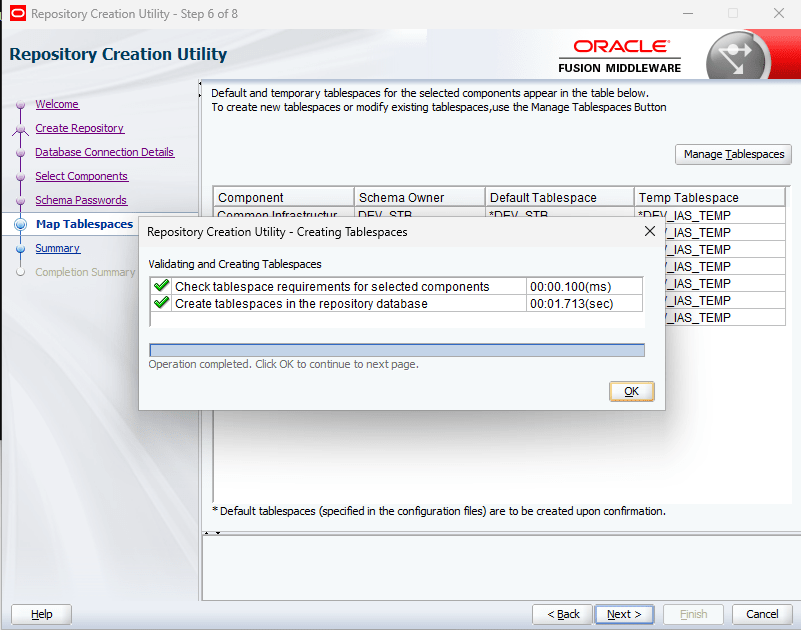
Now we will proceed with setting up Repository for our classic domain. I mentioned in the beginning of the article that I installed a fresh instance of Oracle database 19c for this purpose and during the installation I have created one PDB that will hold the repo data for our classic domain. Switch to the path where you have installed Weblogic server from an elevated command prompt. For example, C:\oracle\Middleware\Oracle_home. Now switch to oracle_common\bin and execute “rcu.bat” script file.

Choose the defaults, that is create repository with the option system load and product load.


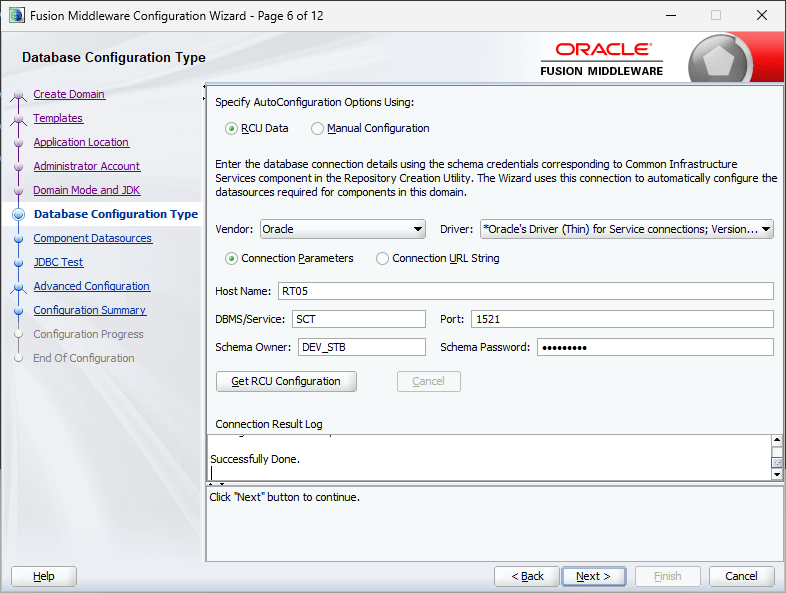
If there are no connection issues, you should see the below screen immediately.

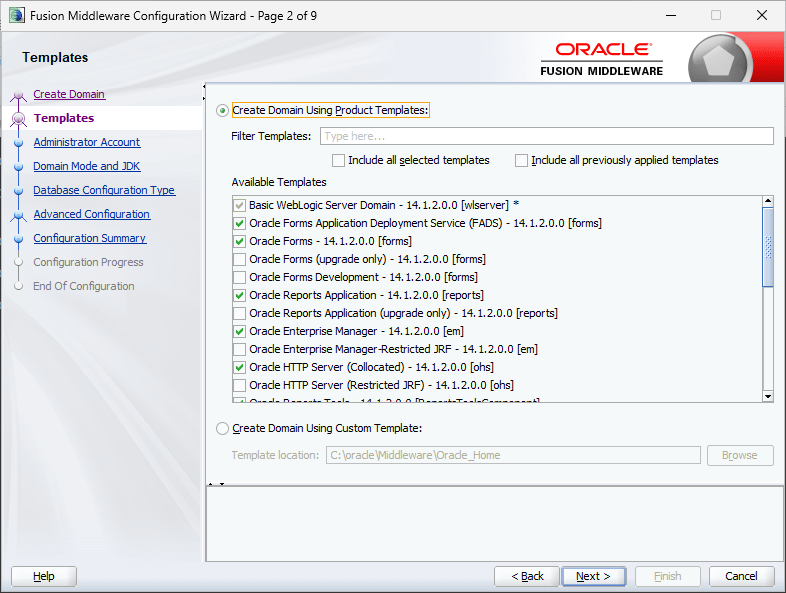
Select all components as seen with the below image.

Use the same password for all schemas.

You may define a new tablespace for this purpose using the Manage Tablespace button.


This is another eventless setup, unless the PDB connections become a trouble. Now, we can go ahead and configure a classic domain, using which we will setup both FORMS & REPORTS instances for applications.
From the same path, execute the script file “config.cmd”

Whatever mistakes you make during this phase will force you to create new repo, go through these steps once again. So, make sure you will cross check all details prior proceeding to next steps. Considering you are creating a new classic domain, leave the suggestions as it is.
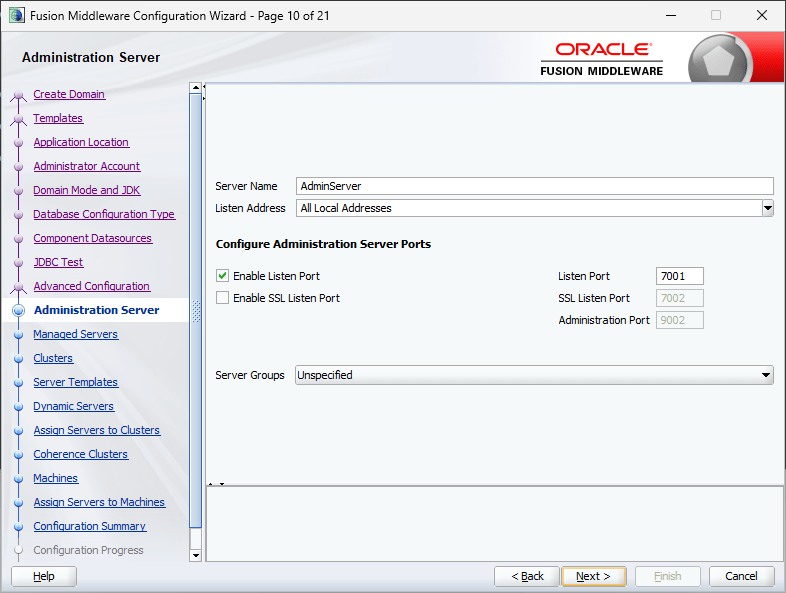
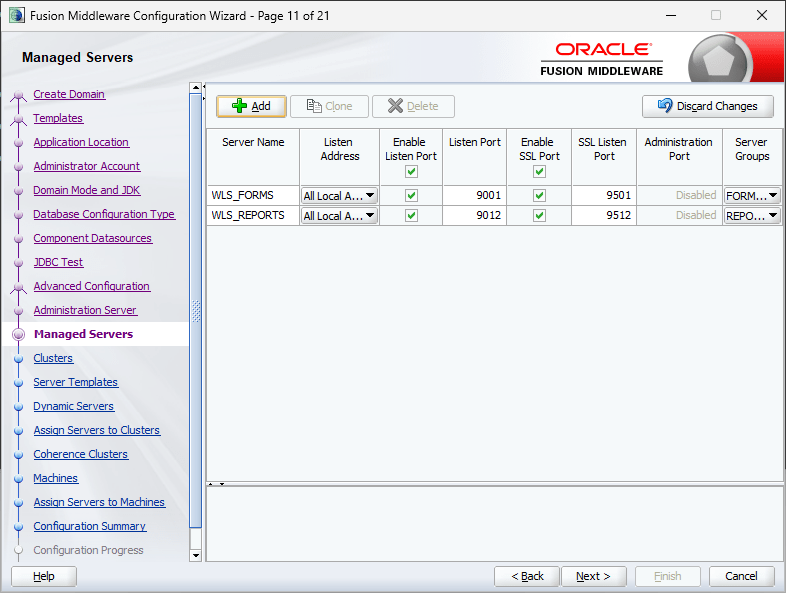
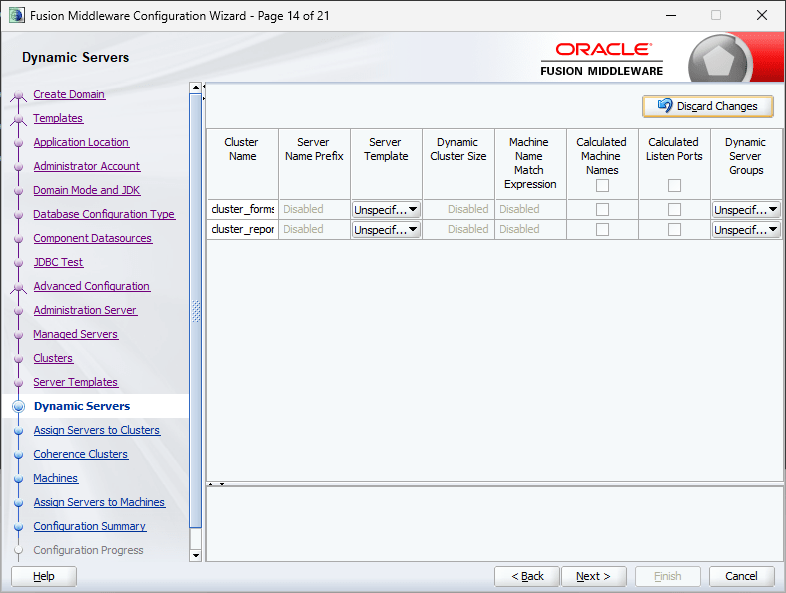
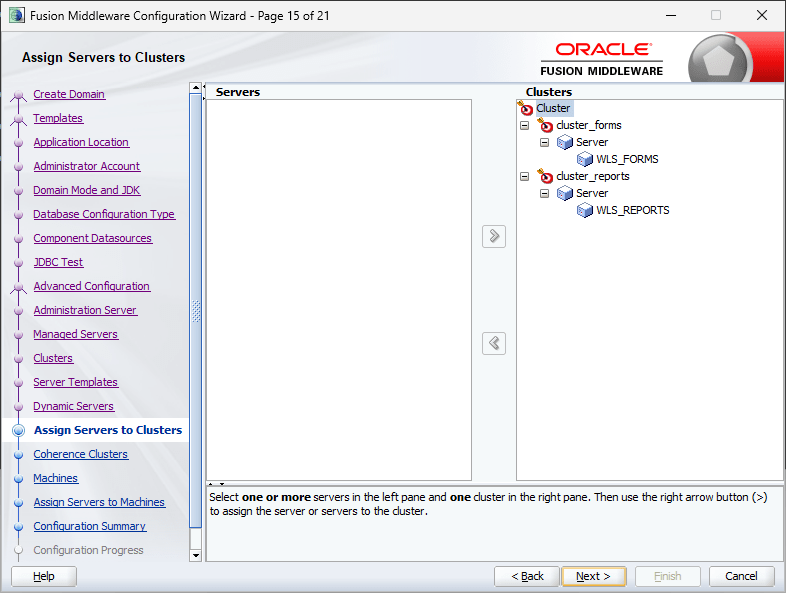
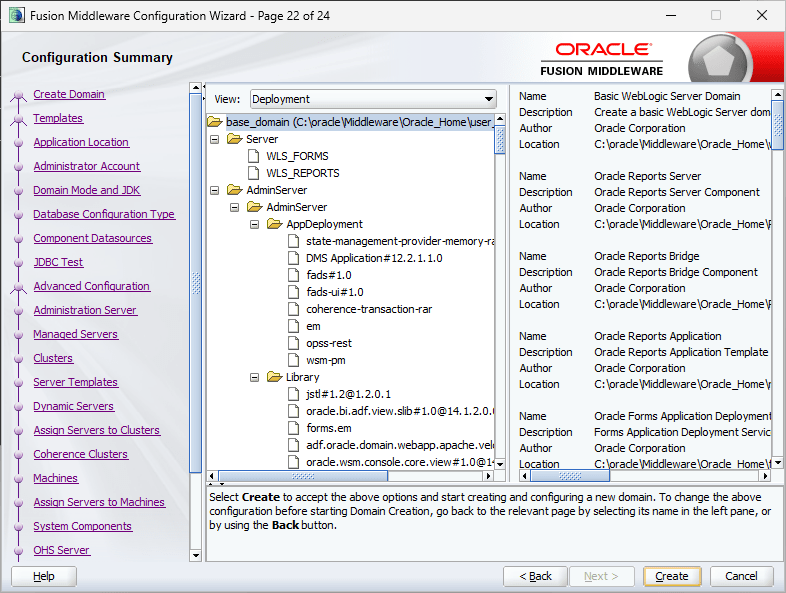
The above and next two images list the items that you are going to setup for the Classic domain.


We will not be setting up SSL, hence make the selections as seen with the image. I am not sure about the technical difficulties that one might face by enabling SSL at this point of time. You may safely ignore the warnings.

Now we have to supply the repository details that we have created previously.


We will leave the SSL unchecked and make sure to select “WSMPM-MAN-SVR” for the Server Groups. Without this setting, the classic domain will fail to serve the purpose.


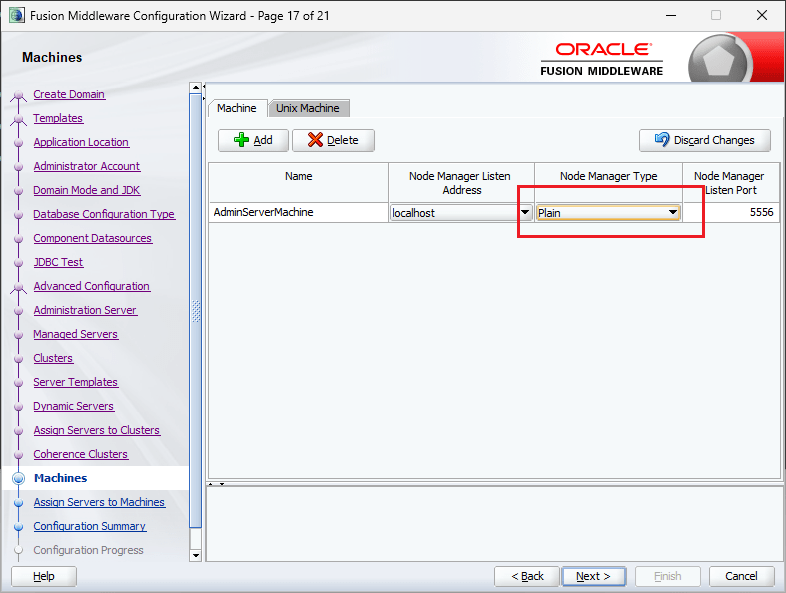
You can switch Node Manager Type from “SSL” to “Plain”, for me leaving it to defaults didn’t make any difference.
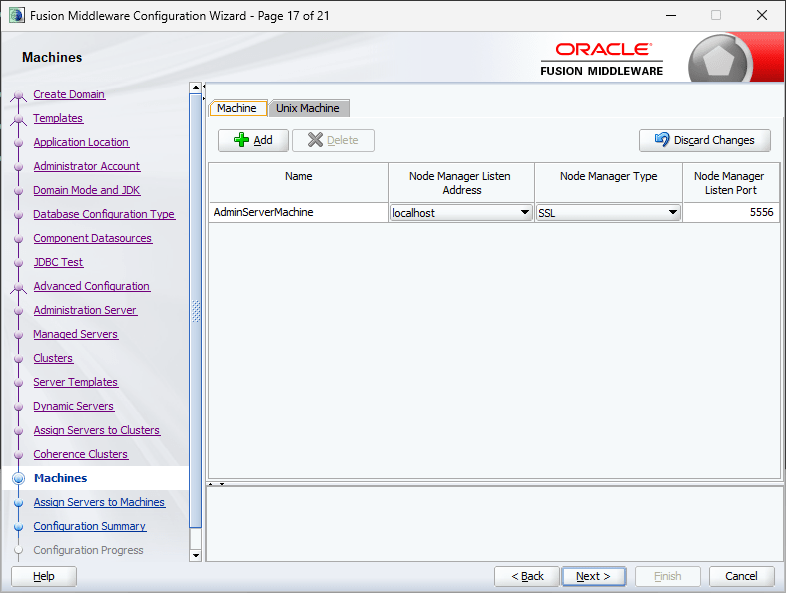
Change the Node Manager type to Plain
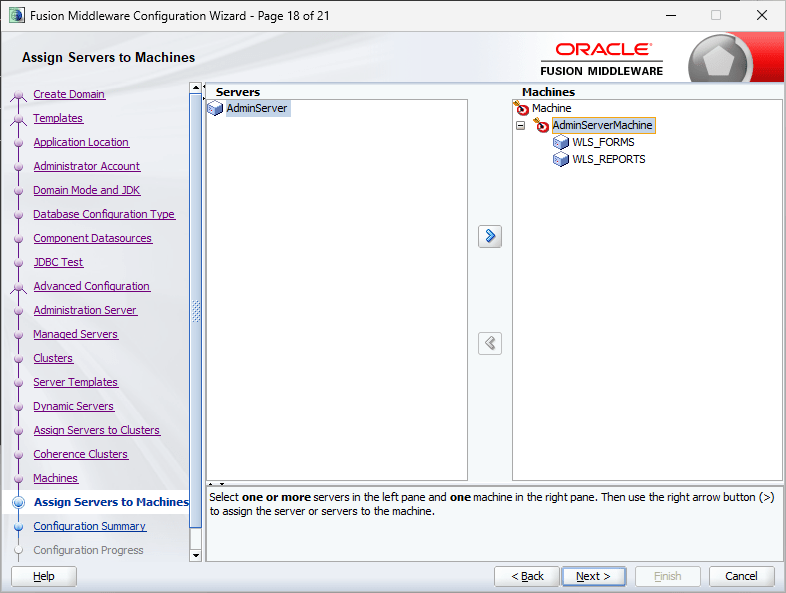
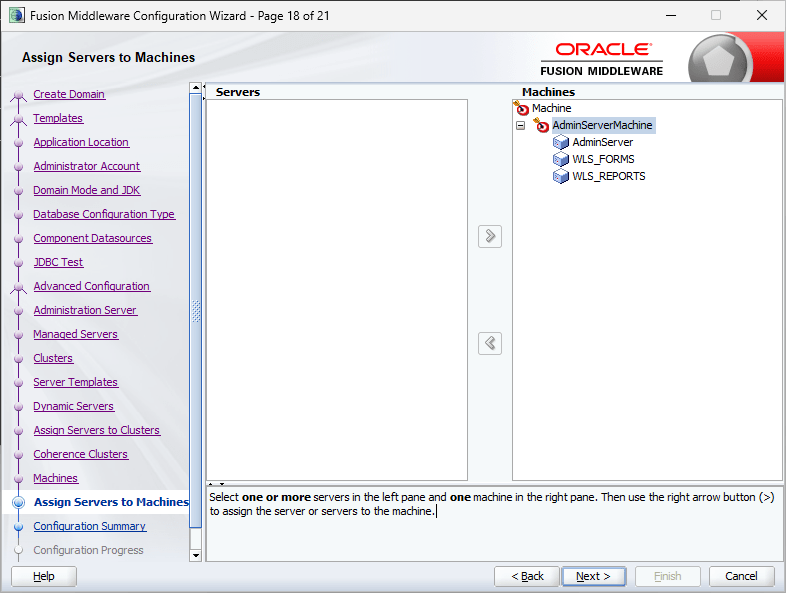
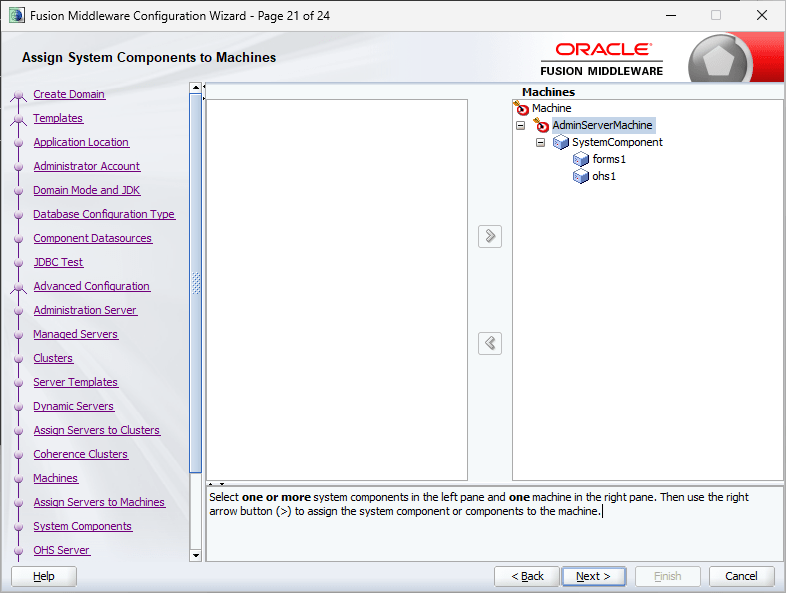
Click on the righthand side “AdminServerMachine” and the button to add “AdminServer” available in the left pan will get enabled. Add “AdminServer” to the “Machines” group.
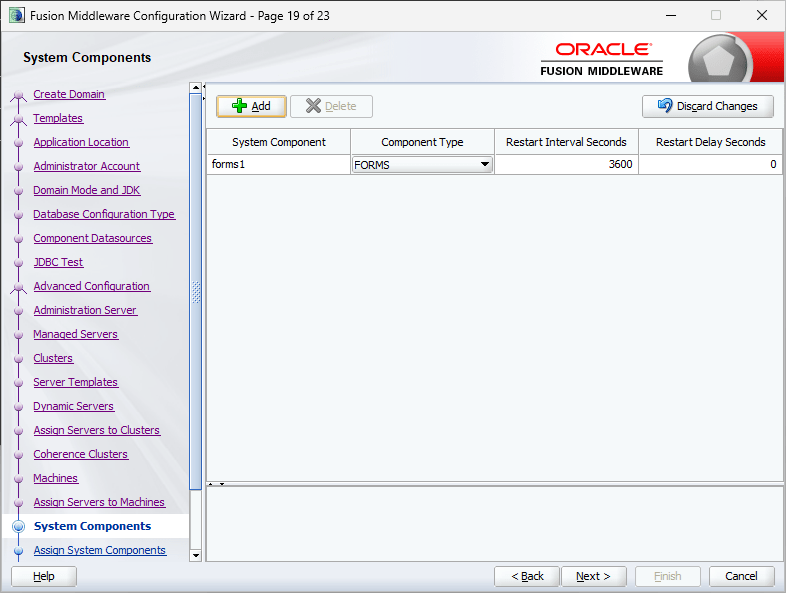
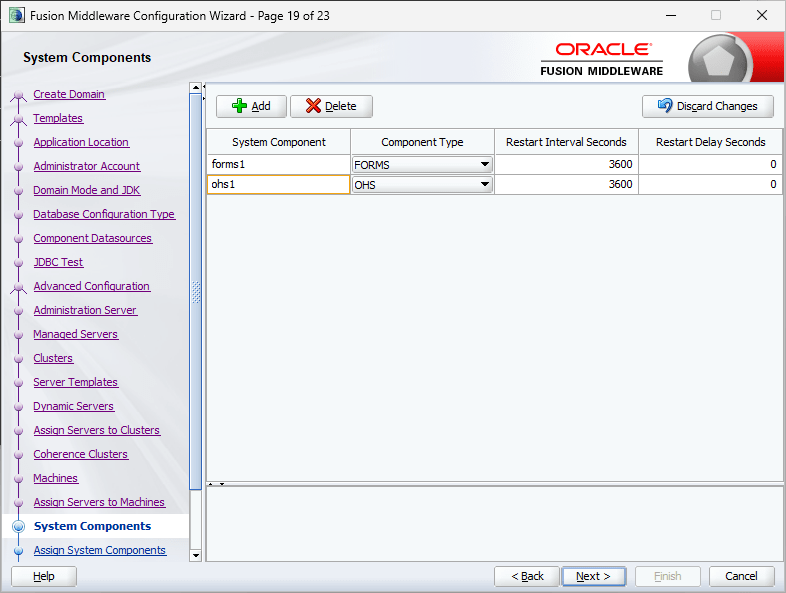
Now, we have only one system component that is Forms. We will add another component, Oracle HTTP Server or OHS.
Leave the defaults.
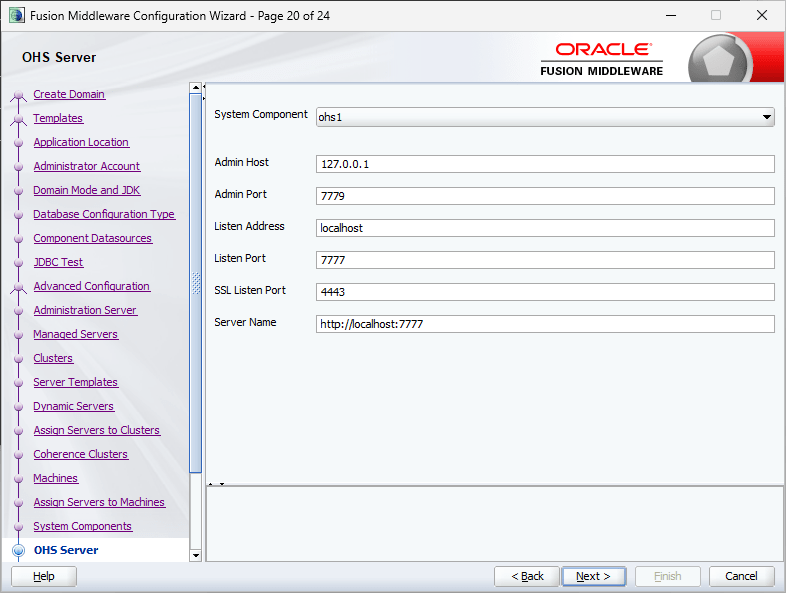
(Added on 7th January 2026, Oracle demands you not to use “localhost” for listen Address incase if you are planning others to connect. Instead you should use the hostname or static IP address. If you missed this instruction during installation, use the enterprise manager console to change the listen address to “any” while the OHS instance is shutdown)
Now move the system component ohs1 to the Machines group as explained above for “AdminServer”

This completes the classic domain setup. Oracle has retired the good old browser based Weblogic Admin Server console and introduced a new tool called Weblogic remote control, that you can download from github About WebLogic Remote Console :: WebLogic Remote Console
It’s a pain until you get used to it.
Now we will see how to start the nodemanager and weblogic admin server.
Switch to
C:\oracle\Middleware\Oracle_Home\user_projects\domains\base_domain\binfrom an elevated command prompt. Start the nodemanger now by issuing the command by executing the command “startnodemanger.cmd”
It may take few seconds to minutes until the node manager starts for the first time. Please remember, you shouldn’t close this command window, which will automatically stop the node manager.

I didn’t experience “Schema validation failure” JAVA error while starting the Weblogic admin server once after the PDB services were added. If JAVA throws “Schema validation failure” errors while starting the admin server, try the below workaround. Regardless, until you finish the initial setups, it is advisable to use the below hack to start the Weblogic Server.
set JAVA_OPTIONS=-Dweblogic.configuration.schemaValidationEnabled=false
startWeblogic.cmd
Okay, with node manager, 99.9% chances that you may not bite bullet. With Weblogic Admin server, this is not the case. For number reasons, the Server will try to start and give up in the middle. So don’t panic. If the Weblogic Admin Server is not coming up to a “RUNNING” status after extended period of waiting, go ahead and restart your computer. Start node manager and then try to start the weblogic admin server once again.
The initial startup could take up to 5-6 minutes (depending upon your hardware, this time could vary) & you should see a status like below. “Server state changed to RUNNING” means set and you are good for next step.

Remember not to close the command prompt window, which will immediately stop the Weblogic Admin Server. The status of the window will keep on updated against the activities happening at the server side. Once started, you can safely keep both node manager and Weblogic Admin Server CMD windows minimized.
As I said above, we cannot access the Weblogic Admin Server using browsers anymore and the Weblogic Remote Console is mandatory for the same. I have made a short video explaining how to start services using the console & leaving the rest on you to explore and learn how to make changes to existing parameters for rest of the setup that are required for publishing your applications 😍
Start both WLS_FORMS & WLS_REPORTS servers using the Weblogic Remote Console or using “startManagedWeblogic.cmd”. Once these servers started, let’s update the OHS instance that we created during the classic domain setup.
From an elevated command prompt, switch to Oracle_Common\common\bin folder
Eg: D:\Weblogic\Middleware\Oracle_Home\oracle_common\common\binNow, start Weblogic Scripting tool (wlst.cmd), refer the below image for details. Use your weblogic admin server credentials when prompted.

Issue the command “ohs_updateInstances()” at the wlst prompt & once the configuration completed, exit wlst by issuing “exit()”
Using Enterprise Manager (http://localhost:7001/em) try to start the Oracle HTTP Server. My OHS instance is named “ohs_1” with the given image.

Under normal conditions Oracle HTTP Server should start without issues.
Now shutdown HTTP and WLS_FORMS & WLS_REPORTS servers using Enterprise manager and Weblogic Remote Console respectively. You can use stopManagedWeblogic.cmd to shutdown both WLS_FORMS & WLS_REPORTS servers alternatively.
As we didn’t configure “Node Manager” during the classic domain creation, let us quickly modify few parameters, that will help us to re-configure OHS instance properly at later stages.
Using Weblogic Remote Console, choose “Edit Tree” Tree element

Once the Tree opens, click on Expand “Environment”, then “Domain”, then “Security” and check “Show Advanced Fields” (Refer image). Enter a meaningful name for the Node Manager username and use the common password as password for the node manager user. Please remember, resetting the node manager password may not be a great experience at all ;)

Click on “Save” button. This action will add the changes to the cart button and you have open the cart button to apply the changes, which replaces the old lock and edit apply changes.
Shutdown the Weblogic Admin Server and Node Manager & restart both. Start both WLS_FORMS and WLS_REPORTS servers. We’ll restart the OHS instance later.
Now we will edit few configuration files for both Forms and Reports so that OHS will know where to look for their details.
Edit forms.conf file in the folder
D:\Weblogic\Middleware\Oracle_Home\forms\templates\config\By default this template file comes with commented examples, like following
#<Location /forms/>
#        SetHandler weblogic-handler
#        WebLogicHost host
#        WeblogicPort port
#</Location>
You need to uncomment one of the blocks starting from until & add properties specific to your deployment, for example, my computer’s name is “RT05: and I am using default ports for both forms and reports applications, hence I have the properties set like following
<Location /forms/>
SetHandler weblogic-handler
WebLogicHost RT05
WebLogicPort 9001
</Location>
Once altered, copy forms.conf to OHS instance “moduleconf” folder. I have copied the file to following location: (Alter according to your setup)
D:\Weblogic\Middleware\Oracle_Home\user_projects\domains\base_domain\config\fmwconfig\components\OHS\instances\ohs1\moduleconfNow we will edit the configuration file for reports. Please note, with Reports 14c, the default listening port has been changed from 9002 to 9012.
Switch to “D:\Weblogic\Middleware\Oracle_Home\reports\conf” folder & edit “reports_ohs.conf” and add a block like following (alter according to your setup)
<Location /reports/>
SetHandler weblogic-handler
WebLogicHost RT05
WebLogicPort 9012
</Location>
Copy the edited file to
D:\Weblogic\Middleware\Oracle_Home\user_projects\domains\base_domain\config\fmwconfig\components\OHS\instances\ohs1\moduleconfAlternatively you can add the entries directly into “mod_wl_ohs.conf” file found in the path. This will be easier incase if you are planning to deploy web applications & use the same OHS instance to access them. For details, check the attached image.
D:\Weblogic\Middleware\Oracle_Home\user_projects\domains\base_domain\config\fmwconfig\components\OHS\instances\ohs_1\

Restart the OHS instance storing all the changes we made until now. Instead of using the Enterprise Manager, we will use the startComponent.cmd this time. Move to the domain base bin path. Example:
D:\Weblogic\Middleware\Oracle_Home\user_projects\domains\base_domain\binNow, execute the command
StartComponent.cmd ohs_1 storeUserConfig
This will start the Weblogic Scripting tool & will prompt for node manager password.

Once a correct password is provided, the OHS instance (ohs_1) will be started & you are all ready to deploy your Forms/Reports based application(s). Please note, 12c was the latest supported version of Oracle Reports & provided with 14c only for backward compatibilities. You are advised to switch to “supported” Oracle BI alternatives.
Next step, we will modify more configuration files for deploying sample application. Please note, Oracle Weblogic is very sensitive around IPv6 protocol, especially the Reports Server. Hoping you already set a static IP address for your box, let’s add an entry to the hosts file first. On Windows you will find the “hosts” file on the path “C:\Windows\System32\drivers\etc”. Make sure to open Notepad as Administrator.

We’ll setup the TNS names for the Forms/Reports next. Copy the tnsnames.ora file from your database installation path and replace the one at the physical location. Usually at
D:\Weblogic\Middleware\Oracle_Home\user_projects\domains\base_domain\config\fmwconfigMake sure that you will make a backup prior replacing the existing one.
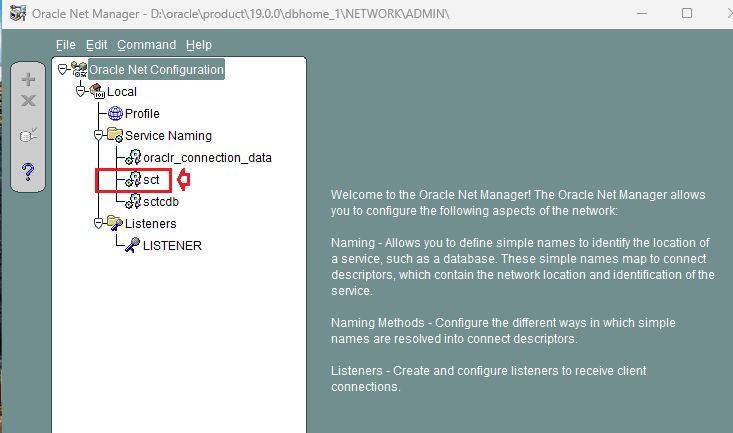
I’ve noticed that recent installations of Oracle products set up the sqlnet.ora with NTS authentication as default. This could create issues when you try to connect Forms/Reports developers to database as well as while trying to launch applications.

Please modify the sqlnet.ora file at this physical path
D:\Weblogic\Middleware\Oracle_Home\network\admin
Now we will modify one of the environment files that should save us many troubles related to Report Server not being able to connect.
Switch to the path
D:\Weblogic\Middleware\Oracle_Home\user_projects\domains\base_domain\binand edit the setDomainEnv.cmd after making backups. Modify the JAVA_OPTIONS
set "JAVA_OPTIONS=%JAVA_OPTIONS% -Dweblogic.ssl.AcceptKSSDemoCertsEnabled=true"To
set "JAVA_OPTIONS=%JAVA_OPTIONS% -Dweblogic.ssl.AcceptKSSDemoCertsEnabled=true -Dweblogic.ssl.AcceptKSSDemoCertsEnabled=true -Djava.net.preferIPv4Stack=true -Djava.net.preferIPv4Addresses=true"Save the file. This modification will help you to address few of the grave issues with Reports Server, that expects IPv4 instead of IPv6 protocol for network related negotiations.
- REP-52266: The in-process Reports Server rep_wls_reports_rt05 failed to start.oracle.reports.RWException: IDL:oracle/reports/RWException:1.0
- Multicast:init java.io.IOException: Network interface not configured for IPv4
Let us proceed to modify rest of the configuration files now. We will start with Reports configurations first, then Forms .
I believe, came across an Oracle forum post where the Product Manager Michael comments about using named Report Servers not supported on 14c. I am not sure, you have to find this out yourselves. I will be configuring the in-process Report server in next few steps.
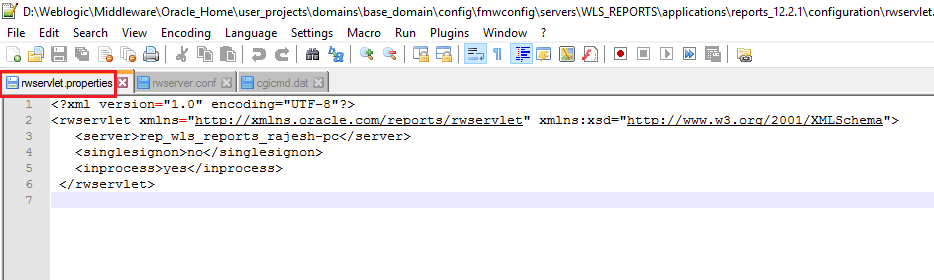
All the Report Server configuration files are available on the same file path. Switch to the physical path
D:\Weblogic\Middleware\Oracle_Home\user_projects\domains\base_domain\config\fmwconfig\servers\WLS_REPORTS\applications\reports_14.1.2\configurationWe will be modifying the 3 files listed below. Make sure to backup the files before you start modifying them.
- rwservlet.properties – Servlet specific properties
- rwserver.conf – Server properties
- cgicmd.dat – key mapping file
1. As far you are using in-process reports server, nothing much to alter with “rwservlet.properties” file. Basically you should see entries like following in the opened file:
2. rwserver.conf (Please check the below image)

3. cgicmd.dat: Many values we supply to call a report using Web.Show_Document method could potentially expose vital information like the database details & many other. “cgicmd.dat” file helps us to map such values to keys and later use them wherever applicable. With this example, I will demonstrate, how the database username, password and service name are mapped using a key. Please check the image attached below

Once these configurations files are altered, we need to create a report instance for the WLS_REPORT server. Open an elevated command prompt and switch to
D:\Weblogic\Middleware\Oracle_Home\oracle_common\common\binStart wlst & connect to the server.

Issue the command
createReportsToolsInstance(instanceName='rptools1', machine='AdminServerMachine')Note, you can choose your own name for the report instance. We will use this tools instance with Forms for accessing report server. Once the report instance created, exit wlst and you can try to start the WLS_REPORT server from the weblogic console.
Switch to the physical path now.
D:\Weblogic\Middleware\Oracle_Home\user_projects\domains\base_domain\config\fmwconfig\servers\WLS_FORMS\applications\formsapp_14.1.2\configWe will be modifying the files listed below. Make sure you make backup copies for the files prior modifying them.
- formsweb.cfg
- default.env
One of the major changes that happened between the version is, Internet Explorer is not anymore and the JAVA NAPI clients are not supported by modern browsers. This leaves the Forms enthusiastics with two options, Java Web Start and FSAL. Both have their own set of issues, that you must address when applied on PRODUCTION environments. Let us create a new section by the dead end of the formsweb.cfg file. Notice the REPORT_SERVLET entry, that is mandatory when you are using CREATE_REPORT_OBJECT calls from Forms.
# Application name "Balaji"
[myapp]
# The name of the starting form (ensure start.fmx is in your FORMS_PATH)
form=start.fmx
# Enable Java Web Start
webstart=enabled
# Template for the JNLP file (standard for non-WebUtil apps)
basejnlp=base.jnlp
# Optional: Set the width and height of the application window
width=1024
height=768
# Connection string (example: user/password@database)
userid=
# Specific environment file for this app (default.env or a custom one)
envFile=default.env
# Report Servlet path
REPORT_SERVLET=/reports/rwservlet
Save the file and let us modify the default.env that could be found in the same file path. You can tell the forms runtime to look in this file to locate the forms runtimes. For example, I’ve all the compiled runtimes available at D:\12c folder for the application that I am trying to deploy/publish. The FORMS_PATH is pointed to it & other paths wherever I have applications (eg: mapped path \\RT04\OPMAN12C\main). Make sure each path is separated using a “;”
FORMS_PATH=D:\Weblogic\Middleware\Oracle_Home\forms;D:\Weblogic\Middleware\Oracle_Home\user_projects\domains\base_domain\config\fmwconfig\components\FORMS\instances\forms1;D:\12c;\\RT04\OPMAN12C\main;\\RT04\OPMAN12C\OPMANAnother mandatory entry you are going to make within the default.env is for the Reports Tools instance that you created earlier. Without specified, your reports may not work at all.
COMPONENT_CONFIG_PATH=D:\Weblogic\Middleware\Oracle_Home\user_projects\domains\base_domain\config\fmwconfig\components\ReportsToolsComponent\rptools1COMPONENT_CONFIG_PATH value is the physical path for the Report Server tools instance we created earlier. Save the default.env file and we’ll make changes to registry.dat file, that enhances the look and feels of few Forms objects live LOV and Required Fields. Switch to the path
D:\Weblogic\Middleware\Oracle_Home\user_projects\domains\base_domain\config\fmwconfig\servers\WLS_FORMS\applications\formsapp_14.1.2\config\oracle\forms\registryMake a backup for registry.dat file and modify the existing entries like given below.
#
# Application level settings to control UI features
#
# app.ui.lovButtons=false
app.ui.lovButtons=true
# app.ui.requiredFieldVA=false
app.ui.requiredFieldVA=true
#    The background color is specified as an RGB triple.
# app.ui.requiredFieldVABGColor=255,0,0
app.ui.requiredFieldVABGColor=255,242,203
This completes the configurations for Forms.
As everything for a lab environment is set, let us quickly restart all services and servers to make sure that all are in place.
Shutdown all running servers and services. Follow the below sequence for shutting down the servers.
- WLS SERVERS
- HTTP Server
- Weblogic Admin Server
- Node Manager
We are restarting to services and servers to ensure that the changes made to environment files are activated. Start the services and servers sequentially
- Node Manager
- Weblogic Admin Server
- WLS Servers (FORMS, REPORTS)
- HTTP Server
Try to access your sample application from the address http://<hostname>:7777/forms/frmservlet?config=<config name>

Ensure that you have JRE 32-Bit (preferred) aleady installed. As my sample page doesn’t have an associated web application, as soon as I press Enter key after entering the URL, the browser will download a jnlp file (Java Web Start)

If you never worked with jnlp files, there will be few security warnings. Ignore them and you can keep and open the file in subsequent actions. Once opened, these files are useless, hence always open them if your browser permit. Firefox ESR versions are best for such situations. You might get some security warnings once again while opening the jnlp file, accept all to proceed.
So here we are


Let’s run a report using “Web.Show_Document” method, when the geeks are asking you to start using “RUN_REPORT_OBJECT” instead for better integration and security.

For the sample scenarios, I chose to stick to Web.Show_Document that supports parameter form.

Here is our report (PDF)

End notes:
I am a developer & the hacks and patches that I apply to get something working may not be copied to PRODUCTION environments. Please, don’t ask me for the “sample application” source code. If you are interested about the “Tree Menu”, I already shared the details with my “OOooOOtoob” channel. Hooking up the video for your references here.
I will recommend you to refer my 12c posts for setting up Forms & Reports environments for publishing applications. This could help you to figure out stuffs that I might have missed with the 14c document.
- Install Oracle forms & reports 12.2.1.4 with Weblogic 12c 12.2.1.4 – Duh! Microsoft did it again
- Oracle Forms & Reports 12c | Publishing a sample application – Duh! Microsoft did it again
For FSAL setups. If you don’t have jacob.jar and associated dll files that are expected to be made available by “YOU”, an error like the below will arise.
D:\Weblogic\Middleware\Oracle_Home\user_projects\domains\base_domain\bin>C:\Java\jdk-21\bin\java.exe -jar "D:\Weblogic\Middleware\Oracle_Home\forms\java\frmsal.jar" -url "http://rt05:7777/forms/frmservlet?config=balaji_fsal"

Detected Java version: 21.0.8
Inspecting archive files in cache directory C:\Users\rajesh\AppData\Local\Temp\frmsal\rt05\14.1.2.0
Using cached archive file frmall.jar from cache subdirectory bkl1e4mo31jhef1bgia0decvk
Using cached archive file frmwebutil.jar from cache subdirectory bkl1e4mo31jhef1bgia0decvk
Downloading archive file jacob.jar to cache subdirectory bkl1e4mo31jhef1bgia0decvk
FRM-92290: HTTP response code 404 received when attempting to download archive file
FRM-92491: Unable to fetch archive file from server.
Download the latest release from https://github.com/freemansoft/jacob-project/releases & extract the files to “….\Middleware\Oracle_Home\forms\java” path. Make sure you copied jacob.jar and associated dll files to this path. Shutdown WLS_FORMS server & restart it.
Sample FSAL configuration as given below
[balaji_fsal]
form=login.fmx
# Note: baseSAAfile must end with .txt
WebUtilArchive=frmwebutil.jar,jacob.jar
WebUtilLogging=off
WebUtilLoggingDetail=normal
WebUtilErrorMode=Alert
WebUtilDispatchMonitorInterval=5
WebUtilTrustInternal=true
WebUtilMaxTransferSize=24573
baseSAAfile=webutilsaa.txt
fsalcheck=true
userid=<<scott/tiger@orcl>>
Refer https://pitss.org/us/2020/08/13/how-to-run-oracle-forms-using-forms-standalone-launcher/ for more details about FSAL