This is our first post after months long break. As Microsoft has released the technical preview for their forthcoming OS “Windows 10” we are once again engaging ourselves to try out “Uncertified” Oracle products over a possibly half cooked OS in the preview state.
Scenario:
Host: Windows 8.1 64Bit Professional
Intel i5, 8GB Memory, 1TB HDD (Dell E6420 14” laptop)
Java VirtualBox 4.3.16 r95972
We will try explain how to install Windows 10 Technical Preview on VirtualBox in next few steps
Windows 8.1 comes with Hyper-V enabled default. If you are planning to try out the 64Bit version of technical preview, make sure you disable Hyper-V from “Windows features”
Uncheck the Hyper-V & restart the computer when prompted.
In order to download the Technical preview you must signup for Windows Insider Program (http://windows.microsoft.com/en-us/windows/preview)
We are sure, if you are an enthusiast wanting to try out the preview, you are already a half geek, who knows how to signup something very straight forward like “Windows Insider”
Download your choice of technical preview, 32Bit or 34Bit ISO file. The file is on disk is 3.81GB, so if you have a slow connection, start download, have a nap. We are on a 12MBPS fiber connection and it took around 50 minutes for the download to finish!
Start Oracle VirtualBox now
Create a new Virtual Machine (Follow the images)
Based on available memory on your computer, setup the maximum memory you can allocate for the VM. We suggest a minimum 4GB for better performance
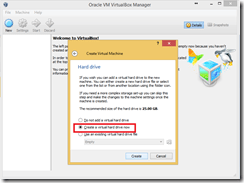
Create a virtual drive now, minimum 20GB is recommended
Complete the Virtual Disk creation based on your preferences (eg: location, VDI or VMDK)
We just created a new VM, however remaining are few more settings. Let us analyze what kind of choices were made by VirtualBox for our new VM until.
General
System
Change the number of processors to 2, if you have more cores.
Finally load your ISO file to the IDE controller.
Save the changes by clicking “Ok” and let us start the VM finally, thus initiating the installation process
Based on the language selection you made prior downloading the ISO file, you will be prompted to start the installation after couple of minutes waiting
Follow the prompts and Select “Custom” installation while prompted.
Rest assured, wait for the installation to complete.
We opted to go with “Express settings” for the installation
You will be asked to sign in with a Microsoft Account next, just select “Create a new account”, that will allow you to “Sign in without a Microsoft Account” option
Once a local account created, you will go through the same Windows 8/8.1 setting up procedure, stay calm
That’s it folks, now you have completed the installation of Windows 10 Technical Preview using Oracle VirtualBox!
It’s time to click on the “Start Menu” button ![]()
for Windows7bugs


