

Last update on: 21-Dec-2023.
Hello there!
Oracle keeps on updating APEX and ORDS on regular basis and I thought of compiling one document that I can refer when I forget things when I do a fresh installation. Hence, I have changed the title of the post & will try to update the same thread with newer version installation tips as and when I try them out. This time we are going to see how APEX 23.2 is installed along with ORDS 23.4 on Oracle database 19c(19.21.0.0.0).
Please make sure that you have either JDK 11 or JDK 17 already installed. ORDS will not work with JDK versions prior that.
Oracle APEX 23.2 with ORDS 23.4 on Windows
Download Software. Usually for the lab, I always download the latest version. You must know, every new version might come with bugs that are yet to surface. So, make sure that for your PRODUCTION environment, will always choose the version that is safe. You can download APEX from this link https://www.oracle.com/tools/downloads/apex-downloads/

We will install APEX first and then move to ORDS, which is a must, as the latest documentations state. Please refer this document https://docs.oracle.com/en/database/oracle/apex/23.2/htmig/oracle-apex-installation-guide.pdf for detailed information about the various installation requirements. Once unzipped, you will see a folder structure like the one below.

I am using Oracle 19c database for multi-tenant purposes & this installation will be targeting an existing PDB.
Let us quickly cross verify that there is no APEX already installed on it. I did the installation few minutes back, hence it shows the APEX as installed.

If you see such information, you should remove the existing version to install the latest version. We will consider that the PDB doesn’t have APEX installed to continue.
--Switch to the APEX installation path
cd D:/apex-latest/apex
sqlplus / as sysdba
--switch to the PDB
alter session set container="SCT"; --your target PDB
--Create a new TABLESPACE
CREATE TABLESPACE APEX DATAFILE 'D:\ORACLE\ORADATA\19C\SCTCDB\SCT\APEX01.DB' SIZE 1G;
--Go ahead with the installation
@apexins APEX APEX TEMP /i/
Trust me, this takes a while. Once the installation completes without errors, you will get some summary information like below
Thank you for installing Oracle APEX 23.2.0

Oracle APEX is installed in the APEX_230200 schema.

The structure of the link to the Oracle APEX administration services is as follows:
http://host:port/ords/apex_admin

The structure of the link to the Oracle APEX development interface is as follows:
http://host:port/ords


timing for: Phase 3 (Switch)
Elapsed:    0.20


timing for: Complete Installation
Elapsed:    5.03
Now we need to setup the APEX ADMIN account. From the same Oracle session, execute the “apxchpwd.sql”. Please note, the password must be complex and having one punctuation character
(!”`’#$%&()[]{},.*+-/|\:;?_~). After a successful creation of ADMIN account, don’t forget to change the password & unlock user APEX_PUBLIC_USER. Refer the installation document to understand the password policies, expiry etc. My database instance is configured to accept non case sensitive password and password expiry is disabled for the profile DEFAULT. Please make sure that you cross verify these settings to avoid PRODUCTION issues.

Now we have to complete the REST configuration before installing ORDS. From the same Oracle session execute the file “apex_rest_config.sql”. Use the same password for all accounts as long as your are not configuring for PRODUCTION.

Once the REST configurations are done, we can move to ORDS installation. You can download the latest version from this link https://www.oracle.com/database/sqldeveloper/technologies/db-actions/download/

Oracle says APEX and ORDS are free, take it with a pinch of salt. Remember, JAVA was free once upon a time. Please refer this document for more details about ORDS installation https://docs.oracle.com/en/database/oracle/oracle-rest-data-services/22.4/ordig/oracle-rest-data-services-installation-and-configuration-guide.pdf
Once extracted to default path, the folder should look like the below image

We will start with setting up a folder for ORDS configurations. Unlike APEX, I chose a new path altogether for ORDS, like D:\ORDS and the configuration path was set as D:\ORDS\config. In addition to config, I have a folder called logs and a copy of apex/images also in the same root.
You can avoid copying the Apex images to ORDS folder, instead point to the apex\images path while setting up ORDS. This could save some storage.
Apex/images is required for accessing the APEX infra through ORDS HTTP or HTTPS, as you WILL set it up later. For our lab, we will be setting up HTTP & the installation method will be interactive.

Before starting the ORDS installation, let us grant SYSDBA privileges to SYSTEM. Over a PRODUCTION instance, please remove the unnecessary privileges from users once after setup completes.
sqlplus / as sysdba
SQL> grant sysdba to system container=all;
Now we have to provide additional privileges to user SYSTEM, the account that we will use for the installation, setup and de-installation of ORDS from the database.
D:\ords-latest\bin>cd /d D:\ords-latest\scripts\installer

D:\ords-latest\scripts\installer>sqlplus / as sysdba
alter session set container="SCT"; --PDB

SQL> @ords_installer_privileges.sql system
old   1: grant alter any table                   to ^ADMINUSER
new   1: grant alter any table                   to system
....
The above sets up all the necessary privileges for SYSTEM account. Now we can proceed to install and configure ORDS.
From an elevated command prompt, switch the folder where we have extracted the ORDS installation source.
D:\ords-latest>cd bin

D:\ords-latest\bin>ords --config D:\ORDS\config install --interactive --log-folder D:\ORDS\logs

ORDS: Release 23.4 Production on Thu Dec 21 08:26:31 2023

Copyright (c) 2010, 2023, Oracle.

Configuration:
  /D:/ORDS/config/

The configuration folder D:\ORDS\config does not contain any configuration files.

Oracle REST Data Services - Interactive Install

  Enter a number to select the type of installation
    [1] Install or upgrade ORDS in the database only
    [2] Create or update a database pool and install/upgrade ORDS in the database
    [3] Create or update a database pool only
  Choose [2]:
  Enter a number to select the database connection type to use
    [1] Basic (host name, port, service name)
    [2] TNS (TNS alias, TNS directory)
    [3] Custom database URL
  Choose [1]:
  Enter the database host name [localhost]:
  Enter the database listen port [1521]:
  Enter the database service name [orcl]: SCT
  Provide database user name with administrator privileges.
    Enter the administrator username: system
  Enter the database password for system:
Connecting to database user: system url: jdbc:oracle:thin:@//localhost:1521/SCT

Retrieving information.
  Enter the default tablespace for ORDS_METADATA and ORDS_PUBLIC_USER [SYSAUX]: APEX
  Enter the temporary tablespace for ORDS_METADATA and ORDS_PUBLIC_USER [TEMP]:
  Enter a number to select additional feature(s) to enable:
    [1] Database Actions  (Enables all features)
    [2] REST Enabled SQL and Database API
    [3] REST Enabled SQL
    [4] Database API
    [5] None
  Choose [1]:
  Enter a number to configure and start ORDS in standalone mode
    [1] Configure and start ORDS in standalone mode
    [2] Skip
  Choose [1]:
  Enter a number to select the protocol
    [1] HTTP
    [2] HTTPS
  Choose [1]:
  Enter the HTTP port [8080]:
  Enter the APEX static resources location: D:/ORDS/images
If everything goes in our favor, the config session should bring up the ORDS standalone instance. Please don’t close the command prompt forcefully. You need to leave it alone for accessing the APEX now.

We can try to access APEX now by visiting http://localhost:8080/ords

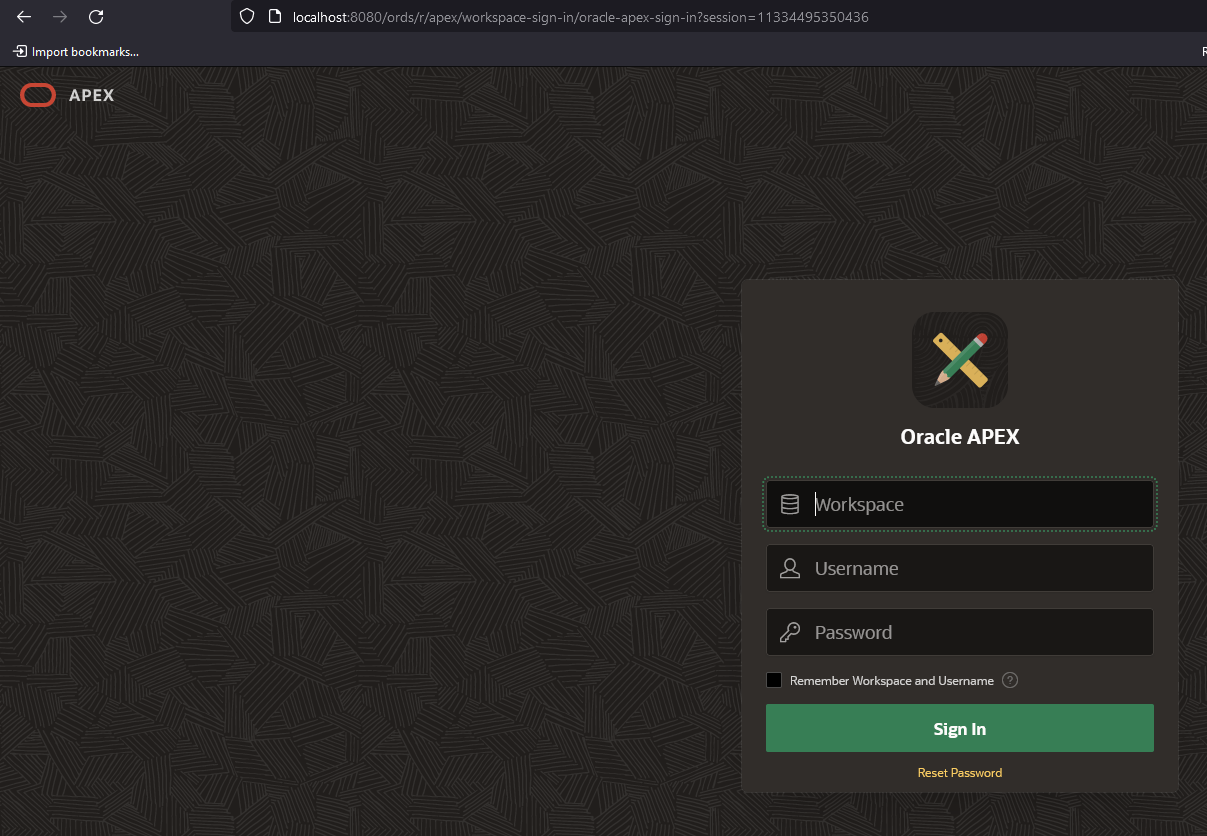
If you used APEX before, you already know the ADMIN login parameters. Enter “INTERNAL” for Workspace, ADMIN (if you didn’t change the default ADMIN name) for Username and the password you have configured while setting up APEX Admin account.
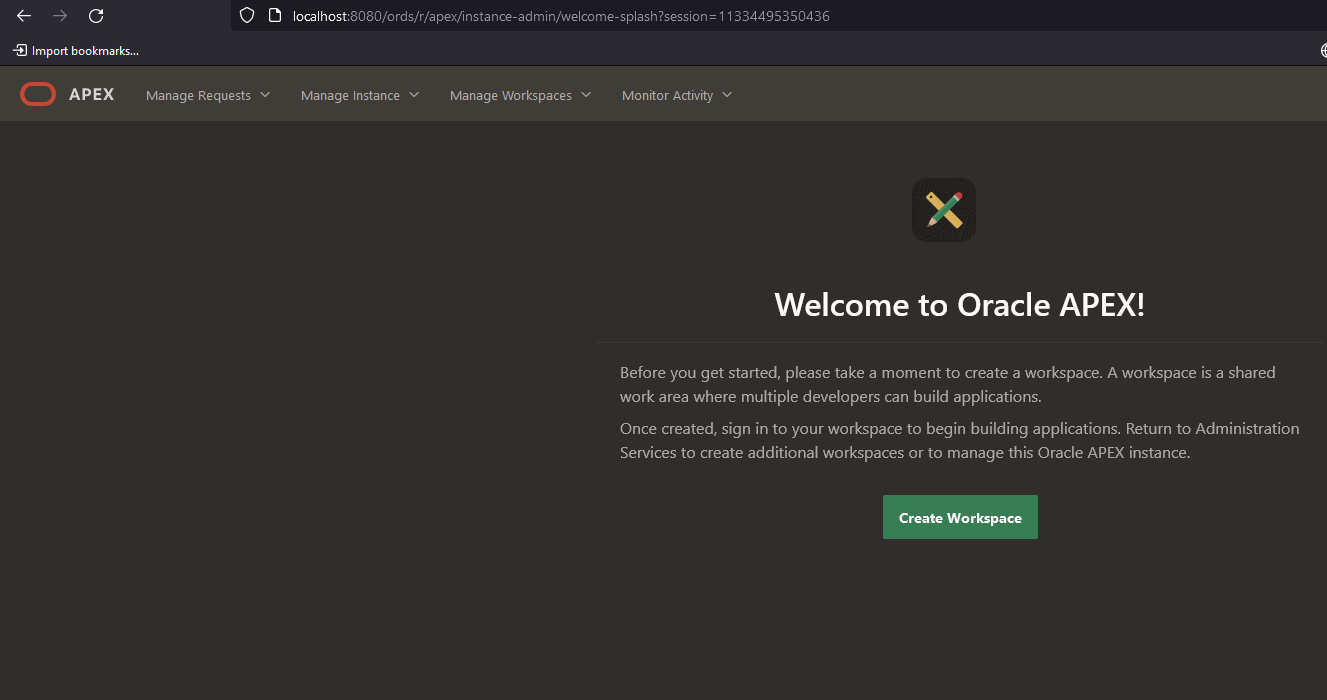
That’s all folks. I will try to cover using Apache/Tomcat for ORDS at a later time. I managed to get ORDS installed in my 4th attempt as I overlooked executing “ords_installer_privileges.sql”, which is mentioned as mandatory in the installation instructions document! For any reasons, if the ORDS fails to install, don’t panic, just uninstall it. Let us see how we could uninstall ORDS after a failed installation.
D:\ords-latest\bin>ords --config D:/ORDS/config uninstall

ORDS: Release 23.4 Production on Thu Dec 21 08:17:21 2023

Copyright (c) 2010, 2023, Oracle.

Configuration:
  /D:/ORDS/config/

Oracle REST Data Services - Interactive Uninstall

  Enter a number to select the database pool to use or specify the database connection
    [1] default      jdbc:oracle:thin:@//localhost:1521/SCT
    [2] Specify the database connection
  Choose [1]:
  Provide database user name with administrator privileges.
    Enter the administrator username: system
  Enter the database password for system:
Connecting to database user: system url: jdbc:oracle:thin:@//localhost:1521/SCT

Retrieving information.
Cannot create or write to the log folder in the current working directory: /D:/ords-latest/bin/logs. Logging will be displayed on the console.
Uninstalling Oracle REST Data Services in SCT
------------------------------------------------------------
Date       : 21 Dec 2023 08:17:30
Release    : Oracle REST Data Services 23.4.0.r3461619
Type       : ORDS Uninstall
Database   : Oracle Database 19c Enterprise Edition
DB Version : 19.21.0.0.0
------------------------------------------------------------
Container Name: SCT
------------------------------------------------------------

[*** script: ords_alter_session_script.sql]

PL/SQL procedure successfully completed.

[*** script: ords_uninstall.sql]

PL/SQL procedure successfully completed.

******************************************************
* INFO: REMOVING Oracle REST Data Services
******************************************************

PL/SQL procedure successfully completed.


PL/SQL procedure successfully completed.


PL/SQL procedure successfully completed.

drop user ORDS_METADATA
drop user ORDS_PUBLIC_USER


PL/SQL procedure successfully completed.


PL/SQL procedure successfully completed.


Commit complete.

******************************************************
* INFO: Removed Oracle REST Data Services database objects
******************************************************
[*** script: ords_drop_app_contexts.sql]

PL/SQL procedure successfully completed.


PL/SQL procedure successfully completed.

[*** script: ords_drop_pub_synonyms.sql]

PL/SQL procedure successfully completed.

******************************************************
* INFO: Removed ORDS Public Synonyms
******************************************************
[*** script: ords_drop_database_roles.sql]

PL/SQL procedure successfully completed.

[*** script: ords_alter_session_script.sql]

PL/SQL procedure successfully completed.

Completed uninstall for Oracle REST Data Services. Elapsed time: 00:00:01.456

[*** Info: Completed uninstall for Oracle REST Data Services. Elapsed time: 00:00:01.456
 ]
Once after uninstall finishes, delete all folders created by the installation process from config folder. Ie, in the example “D:\ORDS\config”. After this, you can try to reinstall ORDS once again.
Troubleshooting
I started getting the below error once after I uninstalled and re-installed APEX after a bundle update attempt. “ORDS was unable to make a connection to the database. ORDS is not able to proxy to the target user because that user is locked. The connection pool named: |default|lo| had the following error(s): ORA-28000: The account is locked”

As we are discussing the unexpected error, let us see the main APEX database accounts now.

We must insure that accounts APEX_LISTENER, APEX_PUBLIC_USER, APEX_REST_PUBLIC_USER are open for APEX to work properly & APEX_230200 locked, that is by design.

Try to access APEX again and there shouldn’t be any issues.
Oracle APEX 18.2 Installation on Windows
Referenced documents:
https://www.oracledbwr.com/oracle-apex/oracle-application-express-18-1-installation/
Let us see how Oracle APEX (Which will eventually replace Oracle FORMS (regardless whether you like that fact or not) for small to medium applications) could be installed on your Windows 10/Server this time.
We’ll be trying the latest version of ORACLE APEX 18.2 & Windows 10 Pro running the latest version 1809 (as on date, fully patched) and Oracle database 11g R2 (11.2.0.4). Oracle depends upon VC++ components loads, so make sure your Windows box is fully patched.
Step #1
Download Oracle APEX installer from APEX repository. Please note, for APEX 18.x, you MUST have 11G R2 11.2.0.4 or later database. 11g R2 11.2.0.4 is only available for customers with valid support, hence if you are a student, freelancer, you best bet is 12c database, that is still freely available to download.
Step #2
Unzip the downloaded .zip file to a finely structured directory. For example, you can extract the zip file to D:\APEX, that will create another “apex” folder within “D:\APEX\”. Check the attached image
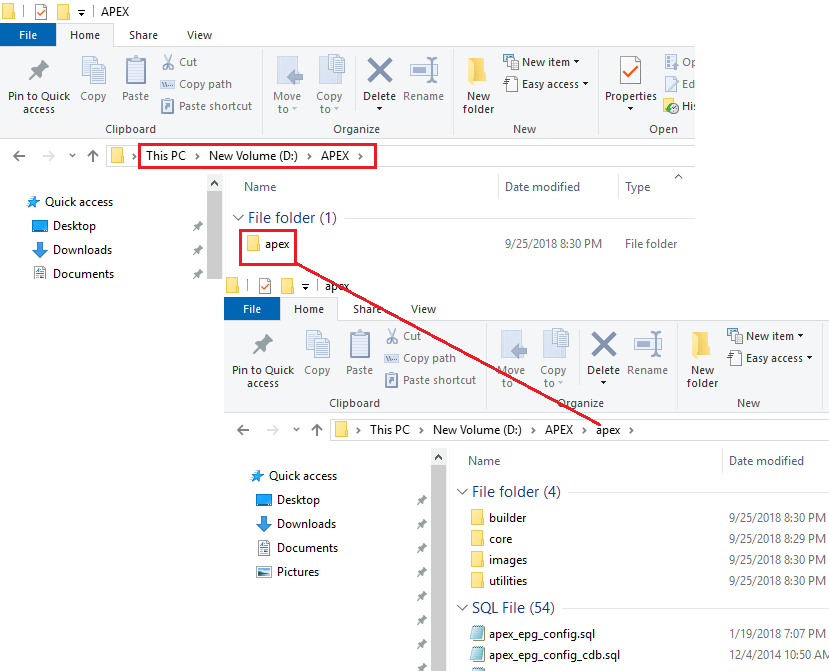
I usually keep all the Oracle Installers under a single folder, called “D:\Oracle_Installers”. So basically the rest of the instructions, I will be using the same directory structure. Please don’t get confused.
Step #3
Switch to the apex folder from an elevated command prompt, in my case to “D:\Oracle_Installers\apex_18.2\apex”. Source the database environment (eg: SET ORACLE_SID=ORCL) in case if you have multiple Oracle products installed in the same box
Step #4
Start SQLPLUS as sysdba
A default installation of 11g R2 installs APEX, which you should remove at this stage. If you are too eager to know which version is installed, you my run the following query
select version from dba_registry where comp_id='APEX';If you haven’t removed the APEX installation, it should return you a row with installed version information of APEX
You should remove the existing APEX prior installing the 18.x version(s). To remove the installed version, please execute as following
@apxremov.sqlWait for the uninstallation to complete, exit SQL and start SQLPLUS once again as sysdba (Mandatory)
Now we can start the installation of APEX 18.x. Prior starting the installation let us create a dedicated tablespace for APEX.
CREATE TABLESPACE APEX DATAFILE 'D:\ORADATA\ORCL\apex01.db' SIZE 1G;Now execute the SQL for installing APEX 18.x
@apexins APEX APEX TEMP /i/

(Note the forward slash "/")
Wait for the installation to finish. My box has a SSD, hence the installation completes in few minutes time (3-5 minutes I believe). It may take bit more time, depending upon the hardware resources available.
Once the installation completes successfully, we have to configure the APEX. To configure execute “apex_epg_config.sql” that is available in the current path. Please note, here is the catch, as with the installation, Oracle expects forward slashes around the parent folder where you have the image files. So, I have extracted the installation files to “D:\Oracle_Installers\apex_18.2\” & this is the PARENT directory for apex installer. Hence we will call the EPG script as below (correct your path appropriately)
@apex_epg_config.sql D:/Oracle_Installers/apex_18.2/

(Note all back slashes are replaced with forward slashes)
Once the script finally exists after successfully copying the image files to APEX repositories, you need to unlock the following Oracle database schemas
ALTER USER anonymous ACCOUNT UNLOCK;
ALTER USER xdb ACCOUNT UNLOCK;
ALTER USER apex_public_user ACCOUNT UNLOCK;
ALTER USER flows_files ACCOUNT UNLOCK;
Now, go ahead with the last configuration by executing
@apxconf.sqlThis script will ask for ADMIN user details, Select ADMIN as admin user and provide an email address. Please note, you must provide a punctuation symbol for the password and allowed punctuations are as below
(!"#$%&()``*+,-/:;?_).That’s all folks. If there are no errors, you are all good to go. You may need to configure your database server for better performances, which we will discuss bit later.
Now try to access the APEX installation. Unless you have changed the ports, you should able to access the portal by visiting http://localhost:8080/apex/apex_admin

regards,
rajesh