WSL 2 is almost here! and if you are here, reading this post. Please consider reading about WSL 2
During one of the recent chit-chats, few of my contacts were asking me about the “real” business sense behind Linux on Windows. It is simple. Microsoft is:
Going to integrate LINUX so deep within Windows that, in the very near future, one don’t have to run a separate LINUX Server. Simple like that.
After experimenting with KALI Linux WSL, I managed to install Xfce & XRDP on Ubuntu 18.04 WSL & the only few things I couldn’t do with the WSL was starting services automatically when the subsystem starts. There are hacks, well, I don’t think they really worth a try soon as Microsoft will BE bringing it on to WSL pretty soon.
Now, let us get back to the topic. I’ve installed Ubuntu 18.04 WSL nothing less than half dozen times. Every time something goes wrong & I am forced to uninstall and re-install the WSL to continue with additional experiments. My last attempt was to install Kubuntu desktop, that screwed my Xfce & after 2 days of continuous efforts to “fix” few “unknown” things, I had to uninstall one Ubuntu WSL that had a fully functional WordPress instance :(
So, I decided to learn how to backup a functional WSL, so that if something goes wrong, I can restore & continue
I’ve ready at few places that Windows 10 version 1903 comes with WSL backup functionality out of the box. Until you decide to upgrade your box to 1903, you may use the below for backing up your dear WSL instance.
I came across a pretty decent thread here & a user Jaime’s answer is the apt ONE, missing only few details like /tmp folder.
Where /mnt/c is C:\> drive of your Windows Machine. You may change /mnt/c/ to /mnt/d/ or /mnt/e/, based on how your partitions are laid. Closely watch the excluded directories. You MUST exclude them.
My tar ball was around 1.5GB in size & I moved the tar ball to another machine which didn’t have WSL activated.
First you have to enable Window Subsystem for linux from Turn Windows Features on or off (If you are not restoring the backup to same Windows Machine). This will ask you to restart your Windows Machine.
If you are going to restore a Ubuntu 18.04 WSL rename launcher.exe to Ubuntu1804.exe & rename your tar ball to rootfs.tar.gz
Open an elevated command prompt & switch to D:\wsl
and just execute, for example “Ubuntu1804.exe”
It will take a while for the installation to complete. As the superuser thread states, it installs and opens the WSL for you. From next time, all you need to do is to start Ubuntu1804.exe & your WSL instance is up and running!
However, I had an issue with the restored instance. It was related to missing /tmp folder. I found a solution for it with nixcraft article.
As many of us know, starting from Windows 10 1803, Microsoft has made Windows subsystem for Linux running in the background even after the console windows are closed.
Definitely this is a gain for those developers who want to have a Linux environment available always, regardless whether the console windows open or not. My requirements towards the same is pretty limited, as I have live Linux systems for almost all my experiments. However, was never less motivated to explore the WSL environments.
Last time I posted a thread about installing and configuring Ubuntu 18.04 WSL and setting up apache, MySQL.
This time we will see how you could enhance your Ubuntu 18.04 WSL with a proper GUI (Desktop environment). I am sure, majority of the Windows users will appreciate a GUI to interact with Linux against the Linux geeks who prefer command line interactions. In addition, few editors like geany or gedit ONLY could be used in a GUI environment.
We will be using Xfce (light weight desktop manager) & XRDP to achieve the GUI requirements on Ubuntu 18.04 WSL
Fire up your Ubuntu 18.04, and update the instance to the latest
sudo apt update && sudo apt upgrade
This could take a while to complete depending upon your internet connection speed
Once the update & upgrade finished, we will install both Xfce & Xrdp in a single session
sudo apt install xfce4 xrdp
The installation should be pretty smooth and within few minutes everything should complete. Not a single attempt from my end failed to install both Xfce or Xrdp
Once the installation is over, we MUST make sure that the XRDP doesn’t use port 3389 which is used by Microsoft RDP (in case if your Windows 10 is already configured for RDP). Hence we will edit the XRDP configuration file with a different port, in our case 3390
sudo vi /etc/xrdp/xrdp.ini
Change the port from 3389 to 3390 & save the file.
Now we will try start the XRDP service
rajesh@rt04:~$ sudo service xrdp start
* Starting Remote Desktop Protocol server [20190509-12:13:49] [DEBUG] Testing if xrdp can listen on 0.0.0.0 port 3390.
[20190509-12:13:49] [DEBUG] Closed socket 6 (AF_INET6 :: port 3390)
[ OK ]
rajesh@rt04:~$
That’s it
Open Remote Desktop Connection from your Windows Machine & log on!
Supply your WSL username and password. You can use ONE of the existing WSL usernames, in case if your WSL have more than one user.
One of the main issues I found using Xfce4 was few goodies like print screen should be installed by the user prior screenshot capturing could be made (I took screenshots from the remote session & copied them to Windows for this post). This will include adding new keyboard shortcut keys.
We’ll quickly see how to resolve the above said
First install missing “xfce4-screenshooter”
sudo apt install xfce4-screenshooter -y
Once the package installation finished, we will define a new keyboard shortcut that binds “Print Screen” physical button on the keyboard to Xfce4 screenshot shooter package.
Launch Applications -> Settings -> Keyboard
and using the “Add” button, Create a new shortcut. Xfce4 supports different switches to be used with screenshooter package. I’m using the “-f”, for full screen captures.
Be careful when you define the keyboard shortcuts. There is a space between the command and switches, for example
xfce4-screenshooter -f
There is a space between xfce4-screenshooter & the switch “-f”. Once after entering the command and pressing OK will ask you to tap the physical keyboard button that you want to bind with the command. Tap “PrtScr” or other button of your choice & that’s all. Your screen capture should work now.
So why one would even need a GUI over WSL. Well, my answer is short. I always dealt with systems those came with GUI. Many business applications could only be installed over a GUI equipped system. Plus, I am not a geek & after hundreds of attempts I cannot deal with a console based editor like VIM. I feel comfortable with geany/gedit than feeling geeky at mind.
Cheers guys, now your WSL have a GUI. Start think about what YOU can’t do with WSL!
Almost a year back I posted about Linux Subsystem for Windows & interesting that I am revisiting the subject in the same period once again. Within an year time loads have changed with the Linux subsystem. Starting from Windows 10 version 1803, once started the Linux Subsystem is available in the background until a reboot! Sounds great?
This time we will see such an enhancement could be utilized on Windows for some extended “developments”, and I will walk you through setting up “WordPress” using WSL. Please note, I am opting “WordPress” as target ONLY for few reasons like:
“WordPress” is developed using PHP
“WordPress” mostly uses MySQL for database
“WordPress” is mostly hosted on LINUX environments
Windows SubSystem for Linux Installation
You must enable “Windows SubSystem for Linux ” through “Turn Windows Features on or off”, after which you will have to reboot your Windows box
Open “Windows Store” and search for Linux, that should bring up many results as seen with the image below
We’ll be using Ubuntu 18.04 LTS this time as I had pretty difficult issues with Pengwin & SUSE. If you are familiar with Linux, Ubuntu is a debian based Linux distribution & widely used for desktop systems. For our limited tests Ubuntu is a right choice.
Total download of Ubuntu 18.04 is around 270MBs & should be installed without giving any troubles.
Once “Ubuntu App” is installed you will be notified and you can immediately “launch” the app.
Ubuntu takes few minutes to finalize the installation & will prompt you to enter a username & password. Make sure you remember the username and password, forgetting may force you to reinstall Ubuntu.
Immediately after setting up a Linux username and password, we will make sure that the Subsystem is upgraded with all new packages.
(While apt & apt-get do almost the same thing, why “apt” is preferred? please read about it here)
Apache installation should not take more than few minutes & we will see how to configure it bit later.
MySQL installation
I faced multiple issues installing MySQL on my Ubuntu based WSL. Few were merely because I was ignoring few pre-requisites like checking for already open ports on my Windows & other were due to lack of adequate amount of experiences with installing software on Linux
After a couple of failed attempts, I landed upon this page, which neatly explains how to use MySQL PPA in the place of Ubuntu’s default repositories for MySQL
I will make some fresh screenshots, that is for recent versions of MySQL installation using the MySQL PPA, because there are few more MySQL versions are supported currently using the same PPA
Now we have a conflict to resolve. As on date, the MySQL 5.7 repository signature is invalid, for the same reason the repository will be disabled. (I don’t know what kind of issues this could produce, so not taking any risks). Next step we will get a valid signature for the disabled repository and re-enable it
Now we can start installing the MySQL 5.7 Server. Please note, if you already have an instance of MySQL running on your Windows, the port 3306 will be in use (unless custom ports are used) & you WILL never able to complete the MySQL installation on WSL. Many undocumented errors will stop the MySQL installation, apparently without giving you the least ideas of what went wrong. So, make sure that the MySQL server is stopped and the port is not listening to port 3306. I don’t know another way to address this situation.
You will be prompted for MySQL root account. I suggest using the same password across this particular setup so that you will not mess them up later stages.
Confirm the MySQL root password
That completes the MySQL 5.7 Server installation.
Now, let us try to start the MySQL 5.7 Server service.
MySQL 5.7 service is started now. So we can proceed to installing phpmyadmin, MySQL manipulation software.
As we are using Apache2 as web server, make the selection by tapping the spacebar and Ok
You will be asked whether the database for phpmyadmin should be configured, You should select Yes, unless you want to do it later.
You will be asked to provide the a password now, that is for the phpmyadmin, use the same MySQL root password here (you can use a new password, just to avoid confusion, I use the same password everywhere)
You have to confirm the password.
Now you will be asked to enter the MySQL administrator(root) password, supply it
Confirm & wait for the phpmyadkin to complete the installation
Installation will notify you about Apache not being running, you can ignore the notice.
Now we will start the Apache Server. Couple of things you should take care with Apache & I will try to list few of them below:
As the WSL runs as another software on Windows, it is bind to experience conflicts. For example, if you already have IIS server listening to port 80, without changing the port information for Apache, will not able to start the server until the ports information is corrected within the Apache configuration file.
If you already have MS SQL server installed with reporting, the reporting engine listens to port 80, so even if you would stop or disable the IIS/WWP services, there is a possibility that port conflicts will arise. This will also prompt you to alter the default port mentioned in the Apache configuration file
So let us see how we are going to address such conflicts:
Edit the Apache ports configuration file
[code language=”bash” gutter=”false”]
$sudo vi /etc/apache2
[/code]
I opted for port 8088 (You can choose a port that is NOT used by Windows. Issue netstat -aon to get a list of ports open/listening on Windows from CMD
100% sure that you are going get presented with an annoying notice “ Protocol not available: AH00076: Failed to enable APR_TCP_DEFER_ACCEPT” which is easily addressable.
We will edit the apache configuration file to address this issue
issue the command
[code language=”bash” gutter=”false”]
$sudo vi /etc/apache2/apache2.conf
[/code]
& add “AcceptFilter http none” by the end of the file.
Save the configuration file & restart the Apache service.
As we have completed all the installations and managed to start the services successfully after fixing the configuration files, it is time to reboot.
WSL unfortunately doesn’t let you use “init 0”, or “init 6” to shutdown or restart the instance, instead you must use the Windows Services MMC for the same.
This will close all open Ubuntu “app” windows. You can restart the Ubuntu from the app list.
Once Ubuntu restarted, let us start the services
[code language=”bash” gutter=”false”]
$sudo service apache2 start
$sudo service mysql start
[/code]
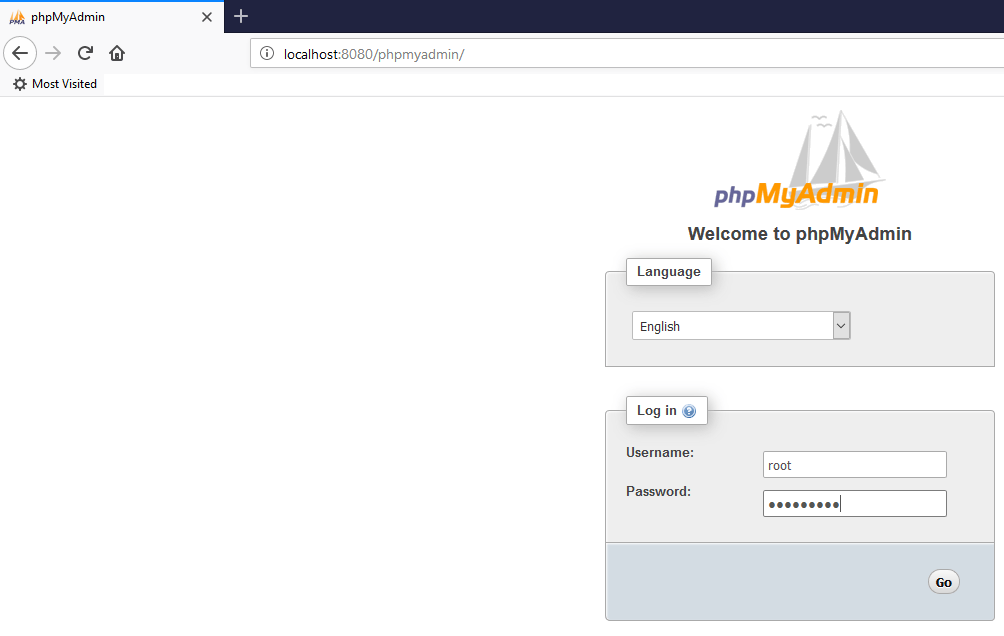
Once the services are started, we will try phpmyadmin. As I mentioned already, I have set the port 8088 for Apache, hence I can access the phpmyadmin from the link http://localhost:8088/phpmyadmin
You can safely ignore the warnings, as the current version of phpmyadmin we installed from Ubuntu repos have certain conflicts with PHP 7.2
Install “WordPress”
“WordPress” is one of the leading CMS (Content Management Systems) with unlimited possibilities. Recently we switched our decade long joomla based corporate website to “WordPress” & after few days of interactions with the technology, I feel I would never look anywhere else.
This will download the latest “WordPress” to your home folder
Now we have to extract the downloaded file to right htdoc root. We are talking about the default configurations available with apache configuration files. Hence the wordpress should be extracted to ‘/var/www/hmtl/’ folder, which is a protected path. We’ll change the folder permissions temporarily to facilitate the extracting
Now we have a problem, “WordPress” installation cannot write to “wp-config.php” file. This is due to linux file/folder permissions. Hence we will again change the permissions over ‘/var/www/’ folder
Now, go back to the previous page, furnish the details and “WordPress” should happily move ahead. Run the installation
That completes what we tried to achieve. “WordPress” running successfully from a WSL environment.
Now, it is time to ask the questions like “Why so much pain, when we can achieve the entire “WordPress” thing on Windows?”
Well, primarly “WordPress” performs better on Linux enviorment (personal observation), second & most important for me. I just love learning something new everyday. You are welcome!
Microsoft has added WSL with it’s Server 2016 (Version 1803) & the vision is pretty clear. Microsoft “wants” to provide a LINUX environment within Windows so that in the future, a separate LINUX Server requirement will NOT truly hurt the customers. Currently the WSL is NOT equipped with desktops/GUI & Pengwin like initiatives are sure making traction. If my guess will NOT go wrong, soon Windows Servers will be running “Linux” side by side & those Linux Servers are going to be as good as physical/Virtualized. We’ll wait eagerly, together.
Hi guys
I confirm, I am not a DBA, yet my last 10 years with Oracle EBS experiments have given me opportunities to learn few facts those are not documented generally.
A general approach towards deploying a new setup/custom development for EBS is 1st developed and tested thoroughly for which a business needs testing environment. To provide such, a DBA “clones” or duplicates the existing environment and this process is called cloning.
A majority of the environments may note have the hardware with same configurations as it is available for the Production, this causes the cloned instances to perform poorly, thus making the entire testing pretty painful.
During the initial stages of learning, I had tough time digesting our part time DBA’s arguments and reasoning for the slowness, tied to the hardware limitations. Our TEST server has dual processors and 20GB memory with more than 3 TB storage that is hooked up to a 1GB network interface.
As my confidence kept on building, I started exploring the database setups and realized the DBA had only allocated 2GB for SGA & 1GB for the PGA. While questioned, he gave me all possible excuses like “Well, your instance doesn’t require more” and so on.
We got rid of him & had another DBA in the due course, who was far better and more experienced handling bigger environments. Yet we had this nagging issues related to the test instance being slow, lagging beyond our extended patience & I started asking oracle communities questions about how to speed up things.
“Not being a DBA” had it’s own limitations. Many instructions were beyond my understanding, many sounded impractical or illogical & finally one day I decided to setup the R12 (12.0.6, 11gR2 database) with 3GB for both SGA, PGA following an old discussion available with asktom.
That was the beginning. Our TEST instance performance improved to a level that, it become difficult to distinguish between the production and test instances when the Production instance is a beast (minimum for our environment)
Although, the manual SGA/PGA settings resolved one of the major performance related issues (login page load, opening large forms etc), I was still NOT convinced by the performance (Queries taking long time..). For some other reasons, I had to restart the TEST server (Which usually happens once in many months time) & was amazed to see that the performance gains were distinguishable from earlier times. As soon as I tried to access the instance, the login screen was loaded (not ignoring the cache mechanisms) faster, so did rest of the accesses. Forms based interfaces were loading faster and the queries were returned instantly etc.
I opted for another cloning. Dropped the entire R12 instances and repeated the cloning, adjusted the database parameters and “RESTARTED” the physical server, started the database and application tiers and insured that the performance gains I observed were not just a hit and miss, actually a permanent HIT that exists.
I continued my experiments further. My next attempt was to upgrade the SGA, PGA with more memory and this time I opted for 4GB for each sector. After the database & application restart I realized the poor performance. I was expecting the instance to be faster! Instead I was dealing with an instance that was as horrible as possible prior to my 3GB/restart patterns.
So I rolled back to 3GB SGA, PGA setups and was living with it until our finance consultant asked me for a fresh clone with most recent data. This time I decided to duplicate database using RMAN rather than a traditional cold back restore and cloning.
As RMAN duplicate database doesn’t require me to alter the database (as the spfile is already available), all I needed was to run the “adautoconfig” from the application tier and go online. I felt something awkward
Although the instance was “Okay”, there were few things which were NOT AT all okay. The database alert log was showing redo log files related issues. I checked the redo log files, things were looking Okay against the documents those I were referring to do the RMAN duplicate database…yet
I took the application tier offline and altered the database like following:
Increased the SGA max memory to 5GB and target to 4GB, restarted the database (40% of total available memory)
Left PGA at 3GB (Thus totaling the memory dedicated for the database to 8GB out of 20GB available)
From the database tier, executed “adautoconfig”
Execute “adautoconfig” from the application tier
Shutdown database and restarted the physical server
Restarted database and application tiers & boom, the instance was once again giving me the buttery smooth experience. I ain’t sure, whether it is technically correct, it was all about executing “adautoconfig” against both tiers after database parameter changes. I will ask Oracle community soon to confirm it.
Now, all the above experiments with an obsolete release of Oracle application R12 (12.0.6) over an OS (Linux 6) that’s not supported were performed over many months time. Lack of true technical training must be one of the reasons contributing towards painful experiences.
Well, whatever, today I feel like a winner. Just because I am able to host an instance of the application over a hardware that was labelled obsoleted just because someone didn’t know how to fine tune an instance of Oracle application, even though he is certified to do that!
If you are like me, not certified, a jack of everything, who loves to keep on experimenting, do give the above a try & post me your experiences!
regards,
rajesh
The good thing is I found a “solution” myself after wasting almost a working day, just because I was stupid enough not to read my own POST dealing with it :/
I will publish a new POST detailing what has changed & how you could avoid getting into a mess with WLS LAMP installations & configurations in a day or two.
Update: 18th April 2019
Although I was able to successfully install LAMP on multiple Windows 10 stand alone machine WLS, yet to figure out a way to install MySQL on a Windows machine running WLS that has already joined a domain. I am not sure whether it is due to some domain policy related issues, access issues or due to a corruption with my Windows. I will definitely try to find out the root cause (hopefully).
====
Usually I prefer a virtual machine for all my Linux/Development requirements. Well, Microsoft is “trying” to setup a Linux subsystem within Windows 10 from a while, which is “yet” to be fully functional in many means. Many benchmarks proven that Microsoft Subsystem for Linux for has the poorest I/O which Microsoft claims, will be addressed in the future releases.
So, why someone will choose WSL against a VM which has better functionalities? From an eager inquisitive person’s perspectives, I will choose WSL for just couple of reasons and they are:
WSL could access the full hardware, when a VM has limited resources. Ie, say your computer running has 4 cores and 8GB memory, you will be limited to 2 cores for your VM (anything beyond that would cause unexpected issues) and maximum of 4GB memory. Here WSL don’t have such limitations, it could access all your 4 cores and the maximum memory & could be launched like just another win32 application!
I’ve been trying to setup WSL using both Ubuntu & OpenSUSE Leap 42.3 over my Windows 10 1709 & I had better results with Ubuntu. OpenSuse has many issues those were beyond my skills to address and resolve. Hence, I chose to stick with Ubnutu for now.
So, installation of WSL on Windows 10 recent versions were made pretty easier compared to the previous releases. A seasoned Windows user could install Ubuntu for WSL very easily by following the instructions below
Once rebooted, from the Windows store, search for Ubuntu or OpenSUSE and just install it! That simple it is.
Once installed, as mentioned with the first image, one can start the WSL either from command prompt or by clicking the tile that is available with the start menu.
As a developer, I would take the pain to setup the WSL for ONLY few reasons like testing PHP application(s) those are based on MySQL database (and outta curiosity)
So next, let us see we can setup LAMP server (LAMP is an archetypal model of web service stacks, named as an acronym of the names of its original four open-source components: the Linux operating system, the Apache HTTP Server, the MySQL relational database management system (RDBMS), and the PHP programming language. The LAMP components are largely interchangeable and not limited to the original selection. As a solution stack, LAMP is suitable for building dynamic web sites and web applications) on our new WSL
You may refer to this post for a detailed information about how to install individual components like apache, MySQL and PHP. Please note, the link that I provided deals with PHP5, which is not anymore available from Ubuntu repositories, hence I chose to go ahead with PHP7.0 for my WSL instance
Issue the following command(s) to install Apache, MySQL,PHP and phpMyAdmin
During the installation, you will be prompted for setting up MySQL root credentials, which is mandatory in order to access the MySQL server at later stages using phpmyadmin module
For PHP, you must install libapache2-mod-php, else you would experience php pages being blank when functions like phpinfo(); are called.
Once the packages are installed (without errors) you can restart apache to verify everything is working fine
[code language="text" gutter="false"]

sudo service apache2 restart or sudo /etc/init.d/apache2 restart

[/code]
If your windows box already has IIS listening to port 80 and a Windows instance for MySQL is listening to port 3306, then you must change the ports for both apache and MySQL before restarting the services.
MySQL installation will GET IN TO a number of undocumented errors if you have another instance of MySQL listening to 3306 (ie, on your Windows box). Hence make sure that you shutdown the instance before attempting to install MySQL on WLS. Please remember, WLS is not another virtual machine, so if a port is open on your “HOST”, that is definitely a conflict for the WLS.
For changing the port of Apache server edit the following file
During the installation you will be prompted for selecting the http server stack and password for MySQL root account. You must provide the root password that you have set during the MySQL installation at this prompt
Once the phpmyadmin is installed, you need to manually enable couple of extensions and they are dealt like following:
(I did a fresh WLS instance on 17th April 2019 & the phpmyadmin installation has changed a little bit here and there, asking for the webserver & an additional setup that helps to setup the phpmyadmin user passwords etc)
[code language="text" gutter="false"]

sudo service apache2 restart

sudo service MySQL restart

[/code]
Example:
[code language="text" gutter="false"]

rajesh@rt04:/etc/apache2$ sudo service apache2 restart
* Restarting Apache httpd web server apache2 [ OK ]
rajesh@rt04:/etc/apache2$ sudo service mysql restart
* Stopping MySQL database server mysqld [ OK ]
* Starting MySQL database server mysqld [ OK ]
rajesh@rt04:/etc/apache2$

[/code]
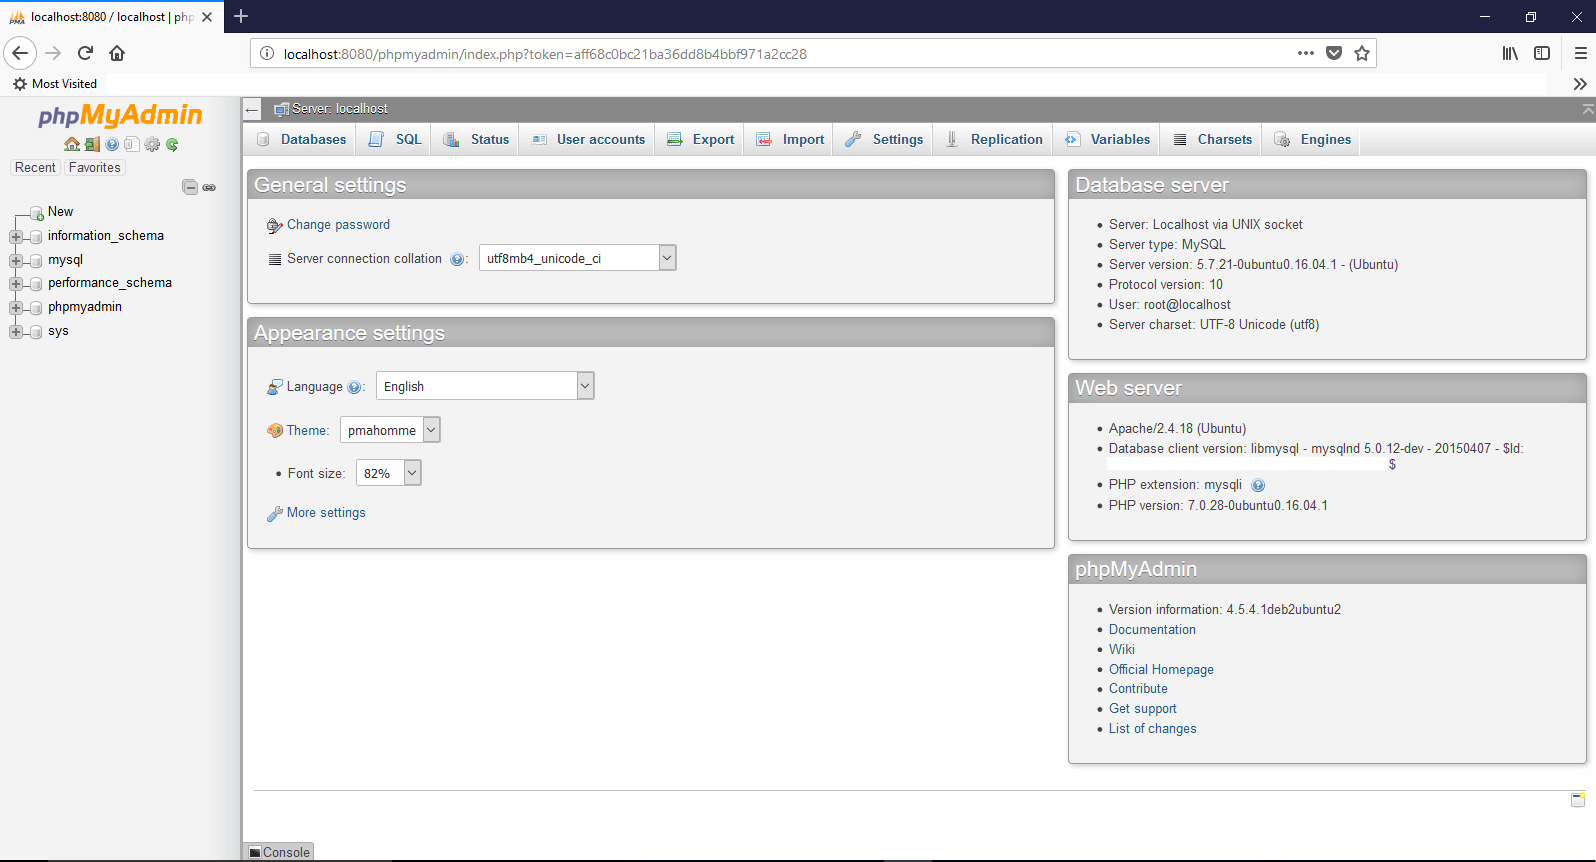
Now you can see that there are no errors or warning while starting both apache and MySQL. So let us go ahead and check phpmyadmin
That’s all folks!
There is no shutdown for WSL, just type “exit” and you are good. I am yet to test whether mere exiting does anything harmful to running instances of apache and MySQL. Until I find them…
Finally
I don’t really understand why, yet, many users are asking for a “way” to ssh into the Linux subsystem. The pre-installed openBDS ssh server doesn’t allow a connection from clients like putty. Hence a re-installation of SSH server is required.
[code language="text" gutter="false"]

sudo apt-get remove --purge openssh-server
sudo apt-get install openssh-server
sudo service ssh --full-restart

Create a firewall inbound rule if required

[/code]
Now you should able to connect to WSL instance using a client like putty.
I “Can” manage a Linux Box, as long as there is a connection to Internet is available. So that concludes my expertise with LINUX OS.
One of the major annoyance for me while interacting with LINUX is the limitations firing up Gedit as a normal user. It requires kind of manipulation as “root” user (or I am not sure about other methods), yet the screen keeps screaming about few warning like below
(gedit:3531): Gtk-WARNING **: Attempting to set the permissions of `/home/oracle/.local/share/recently-used.xbel', but failed: No such file or directory
(gedit:3580): Gtk-WARNING **: Attempting to store changes into `/home/oracle/.local/share/recently-used.xbel', but failed: Failed to create file '/home/oracle/.local/share/recently-used.xbel.NN11EZ': Permission denied
(gedit:3580): Gtk-WARNING **: Attempting to set the permissions of `/home/oracle/.local/share/recently-used.xbel', but failed: No such file or directory
So, in a nutshell how to start Gedit as a restricted user & to avoid watching the above few warnings?
as root user, issue the following command:
[root@rt05 ~]# xhost +localhost
localhost being added to access control list
The above will add “localhost” to access control list, YOU better know the consequences of it.
Now, the warning “(gedit:3531): Gtk-WARNING **: Attempting to set the permissions of `/home/oracle/.local/share/recently-used.xbel’, but failed: No such file or directory” is due to missing “../.local/share” folder. Creating this path as “Oracle” user didn’t resolve the issues. I had to change the ownership of the folder(s) as root.
We are on VEEM+VMWare infrastructure from a while, yet I am paranoid to maintain copies of the backups on different media once after going through couple of nightmares. We take weekly cold backup for our ERP Production server, move the tar files to a standby Linux server, and move those backups once again to an external HDD.
So basically I have a full VM backed up, the same VM holds a weekly cold backup, standby Linux server holding a copy of the cold backup files & to finish it, again copied to an external HDD. The funniest part is, we are moving the entire VMs to a TANDBERG Quick Station as well!
Though everything works fine till date, the last part of the deal needs to intimate me about successful completion of copying the tar files to the external media, ie, HDD that is formatted using NTFS, so that I can use it on both Linux and Windows environments
Be warned: The below bash script only works in an environment that has an internal SMTP server (or I don’t know how to relay the messages through an external SMTP relay and to disappoint you further, I don’t care about relaying through external SMTP). In addition, you must be on Linux 6 and above to use the internal mail command as demonstrated below. Linux 5 doesn’t support many switches provided with the example.
Further, below example demonstrates the basic level of error capturing with “bash” scripts as well
if [ $? -eq 0 ]
then
echo "The files were successfully copied to external hard disk" | mailx -v -s "ERP Tar Files Moved to External HDD | Success" -S smtp=smtp://server.domain.com -S from="ERP Alerts <someone@example.com>" someoneelse@example.com,someone2@example.com
else
echo "Files were not copied to external HDD" | mailx -v -s "ERP Tar Files to External HDD | Failed" -S smtp=smtp://server.domain.com -S from="ERP Alerts <someone@example.com>" someoneelse@example.com,someone2@example.com
fi
[/code]
Try it and let e know whether it worked for you :)
We’ve a EBS instance that totals almost 1TB physical size hosted on a high end IBM server & periodically we clone the instance to insure that the cold backups are reliable for DR purposes.
Recently we’ve decommissioned one HP ML110 G6 server with single xeon processor, 8GB memory that was dedicated for obsolete bio-metric monitoring and reporting running Windows 2003. I thought of using the same server for future restorations of EBS cold backups & realized that the server doesn’t support RAID 5 & moreover the built-in RAID is categorized under “fakeRAID”, which uses the built-in RAID technology, depending upon the CPU for the crippled RAID processing.
Using the HP Pavilion Easy Setup CD, I created an array and to my total disappointment found that Linux doesn’t read the fakeRAID while an installation is attempted.
The above were attempted because the ML110 G6 had 4 numbers of 500GB SATA HDD drives and I needed 1TB on a single volume. My database instance size as on date is 493GB, which would scream lack of space on a single 500GB partition. So I started reading about software RAID, which was too complex to setup with my minimal exposure to Linux. Further readings brought me to LVM (Logical Volume Manager) using which one can create spanned volumes as like in Windows.
Hardware: HP ML110 G6, 8GB memory, 4x500GB SATA HDD
Linux installation details
Installed Linux on HDD#1 (/dev/sda), 10GB boot, 4GB Swap, 110G / & balance as extended partition
Now, I am left with 3 HDDs, which are “untouched”, ie, no partitions are made
/dev/sdb
/dev/sdc
/dev/sdd
As I have mentioned, my requirement was to have 1TB of storage for the cloning purposes, hence I chose 2x500GB (/dev/sdb, /dev/sdc)
First I created partitions using “fdisk”, the age old command line utility, even though better structured GUI is available with latest Linux distributions
Login to terminal as “root”
$fdisk /dev/sdb
n (new parition) -> p (primary partition) -> 1 (number of partitions) -> w (Write changes)
Repeated the same for /dev/sdc
$fdisk /dev/sdc
n (new parition) -> p (primary partition) -> 1 (number of partitions) -> w (Write changes)
We’ll use the following 3 commands to create our LVM
pvcreate
vgcreate
lvcreate
create two physical volumes
$pvcreate/dev/sdb1 /dev/sdc1
create one volume group with the two physical volumes
$vgcreateVG_DATA/dev/sdb1 /dev/sdc1
create one logical volume
$lvcreate -l 100%FREE -n DATA VG_DATA
create the file system on your new volume
$mkfs.ext4 /dev/VG_DATA/DATA #You may use ext3, based on your Linux distribution
$mkdir -p /u01
mount the volume (mount /dev/VG_DATA/DATA /u01)
That’s all folks, I have created my1st LVM aka spanned volume in Linux.
If you are planning to create logical volumes using multiple disks, be aware of the risks. You may lose millions worth data if no proper backups are taken and recovery could be a nightmare!
Not limited to total data loss, performance issues also should be considered, especially when such a setup hosts databases which require faster I/O.
This is my first post for the year 2016. Actually I have more drafts than posts this time with me and I truly hope that I will able to finish all of them in few weeks time. I’m sure you are interested about Oracle 12c products on Windows platform. Stay tuned, am on it
Coming back to the topic, I have a decent desktop computer that could be called a “half server” with the following configurations
i7 processor 2nd generation
16GB DDR3 memory
Around 4.5-5 terabyte of storage
windows 10 64Bit Professional
I came across VMWare always 8 years back, liked it, and used it until they started charging for everything. Then Oracle VirtualBox (Earlier JAVA VirtualBox) started giving tough fight and it has become quite famous among developer communities where NOT many were truly able to afford VMWare’s paid software.
VMWare is altogether a different standard made for sophisticated environments, hence we will never compare both the products here. Our intention is to point you towards the advantages of using Virtual Machines that could less clutter your rig, give you better exposure to different technologies and a bit of networking etc
So our product of interest for this post is Oracle VirtualBox and we will see how we can utilize our existing desktops/laptops to run multiple virtual machines at the same time and thus utilize the available hardware to the maximum extends
So prior attempting to virtualize your existing computer, you need to know what kind of hardware you have and whether your computer meets minimum requirements to support virtualization.
So today is 3rd January 2016 & if your computer is 4 years old or less, 99.9% chances that your rig sure supports virtualization. Most of BIOS comes with the virtualization enabled by default.
Yet we should make sure that our computers support virtualization. Read the instructions provided here to find out whether your current processor supports virtualization OR
Just install Oracle VirtualBox and try to create a VM. You will immediately come to realize whether your rig really supports virtualization ;)
Well, that’s the brute force way of doing stuffs, adapt the one that defines you. If you are using Windows 10, I’ve noticed that many default installations enable Hyper-V by default. You need to disable it from add remove windows features console, so that you can create 64Bit VMs using Oracle VirtualBox. This post explains how to enable it, just do the opposite to disable it
Before anything else, you need to identify your processor, it’s capabilities. A nice comparison is available here for i3, i5 & i7 processors and definitely, the author favors i7 processors. Please spend few minutes to read about the differences between these three different processors.
What the difference between Core i3, i5, i7: Hyper-Threading
A thread in computing terms is a sequence of programmed instructions that the CPU has to process. If a CPU has one core, it can process only one thread at once, so can only do one thing at once (as before, it’s actually more complex than this, but the aim here is to keep it simple and understandable).
Hence, a dual-core CPU can process two threads at once, a quad-core four threads at once. That’s twice or four times the work in the same amount of time.
Hyper-Threading is a clever way to let a single core handle multiple threads.
A Core i3 with Hyper-Threading can process two threads per core which means a total of four threads can run simultaneously. The current Core i5 range doesn’t have Hyper-Threading so can also only process four cores. i7 processors do have it, so can process eight threads at once. Combine that with 8MB of cache and Turbo Boost Technology, and you can see why it’s good to choose a Core i7 over an i5 or i3.
Now, you should know how much physical memory you have. More, the merrier. Starting with Windows 7, computers started shipping with a minimum of 4GB as a standard. So, 4GB is enough for your OS and proposed virtualization? It’s going to be a tight fit. I will suggest an additional 4GB minimum, making the total physical memory 8GB so that you won’t have to sacrifice performance.
Finally the storage. Most of the branded PCs and laptops are coming with 500GB HDD as standard & extending the storage of a laptop is complex than of a desktop computer. For the later, all you need is another HDD which you can plug to one of the available SATA ports and configure. With a laptop, you may need to replace the HDD with a higher capacity one or use an external HDD for your additional storage requirements.
My current Virtualizations are mostly for Oracle technologies. I am a forms and reports developer, doing a certain level of .NET development & manage Oracle EBS R12 instances (“NOT a DBA”). Further I try almost all the database, weblogic versions & currently learning ASMM & RMAN. I have never attempted other areas of Oracle technologies, so my VMs run
Oracle EBS R12 cloned instances
Oracle database(s)
Oracle weblogic server(s) with forms and reports (supported)
My EBS R12 VM has the following configuations
8GB memory out of 16GB physical, 4 processor out of 8 logical processors & almost 850GB of storage out of 4.5 terabyte total storage. Our instance has 400GB database size, 175GB application instance & the VM responds to requests instantaneously once after scheduled jobs are completed after a restart of the application. Usually I find the application responding better after 3 hours of settling down & the performance is assured throughout days and weeks until a restart.
My Weblogic, database VMs have the following configurations
4GB memory out of 16GB physical, 4 processor out of 8 logical processors & almost 250 GB of storage out of 4.5 terabyte total storage. I have my weblogic VM running 11gR2 64bit database as well. I get instant responses from both the Weblogic server and Oracle database 11gR2 from a client system, whenever accessed
Recommendations
Even though you can run multiple VMs at the same time, I would suggest, based on your hardware, limit them. Example
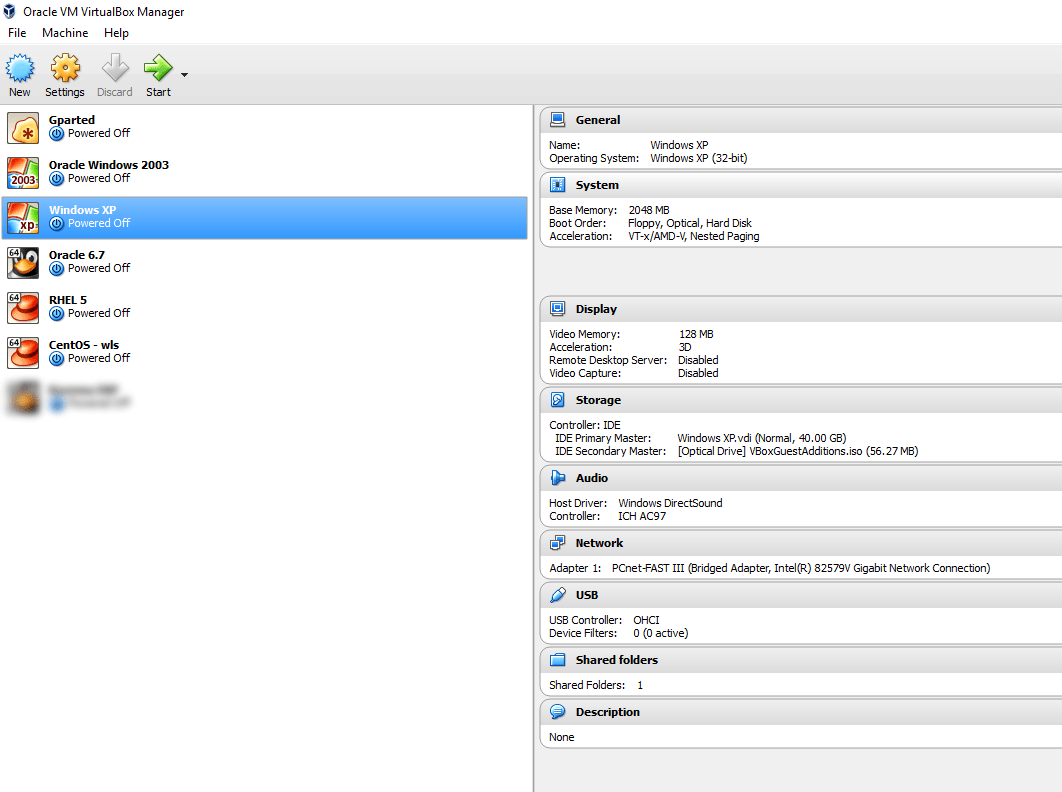
When I run my EBS R12 VM (8GB memory, 4 processors) my HOST computer is left with only 8GB free memory and 4 logical processors. If I start a Windows XP VM (2GB memory, 2 processors) to check the application performance, I feel my rig start slowing down and couple of times my computer shutdown with a high thermal point.
So make sure that you do tweaking to your VMs in order to make sure that your HOST doesn’t breakdown due to overload.
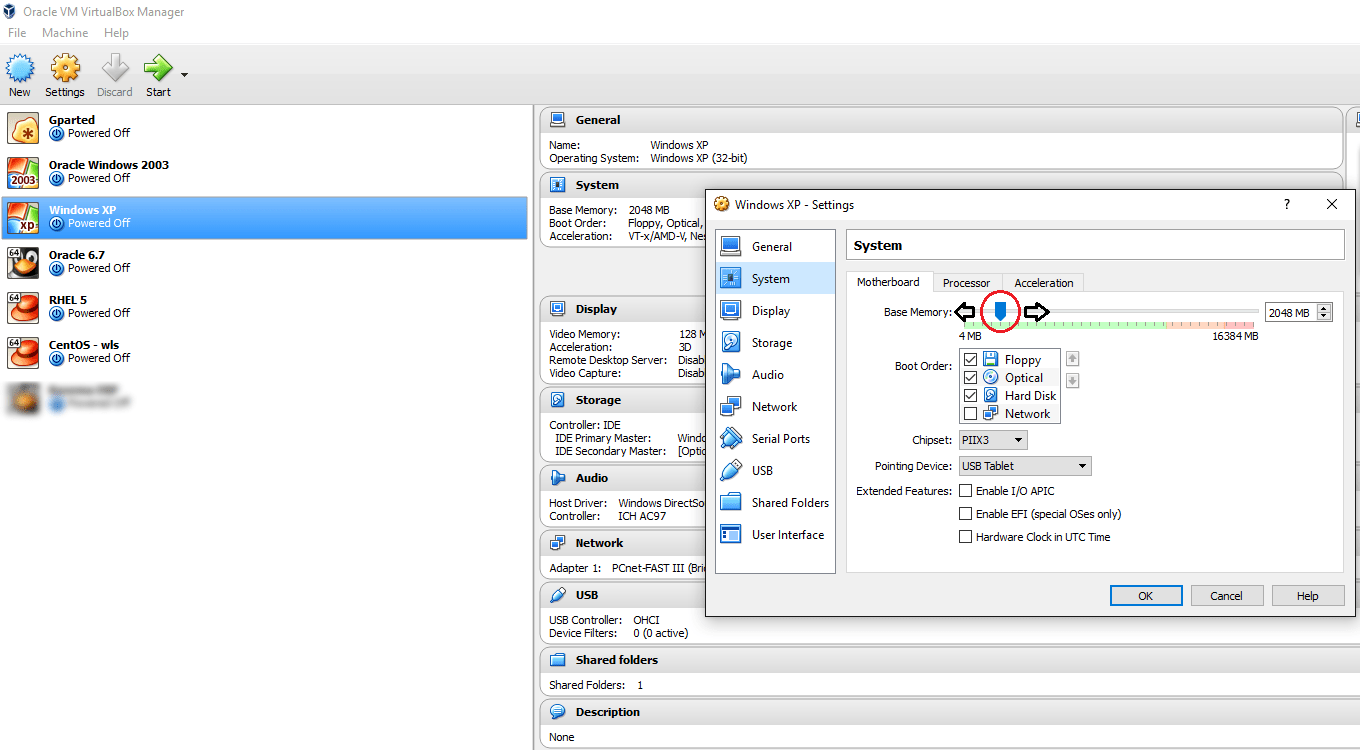
I always make sure that my HOST always has half of the hardware resources reserved for it, ie, 8GB memory, 4 processors regardless how many VMs I run at the same time! This is by using the VirtualBox console to alter the parameters of VMs before they are started
All the settings for the VMs could be altered using the settings, like increasing or decreasing the memory, processors, adding and removing storage devices etc.
Below you watch how fast my VM running EBS r12 responds to requests from another VM running Windows XP
Advantages of using Virtualization
The most important advantage for me is: I’ve a less cluttered HOST, said, I am NOT installing all the technologies to one OS, breaking it with conflicting versions of services and libraries and processing load.
Other advantages
I can backup (copy) my entire “machine” and restore it during a total mess up or loss of data, rather than rebuilding the entire computer
I get a sand-boxed environment & without fearing my attempts will break my main OS, continue the experiments
I can make a VM, for example, running Oracle Enterprise Linux, copy and keep the OS installed disk somewhere and copy it to new VMs whenever required! Say, you install the OS only once and whenever you need to create a new VM with same OS, just duplicate the disk that has the OS! (Make sure you make a backup of the OS disk prior installing and configuring additional software into it)
Finally my suggestions for you, in case if you are considering to build your 1st VM using Oracle VirtualBox
Majority of the Oracle geeks prefer Linux against Windows for database, weblogic deployments. So if you are NOT familiar with Linux, I suggest you start learning, regardless whether you FEEL very comfortable with it or NOT. You may be joining a firm that has reservations towards Windows OS running Oracle products, especially Oracle DBAs who have valid points like block corruptions, difficulties to recover from a crash are complex in the case of Windows OS.
Install OS in a separate disk. 40GB dynamic size should be more than enough for any recent Linux distros. Avoid Linux 7 if you are truly new to Linux. Oracle Linux 6.7 should be your friend.
Install 64Bit OS, so that you can take the advantage of your 64Bit processor and physical memory
Install Oracle supported Linux distros (RHEL, OEL & certain versions of Debian. CentOS is not at all supported)
Install the complete desktop, you are hardly going to complete the installations on pure CLI mode.
Add SCSI interface to your VM and for Oracle database etc, use SCSI disks. I had a huge argument with VirtualBox guys about the performance difference between SATA VDI disks and SCSI VDI disks. I found the SCSI VDI disks performing better, however I was dismissed saying as far both the types are created on the same HDD, it must be more psychological :O
Use 1TB 7200 RPM disks in the place of 2TB 5400 RPM disks. Later ones are best for data storage, when the previous ones give you better I/O. Create fixed size VDI for databases & applications, that means you will NOT able to increase the size of the disk once after created, however, it gives you faster I/O and better performance.
Update your OS. As soon as the VM is built, update your OS prior installing database, weblogic etc. RHEL will NOT allow you to update the packages without subscription, hence Oracle Enterprise Linux should be your best choice of Linux distro. Please note, you shouldn’t use Oracle Linux in a production environment without acquiring sufficient licenses. Whatever I suggest here are limited for study/evaluation purposes and I don’t encourage any kind of illegal usage of software!
Use Oracle’s pre-install packages to install database, EBS etc prerequisites rather than trying to download individual components from different download sites.
Use shared folders between HOST and Guest (VM) so that you don’t have to sacrifice storage. Not just that, when you want to keep the backup of some files from the VM, the shared folders will make it as easy as possible
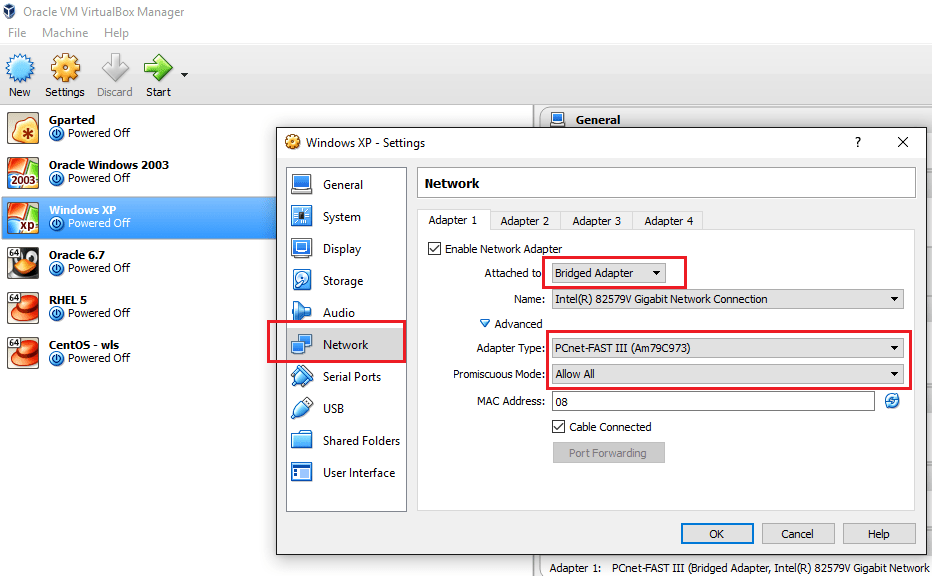
Use bridged network, with Promiscuous Mode “Allow All” so that you can communicate with the VM from network
Disable IPV6, firewall, SELinux on your Linux VM
If you creating a Windows VM, I’m sure you better know how to configure your guest so that you can access it from a network.
Finally recommendations for a DESKTOP computer to try virtualization
i7 processor + good quality heat sink. Your HOST and VMs are going to create loads of heat!
16GB Memory (DDR4 is the new standard, do not ignore it)
1×2 TB HDD
Few years back, such a configuration looked impossible for me, well, I saved bit by bit and made my dream computer. I’m sure you can also do it :) & trust me, a good computer opens a new world for you.
All the best and wish you all a very successful year ahead!
There could be thousands (exaggerated) reasons why a Oracle cloning process could go all bad. I’m not an application DBA, however, have enough experience with the architecture, technology as I interact with it everyday as a part of my job.
Few months back, I started doing something what a DBA should do, cloning. My prior attempts were mostly at home, using virtual machines and test instances and they were NOT as mission critical as what we do at work.
So, after the storage device was revamped with new partition structures I was asked to do a cloning for the production instance. Let me explain how the application was deployed prior the storage restructuring
We had the database tier on mount point /u05
Application on /u06 mount point
So, I recreated the same mount points and started the cloning process for dbTier and the process got terminated at 2% and the log files shown me an error that I was not familiar with.
“ouicli.pl INSTE8_APPLY 1”
Google searches fetched me hundreds of results for “ouicli.pl INSTE8_APPLY”, however the error codes were mostly for 255 or “-1” and apparently I didn’t have any clue what was going wrong.
So I unzipped the tar ball for database tier once again, and the cloning process got aborted at 2%, and I was getting nervous as I was expected to make the instance online by early morning 7AM
Most of the reference materials were explaining about non-existent Oracle inventory locations, and I confirmed that it was not the case from my part (Obviously, I was overlooking at this constrain itself!)
After half a dozen times tasting failure, finally I tried to see what was written inside the oraInst.loc file
and the cloning process went ahead without giving another errors.
We had an instance that was running from last 6 years, which was only once cloned from a cold backup during the storage device change, and somehow the inventory location remain unchanged with the repositories.
I hope this finding could help few newbies like me out there